Workspaces
Blink's workspaces enable you to organize your company into smaller subdivisions based on your specific needs. Every team can have one or more workspaces. This enables team members to collaborate on projects and share Workflows and resources efficiently.The first time a new user enters Blink, a personal workspace is automatically created. The title of the workspace is the email you signed into Blink with.
The name of your workspace and a dropdown menu showing other workspaces you have access to, appear in the upper left-hand corner.You can also search for a specific workspace by entering its name in the search bar.

Organizing your Workspaces
Additional workspaces can be created to fit your company's needs. Workspaces can be created for departments, teams, projects, and any other subdivision existing in your organization. The owner of the workspace controls the members and their roles.
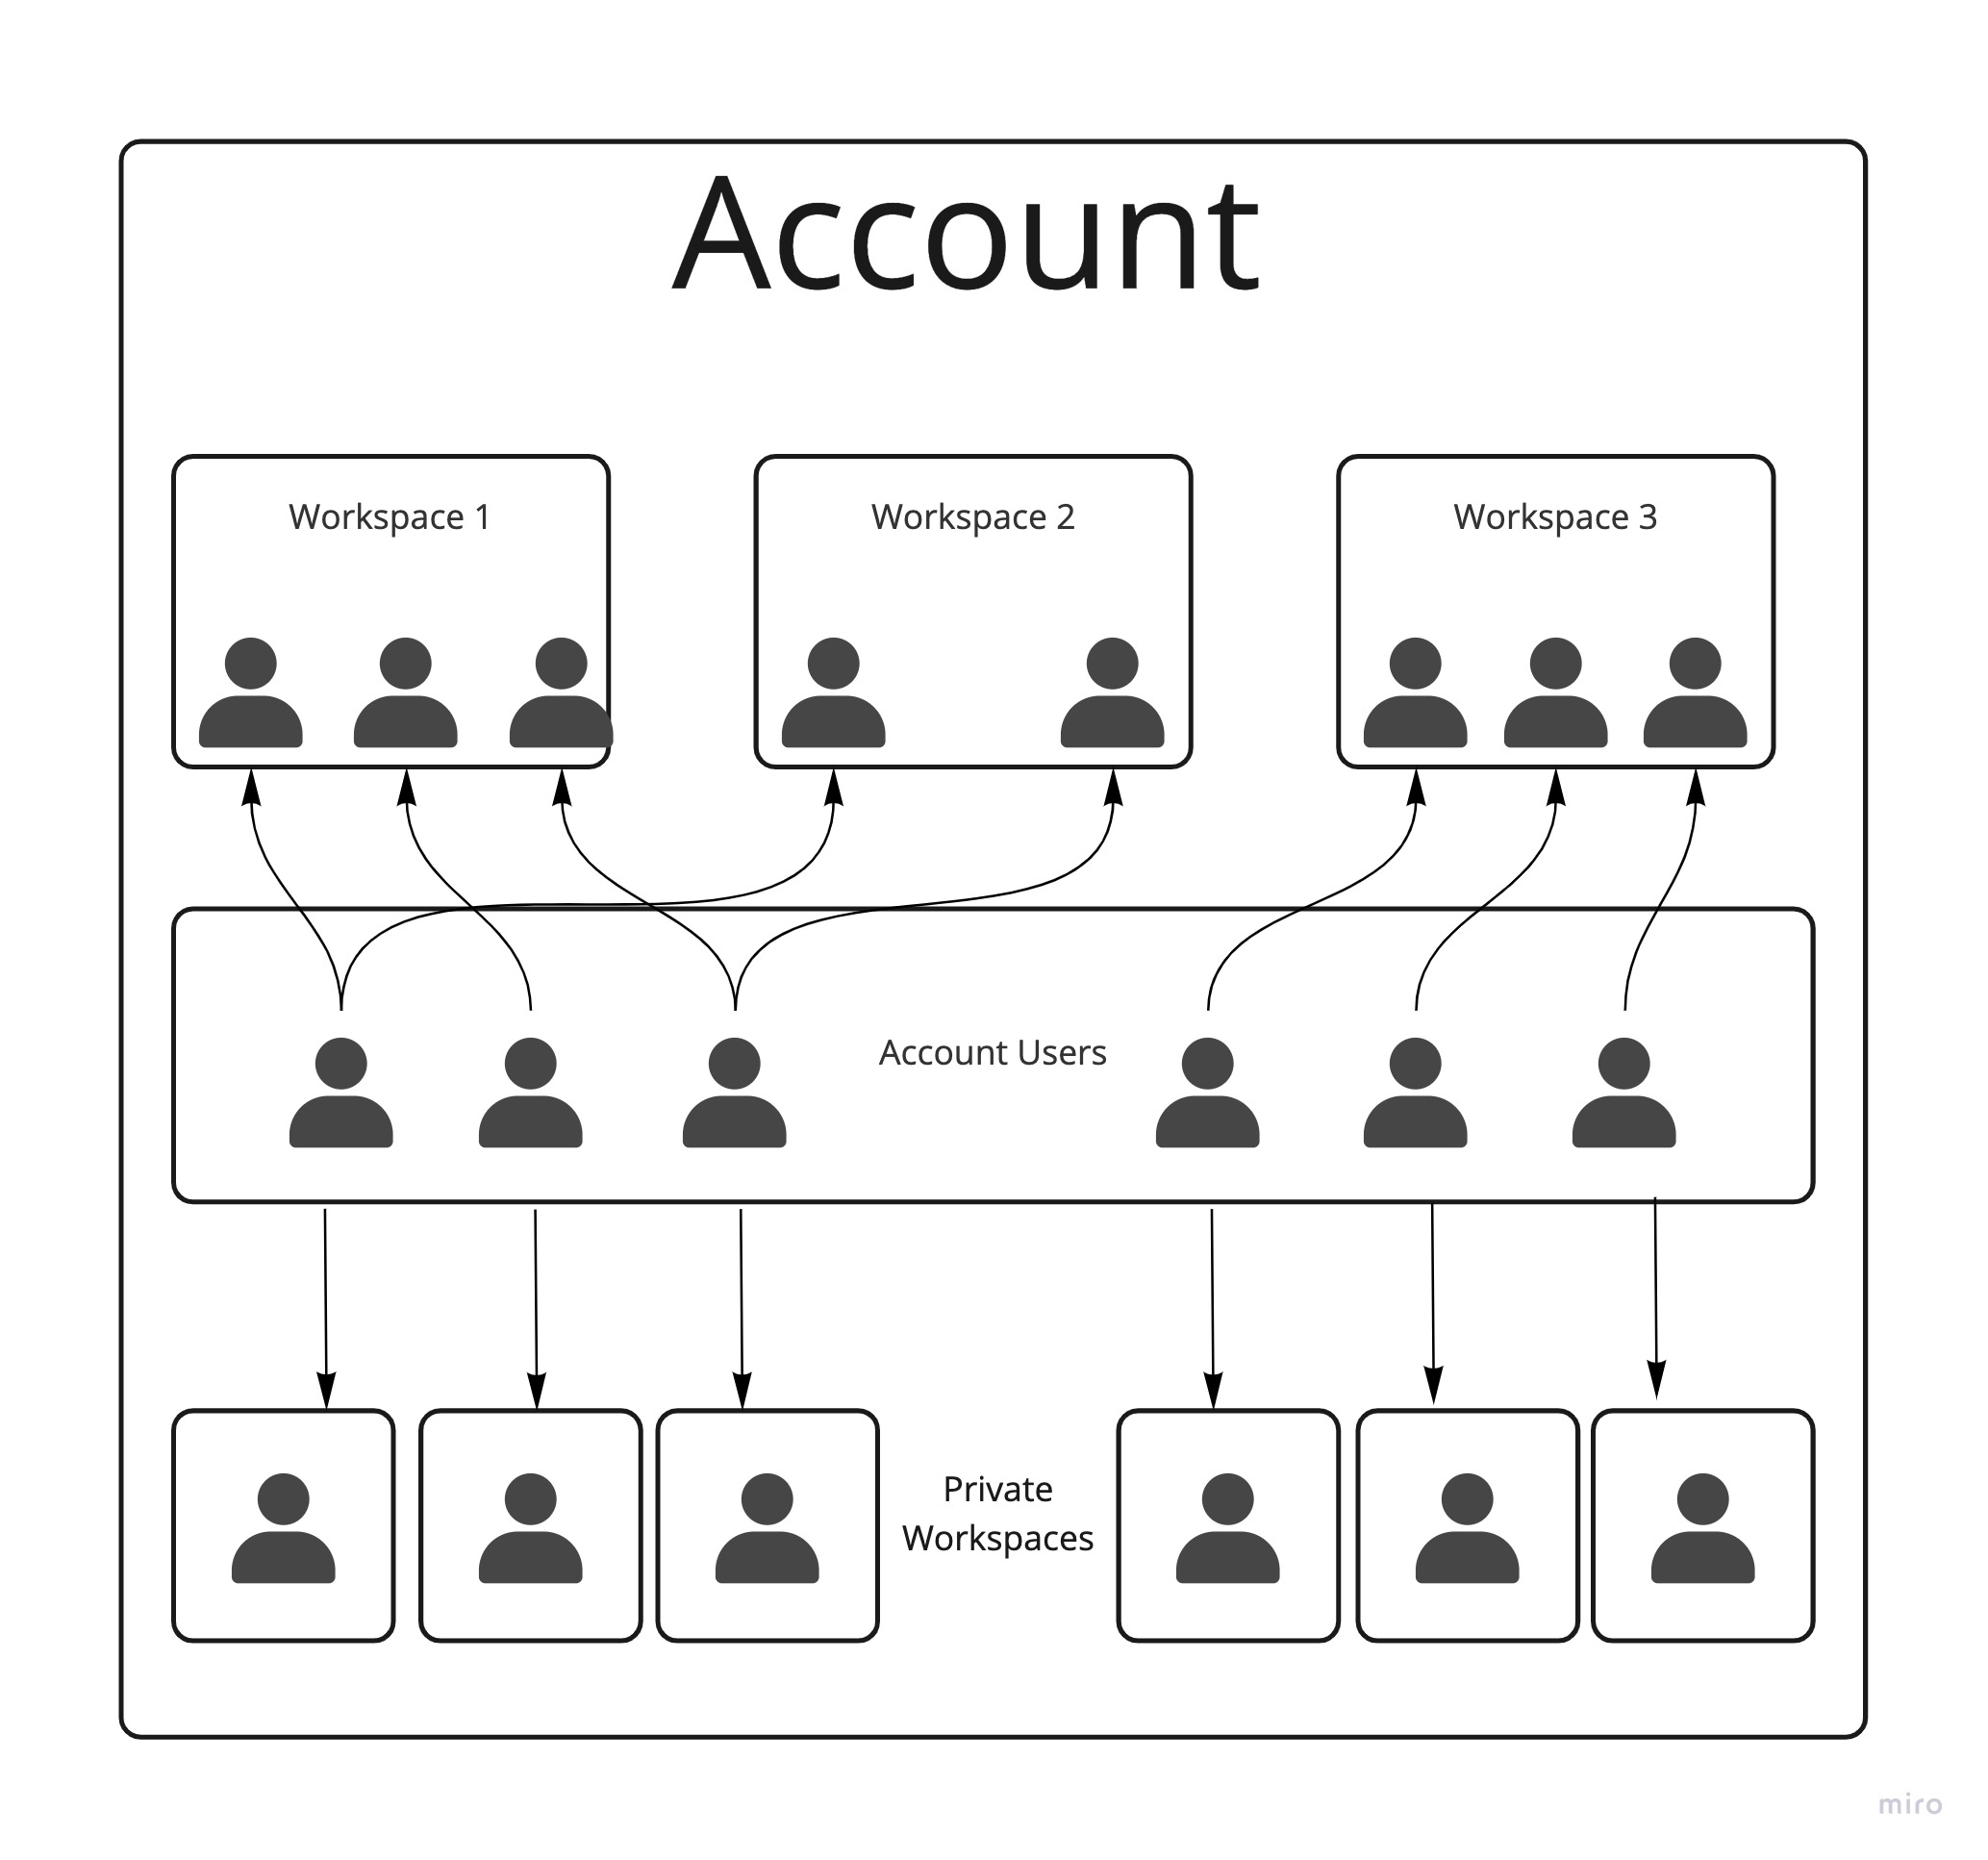
This diagram shows how a company can organize workspaces for efficient collaboration of its teams.
Creating a new Workspace
- In the left-hand sidebar, click the dropdown menu next to the colored square containing your initials, in the top left corner. The menu shows the name of your personal workspace and other workspaces that are shared or created by you.

Click + Create new workspace. An Add New Workspace dialog window opens.
Fill in the following input parameters:
- Workspace Name (Mandatory)
- Workspace Description
Your new workspace is now found in the dropdown menu with your other workspaces.
