Deploying a Runner with CloudFormation
Prerequisites
- AWS Account: You need to have an AWS account to use AWS services, including CloudFormation.
- AWS EC2 Key Pair: Before creating the CloudFormation stack, you should have an EC2 Key Pair set up in your AWS account. If you don't have one, you can follow the AWS documentation to create a key pair.
- BlinkURL: You will need to know the Blink URL the runner should connect to. This parameter is mandatory for the CloudFormation stack.
Deployment
Use this option if you don't have Helm or a Host with a Docker Engine. Before following the next steps, make sure you have an AWS EC2 Key Pair:
Click on the CloudFormation option and click on the blue Cloudformation stack link.
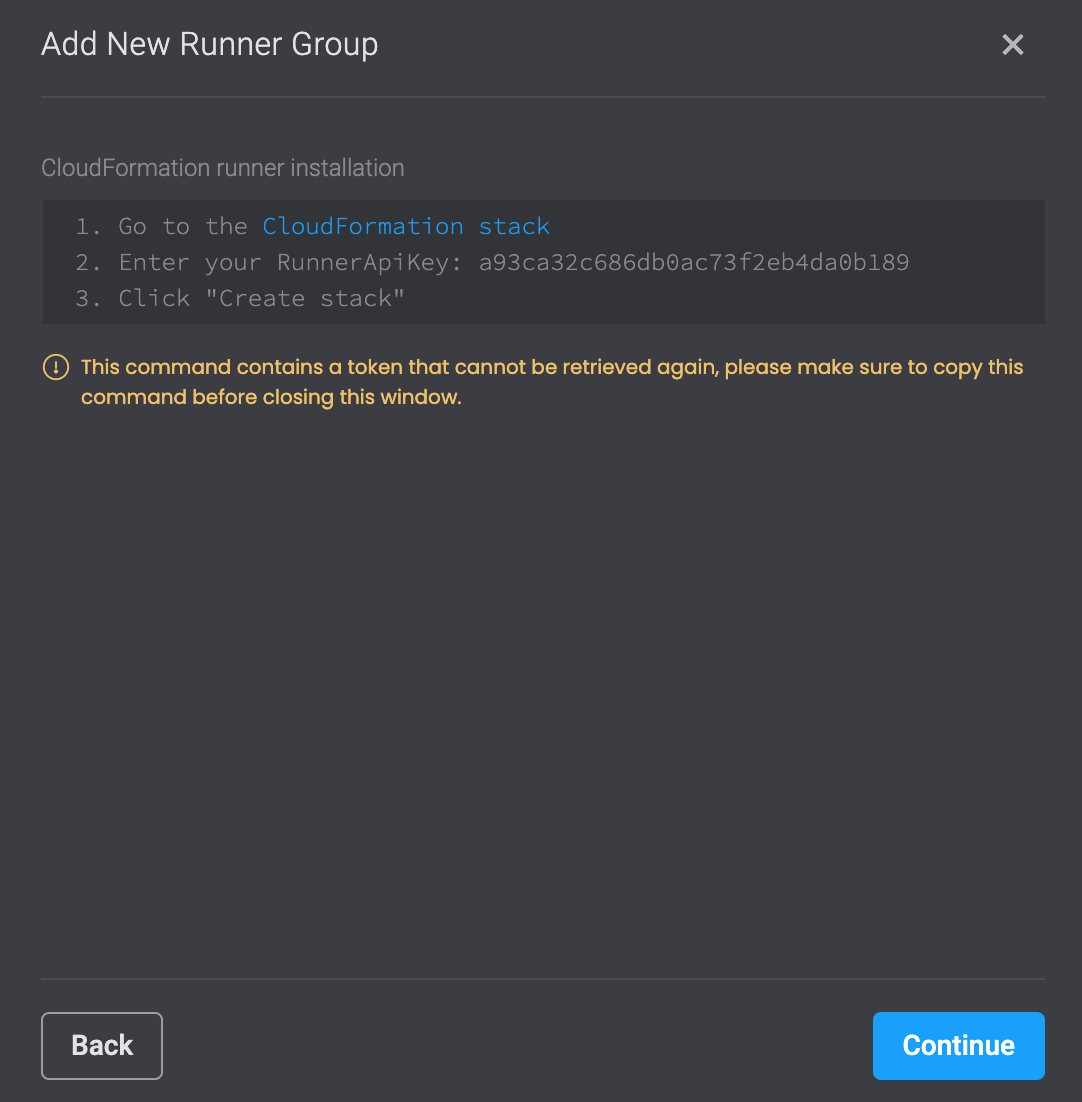
Please sign into your AWS Account if you are not already signed in. You will then be redirected to a new page where you must fill out the Quick create stack form.
Enter the values in the form as follows:
Parameter Description Stack name Give your stack a name BlinkURL The Blink URL the runner should connect to. Do not change the default value. This parameter is mandatory. DiskSize The disk size of the EC2 instance running the runner. Default is 40. This parameter is mandatory. InstanceEc2KeyPair The EC2 Key Pair used for logging in to the EC2 instance running the Runner. This parameter is mandatory. InstanceSshAccessCIdrBlock A CIDR block describing the IP addresses from which the EC2 instance running the Runner should be accessible from. This parameter is mandatory. InstanceType The type of the EC2 instance running the runner. Select a type from the drop-down menu. This parameter is mandatory. LatestAmiID The path of the AWS SSM parameter which stores the AMI ID of the latest Amazon Linux version. Do not change the default value. RunnerApiKey Copy from the text are in the blink platform step 2 and paste the value. This parameter is mandatory. RunnerVersion Do not change the default value. This parameter is mandatory. SubnetId ID of a subnet which can access the internet in the given VPC. If this parameter and Vpcid will be left empty, a VPC with a public Subnet and an internet gateway will be created. Otherwise this parameter should be specified. VpcId ID of a VPC to create the EC2 instance running the runner in. If this parameter and Sunetid will be left empty, a VPC with a public Subnet and an internet gateway will be created. Otherwise this parameter should be specified. OnPremVaultUrl The URL of the Vault instance the Runner should connect to. Should be specified together with the OnPremVaultRootToken parameter. OnPremVaultRootToken The Root Token of the Vault instance the Runner should connect to. Should be specified together with the OnPremVaultUrl parameter. Once you have entered all the correct values click Create stack. AWS will create a stack form with all the specific values you filled out in the form.
Click Close. You can then head over to the Runners page in the Blink Platform, where you will see that your runner is now connected and how many instances it has.

Connecting to the Runner host created with CloudFormation
Once the stack if fully created from the above template, navigate to the
Outputstab. There you can find theEc2InstanceUserandEc2InstancePublicDnsNameoutputs, among others. Using the values of these 2 outputs and the key file which corresponds to the EC2 Key Pair you selected when creating the stack (The file should have been downloaded when the Key Pair was created), you should be able to log in to the Runner host by running the following command (given that the IP of the host from which you're running the command is within the range defined by the CIDR block you specified when creating the stack):ssh -i <path_to_key_file> <value of Ec2InstanceUser output>@<value of Ec2InstancePublicDnsName output>