Deploying a Runner with Kubernetes
Prerequisites
- Kubernetes Cluster: You need to have a Kubernetes cluster up and running. This can be an on-premises cluster or a cloud-based Kubernetes service like Amazon EKS, Google Kubernetes Engine (GKE), or Azure Kubernetes Service (AKS).
- Blink Platform UI Command: You will need the command provided in the Blink platform UI to install the Blink Runner on your Kubernetes cluster.
- Runner Profile: Before deploying the runner, you must choose a runner profile from the available options: Low, Medium, High, or Custom. These profiles define the resource limits for CPU, memory, and storage for the runner containers and pods.
- Optional: SSH Access to Kubernetes Cluster: If you need to manually manage your Kubernetes cluster or troubleshoot any issues, you should have SSH access or appropriate permissions to interact with the cluster.
Deployment
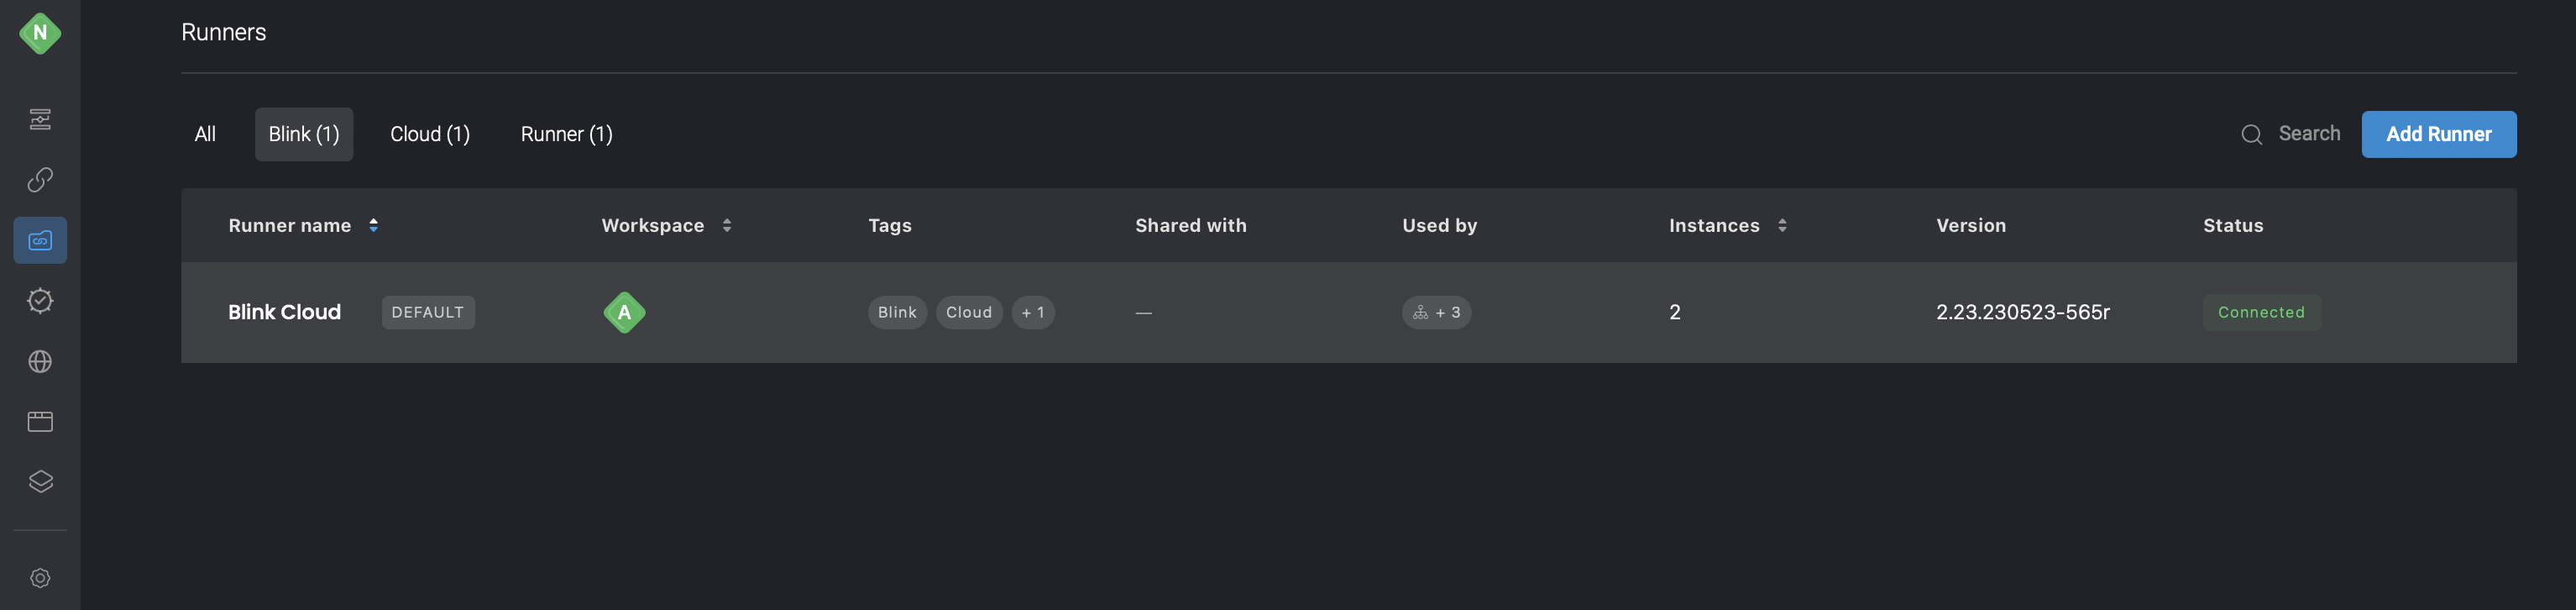
- On the left-hand side of Blink browser click Runners > Add Runner. A dialogue box will then open.
Fill in the parameters:
Name: Name of Runner group.
Default: Select the checkbox if this your default Runner group from now on.
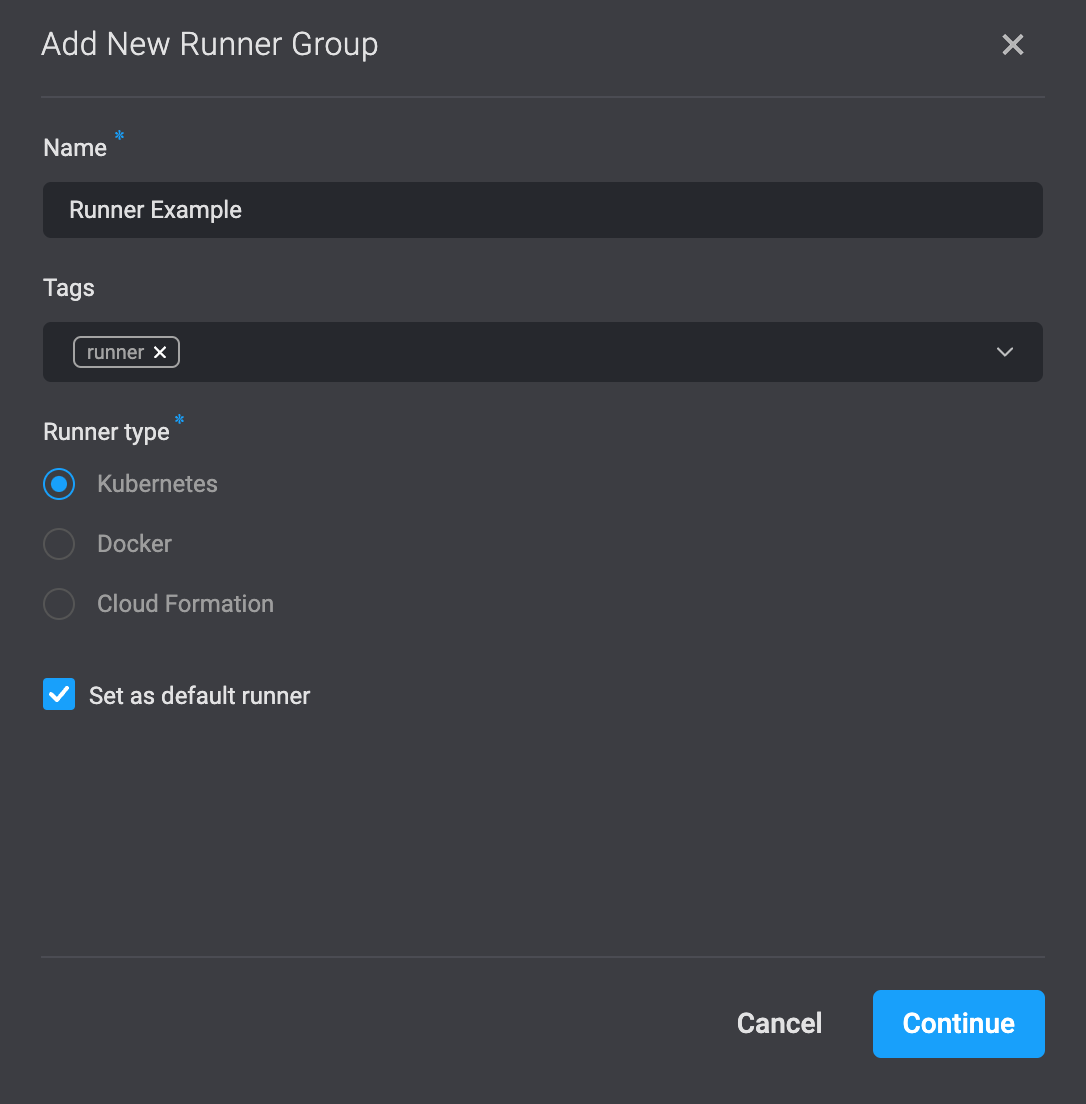
- To proceed, click on the Continue button located in the bottom-right corner. This will prompt the opening of a dialogue box where you can access the command required to install the Runner in your Docker environment. Simply copy this command to your clipboard by clicking on the icon positioned in the top-right corner.
Please be aware that the provided command contains the registration token of the Runner, which will not be retrievable after copying. It is essential to securely store this token in a safe location for future reference.
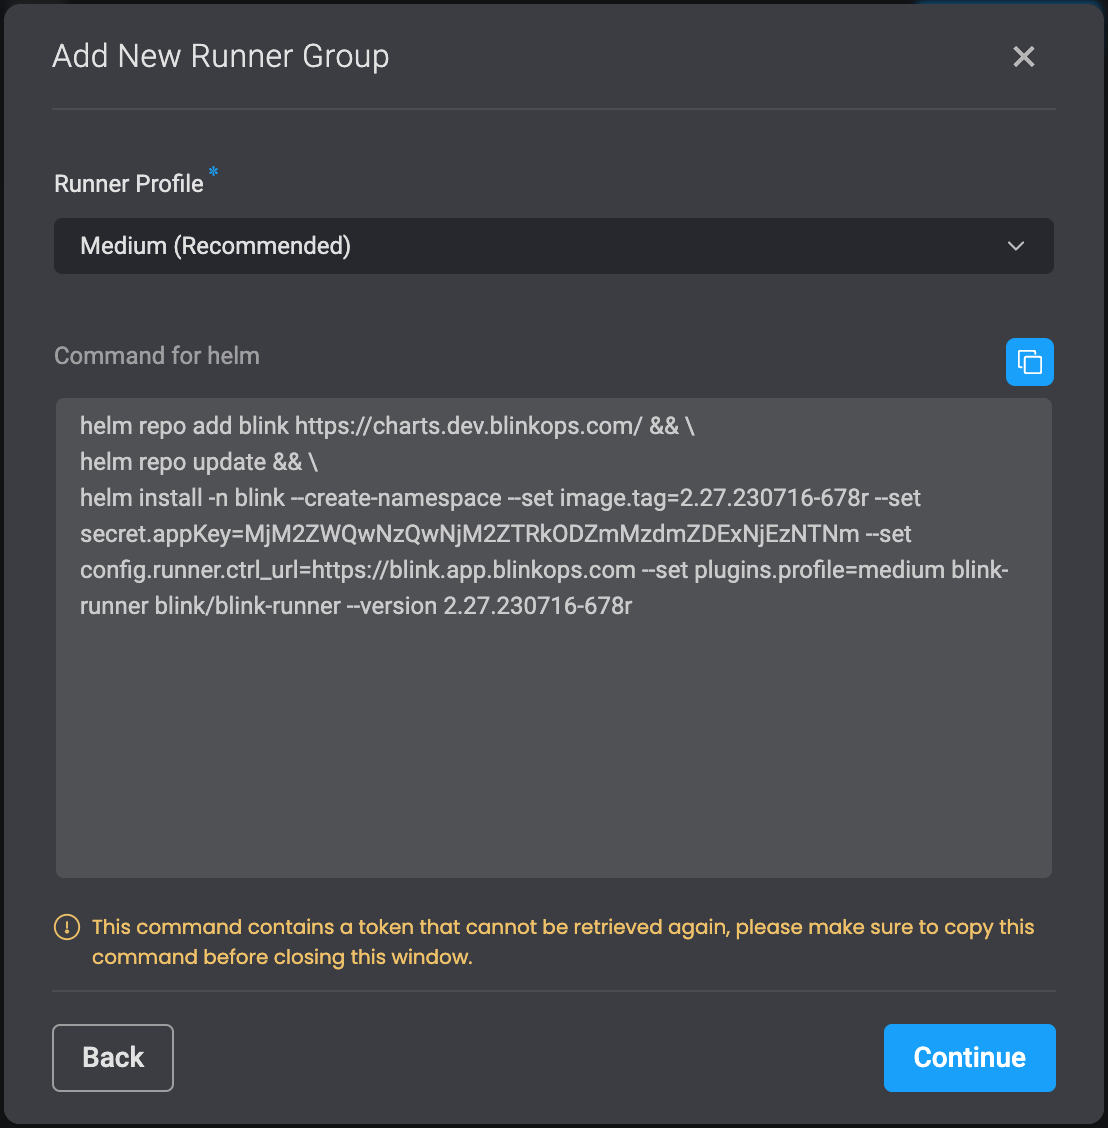
- Under the Header Runner Profile , please choose between the following options: Low, Medium, High or Custom. This allows you to better manage your resource containers and pods. To read more about it you can visit resource container links.

Low Runners Profile Request-Limit Table
| Parameter | Request | Limit |
|---|---|---|
| Regular CPU | 100m | 1000m |
| Regular Memory | 15Mi | 375Mi |
| Core Memory | 250Mi | 1000Mi |
| Regular Storage | 1Gi | 2Gi |
| Core Storage | 2Gi | 4Gi |
Medium Runners Profile Request-Limit Table
| Parameter | Request | Limit |
|---|---|---|
| Regular CPU | 200m | 2000m |
| Core CPU | 500m | 4000m |
| Regular Memory | 15Mi | 650Mi |
| Core Memory | 500Mi | 1500Mi |
| Regular Storage | 2Gi | 4Gi |
| Core Storage | 4Gi | 6Gi |
High Runners Profile Request-Limit Table
| Parameter | Request | Limit |
|---|---|---|
| Regular CPU | 400m | 3000m |
| Core CPU | 600m | 6000m |
| Regular Memory | 50Mi | 1000Mi |
| Core Memory | 750Mi | 2000Mi |
| Regular Storage | 4Gi | 6Gi |
| Core Storage | 6Gi | 8Gi |
Custom Runners Profile Request-Limit Table
- If you choose the Custom Option as your Runners Profile, you will be able to enter your own Request Units and Limits Units. For Example:
Advanced:
Configuring runner resource limitations
Use the following flags when deploying the Runner to set pod requests:
--set plugins.requests.cpu="400m" // The CPU request for plugin containers
--set plugins.requests.memory="650Mi" // The Memory request for plugins containers
--set plugins.requests.storage="1Gi" // The Storage request for plugins containers
--set plugins.requests.core_cpu="400m" // The CPU request for containers
--set plugins.requests.core_memory="650Mi" // The Memory request for core containers
--set plugins.requests.core_storage="4Gi" // The Storage request for core containers
Use the following flags when deploying the Runner to set pod limits:
--set plugins.limits.cpu="400m" // The CPU limit for plugin containers
--set plugins.limits.memory="650Mi" // The Memory limit for plugins containers
--set plugins.limits.storage="1Gi" // The Storage limit for plugins containers
--set plugins.limits.core_cpu="400m" // The CPU limit for core containers
--set plugins.limits.core_memory="650Mi" // The Memory limit for core containers
--set plugins.limits.core_storage="4Gi" // The Storage limit for core containers
Balancing the Load within a Runner Group
A Group consists of many identical instances of runners. You can balance the load of a runner by spreading it over any number of Instances.
Checking How Many Instances you Currently Have in a Runner Group
Click the three dots on the runner and select Edit. A dialogue box opens.
Under Instances, you can see a list of instances and their status, that are used in the runner group.
Scale with Kubernetes Runner
Enable Horizontal Pod Autoscaler (HPA) for the Kubernetes Runner deployment by including the following addition in the helm command:
--set hpa=true.Configure the Horizontal Pod Autoscaler (HPA) for the Kubernetes Runner deployment by including the following addition in the helm command:
--set minReplicas={minReplicas}(The default value is set to 3)--set maxReplicas={maxReplicas}(The default value is set to 6)--set targetCPUUtilizationPercentage={targetCPUUtilizationPercentage}(The default value is set to 80 percent)--set targetMemoryUUtilizationPercentage={targetMemoryUUtilizationPercentage}(The default value is set to 80 percent)
Scale integrations with Kubernetes Runner
This configuration only affects Blink Ops HPA Supported integrations.
Enable Horizontal Pod Autoscaler (HPA) for the plugins deployed by the runner using the following addition to the helm command:
--set plugins.hpa.enabled=true.Configure the Horizontal Pod Autoscaler (HPA) for the plugins deployed by the runner using the following addition to the helm command:
--set plugins.hpa.minReplicas={minReplicas}(The default value is set to 2)--set plugins.hpa.maxReplicas={maxReplicas}(The default value is set to 4)--set plugins.hpa.targetCPUUtilizationPercentage={targetCPUUtilizationPercentage}(The default value is set to 60 percent)--set plugins.hpa.targetMemoryUUtilizationPercentage={targetMemoryUUtilizationPercentage}(The default value is set to 60 percent)