Deploy Pack to Workspace(s)
Please note that this feature is limited and only accessible to customers upon request.
The deploy pack to workspace feature establishes a deployment pipeline for automations from development to production stages. The deploy pack to workspace feature replaces the contents of the pack in the target workspace with the contents of the pack from the origin workspace, while retaining the metadata of the automation(s) in the target pack, including their share state, activation state, and connection mapping.
Automations with the same name in the target workspace, will be overridden by the latest published version of the automations from the origin workspace.
Please also be aware that both the published and the draft versions of the pack's automation(s) in the target workspace will be overridden by the deployed versions of the pack's automation(s)
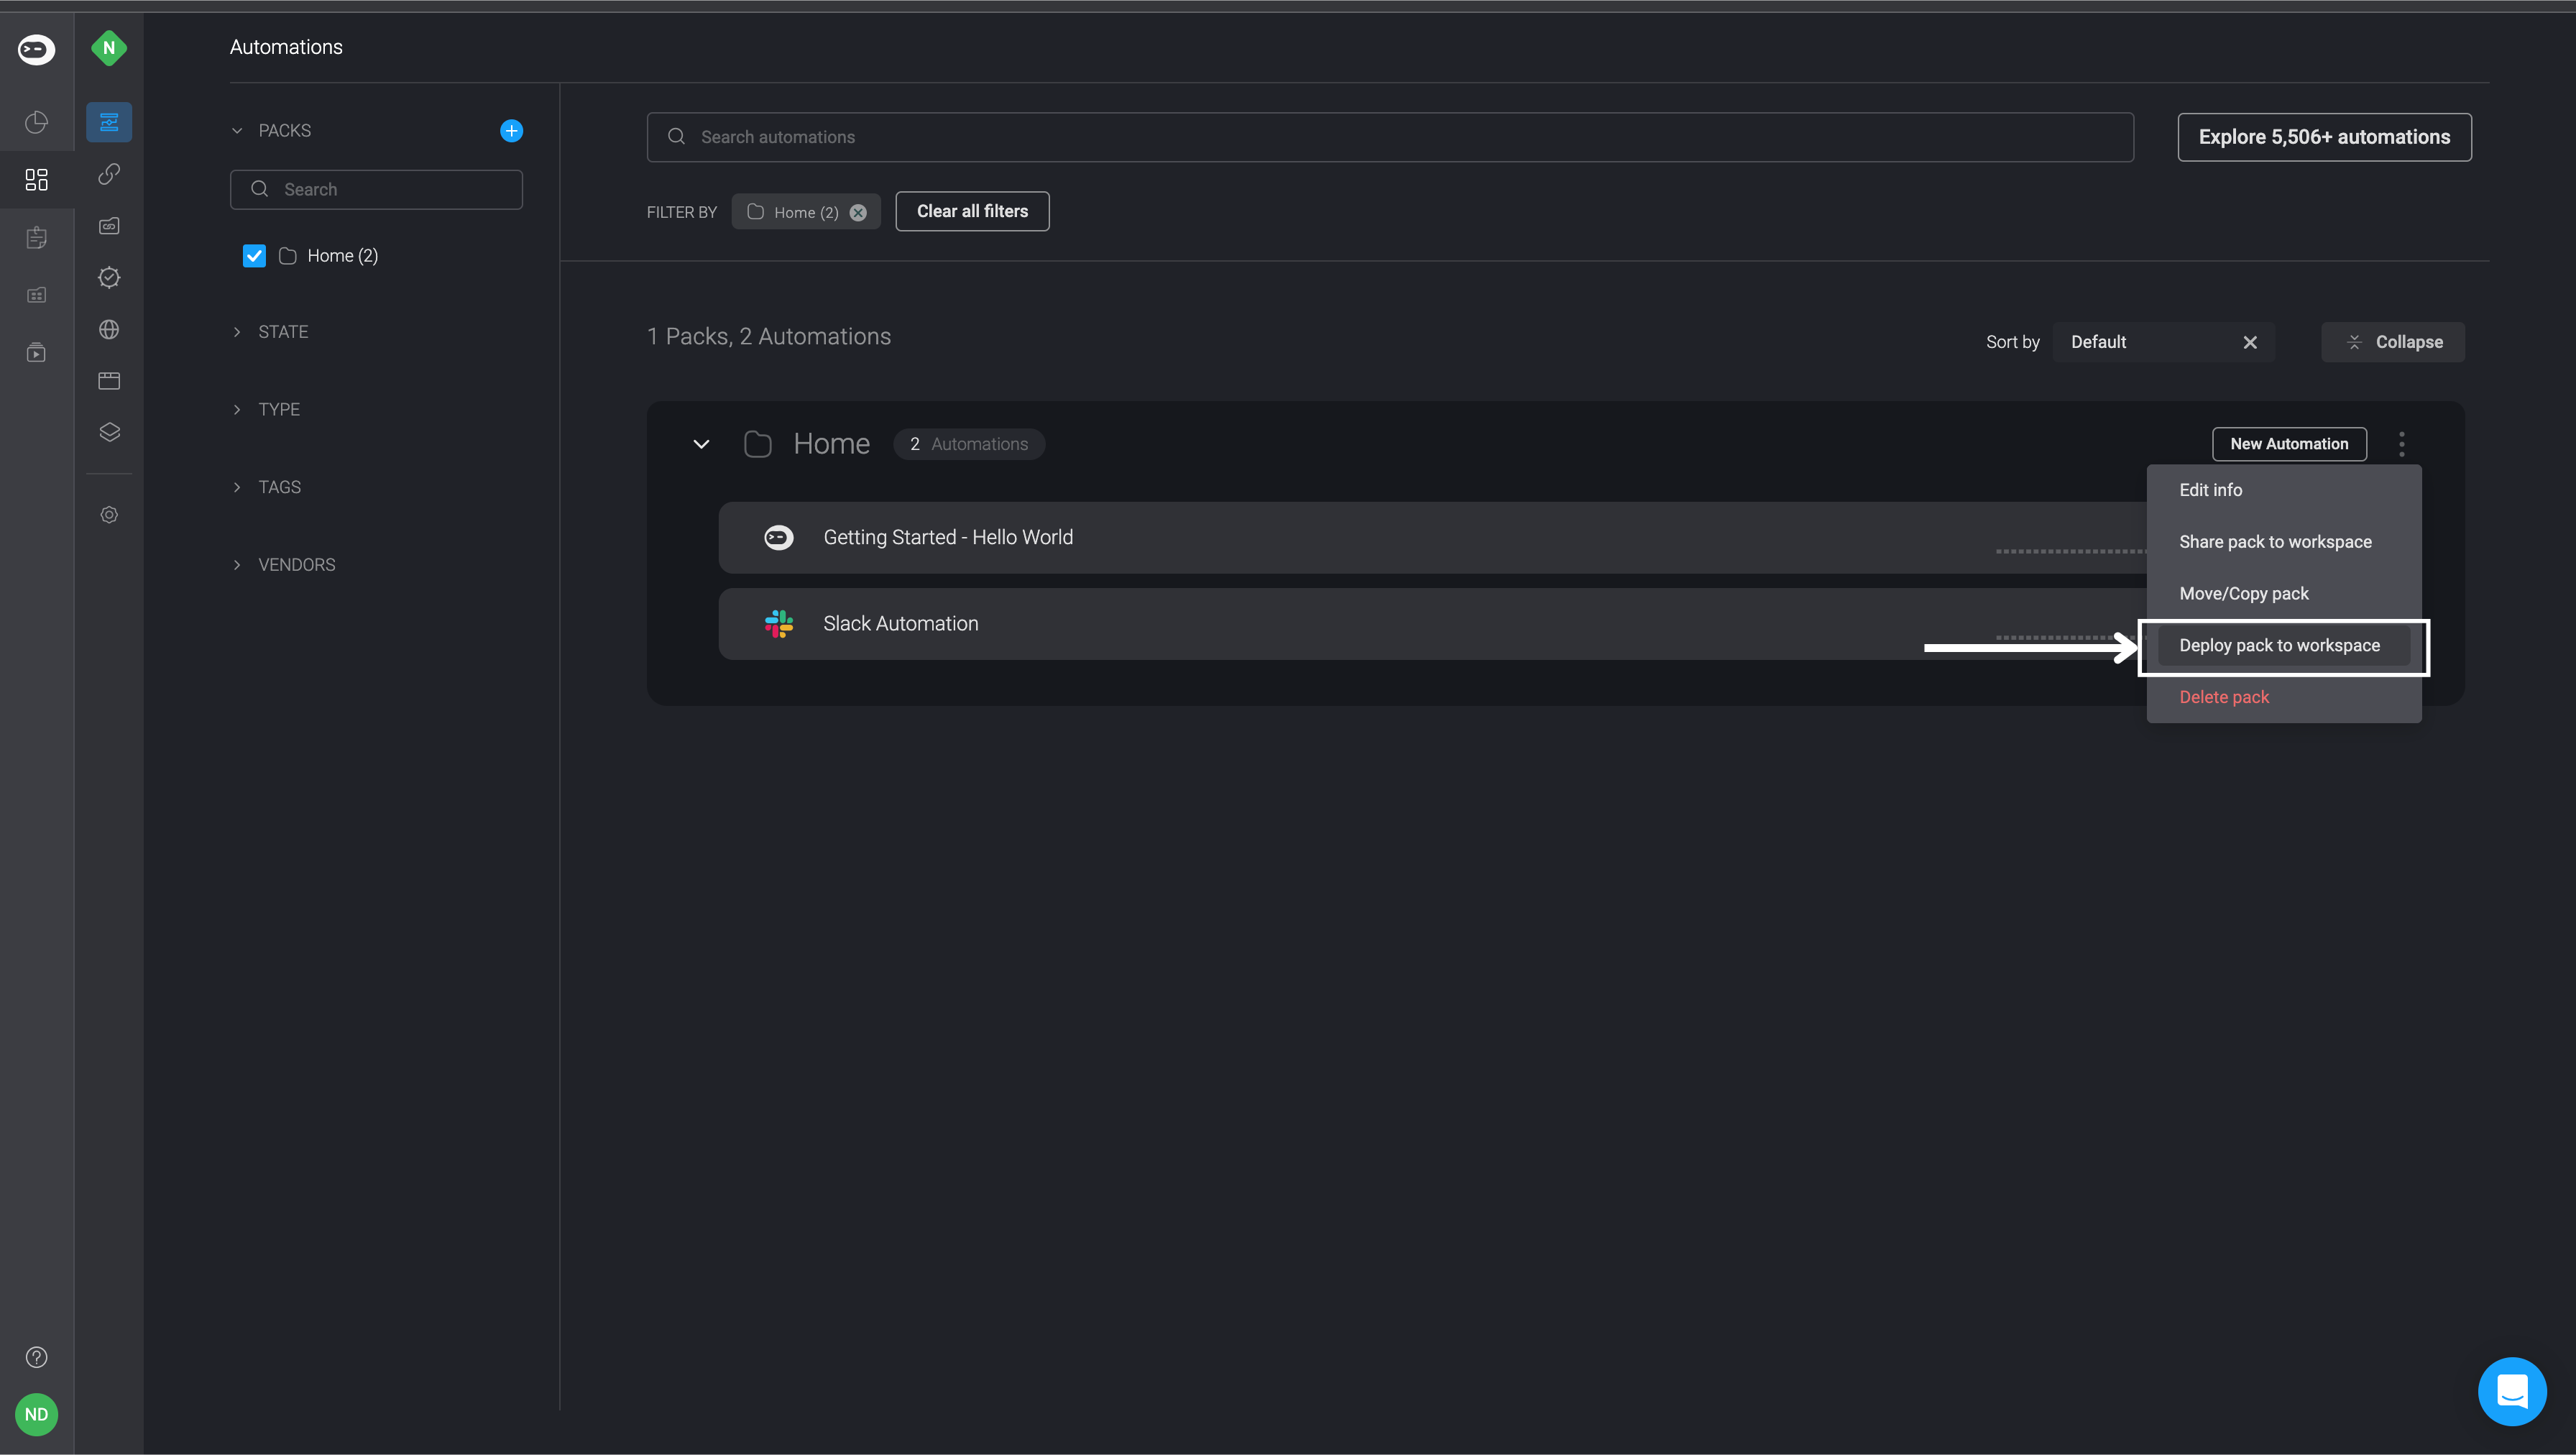
- Click on the
 in the top-right corner of the automation pack and select the deploy pack to workspace.
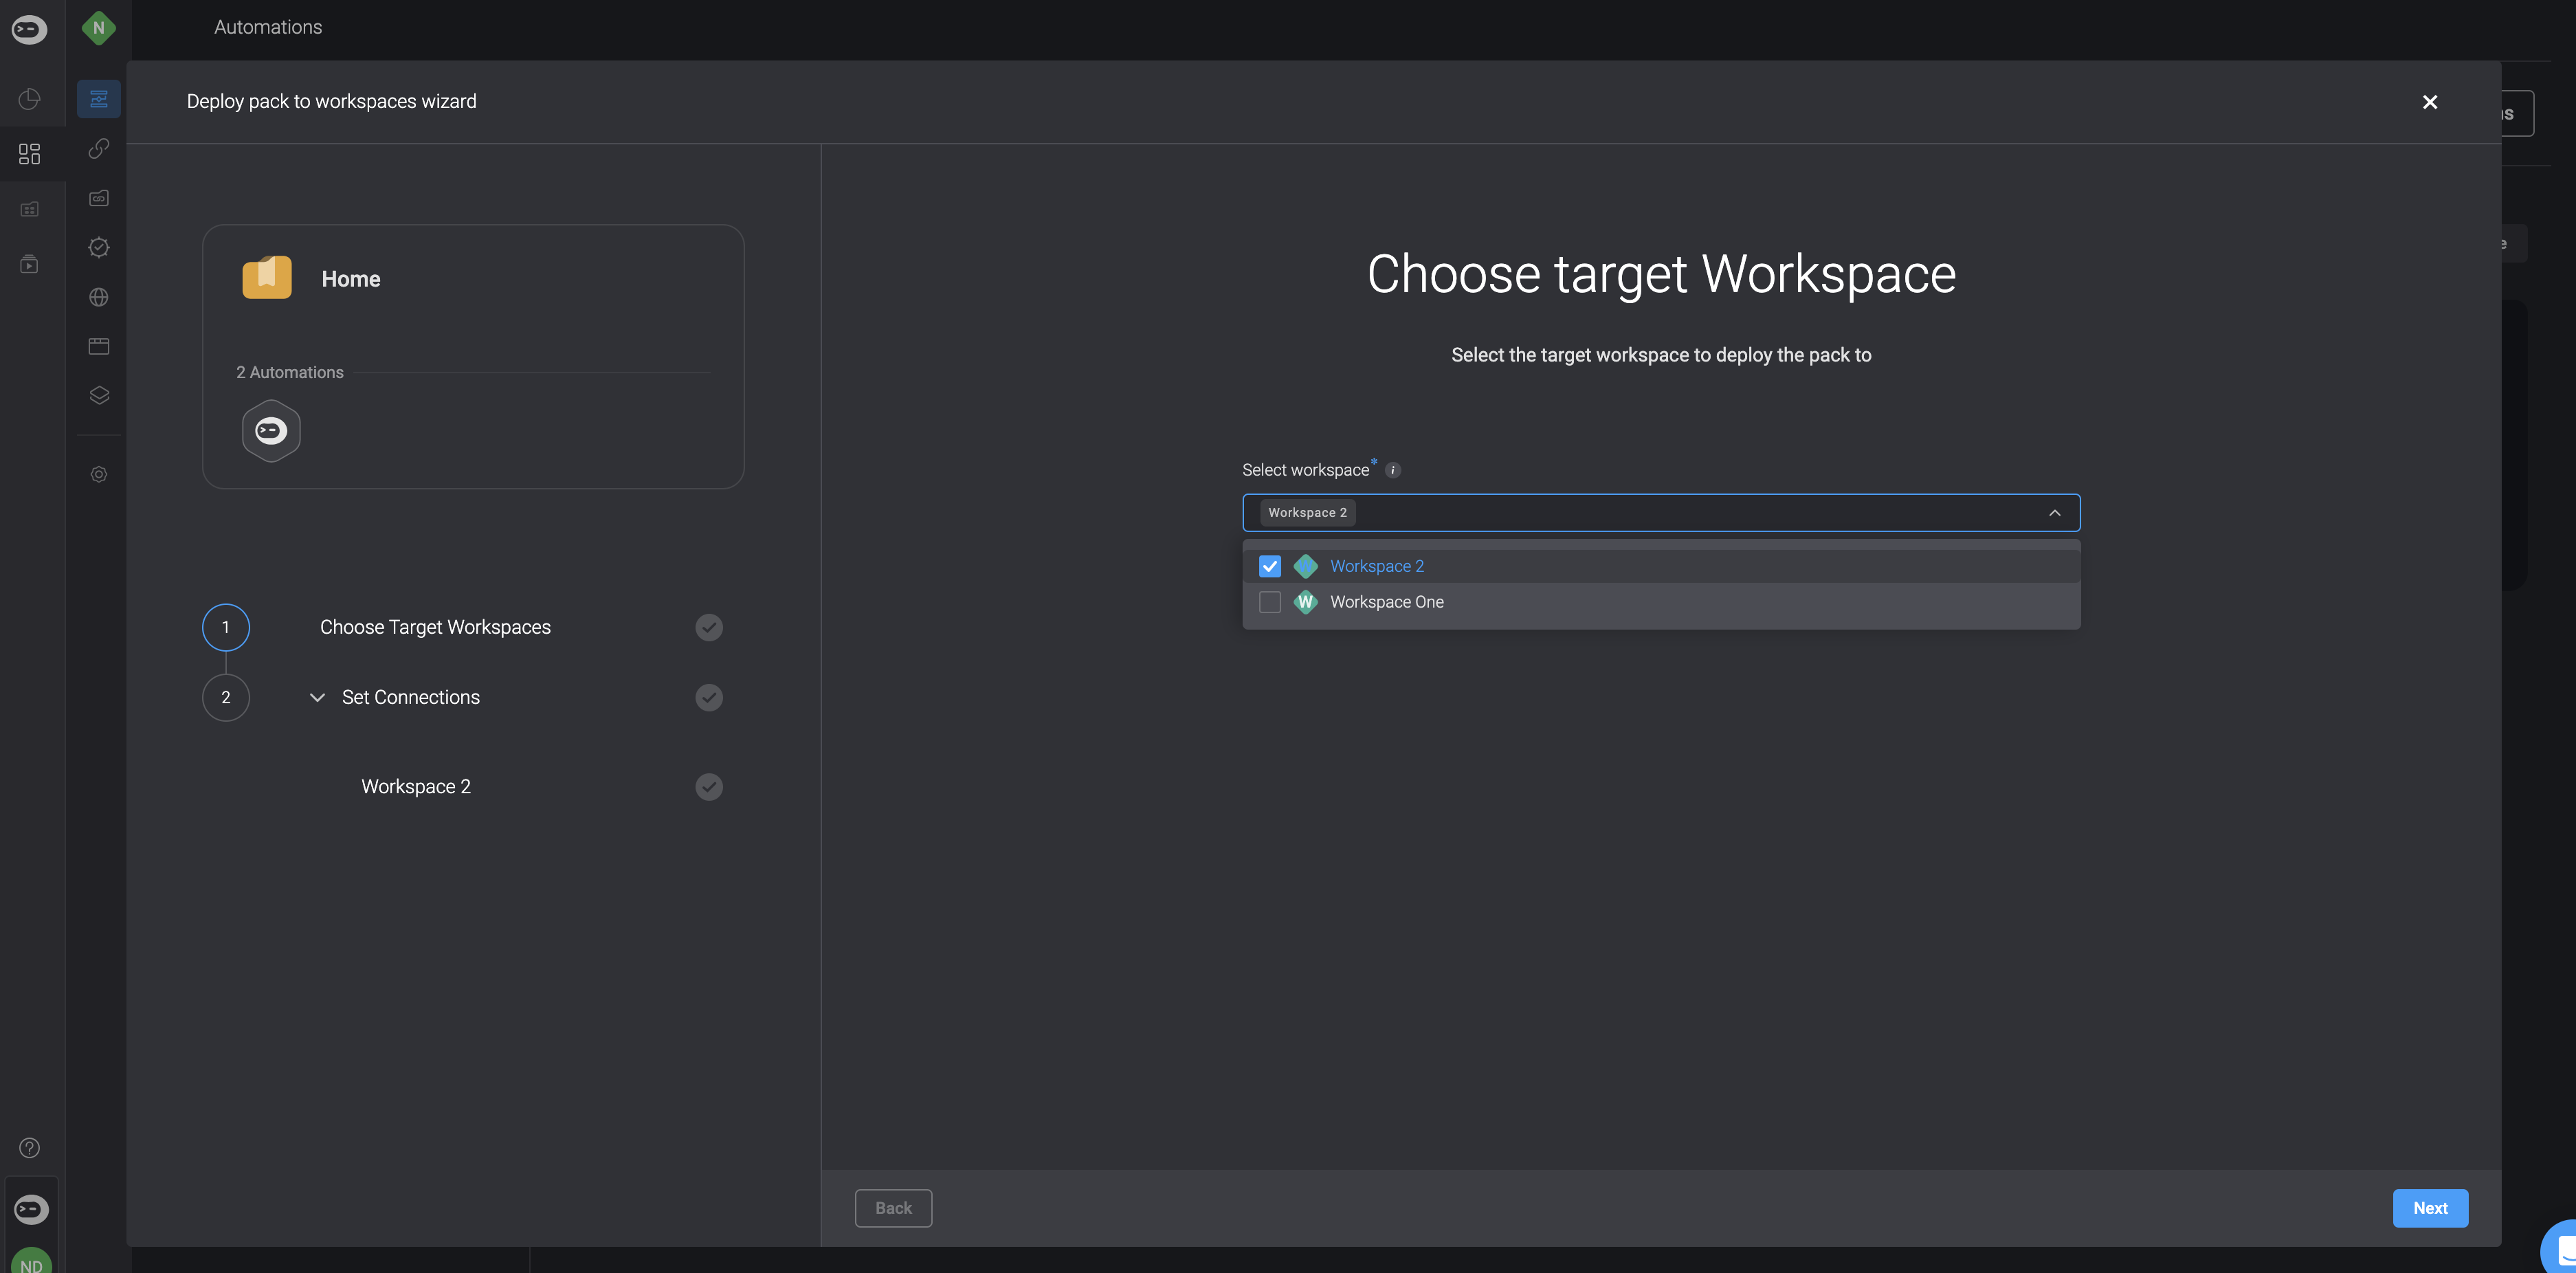
- This will open the Deploy Pack to Workspace wizard where you can select which workspace(s) you want to deploy the pack to. Begin by selecting target workspaces
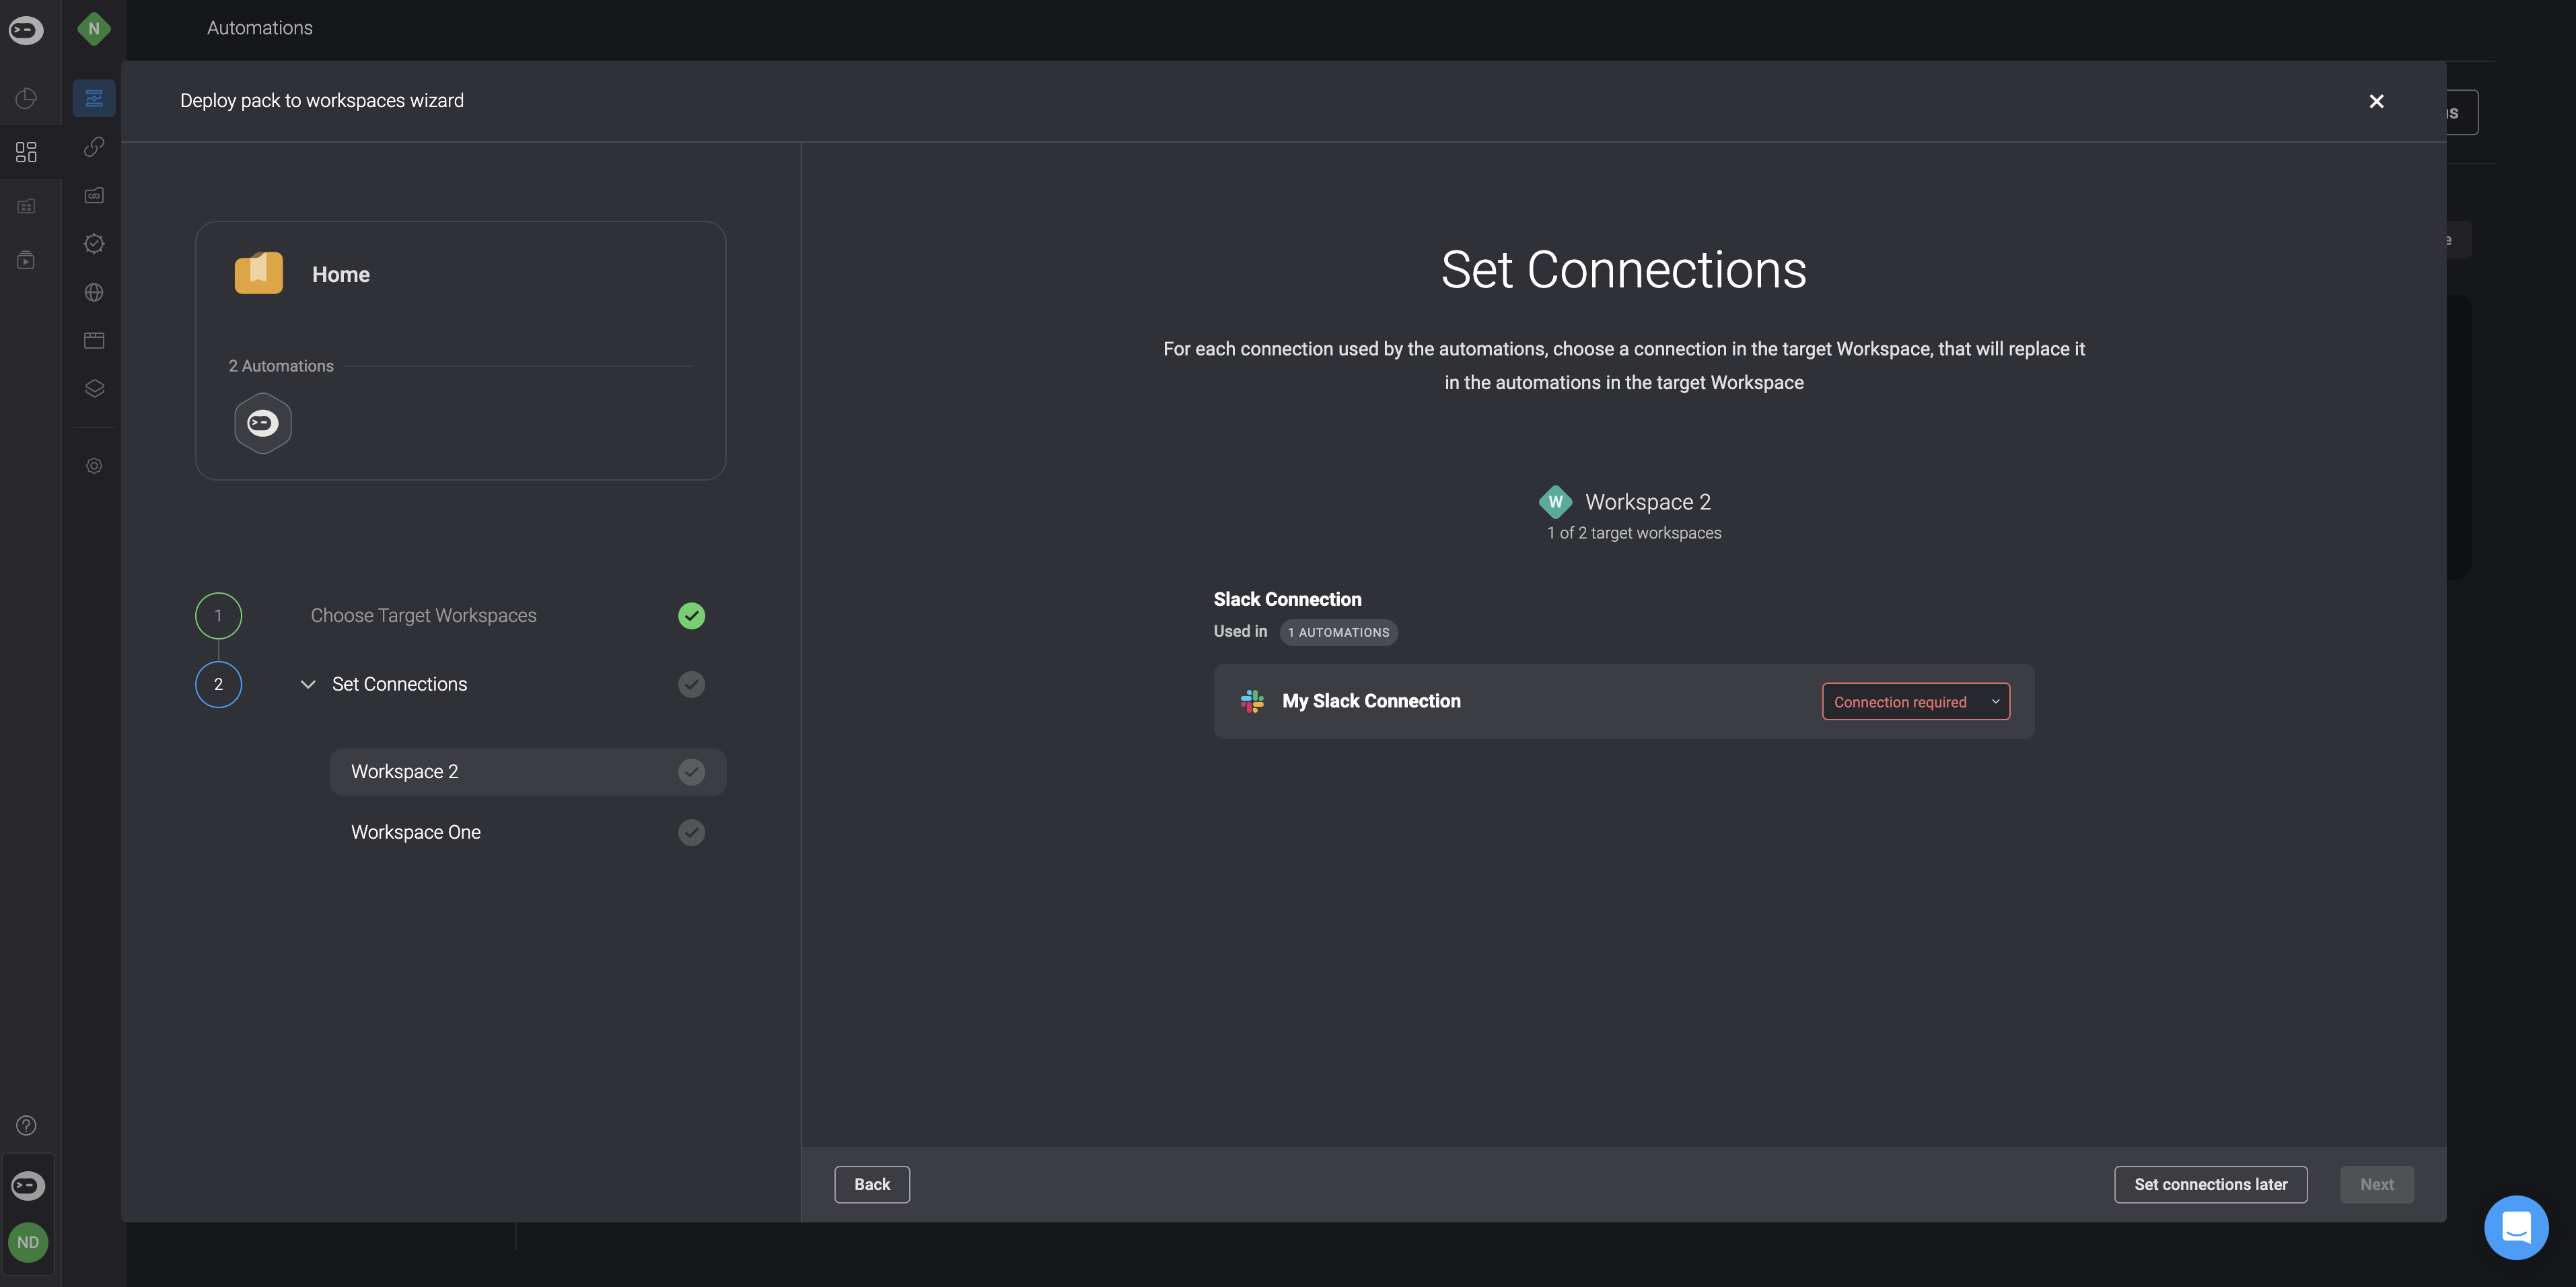
- Set the connections- For each connection used by the automations, choose and set a connections in the target Workspace, that will be used in the deployed automations in the target Workspace. You can also change or configure the automation's connections in the target workspace at a later point, directly in the editor tab.
Please note that if you have already deployed a pack and established the connections, they will be preserved for any subsequent deployments.
You also have the option to configure your connections at a later stage, though we advise against this. Delaying this step may lead to a more complex process and potential time inefficiencies.
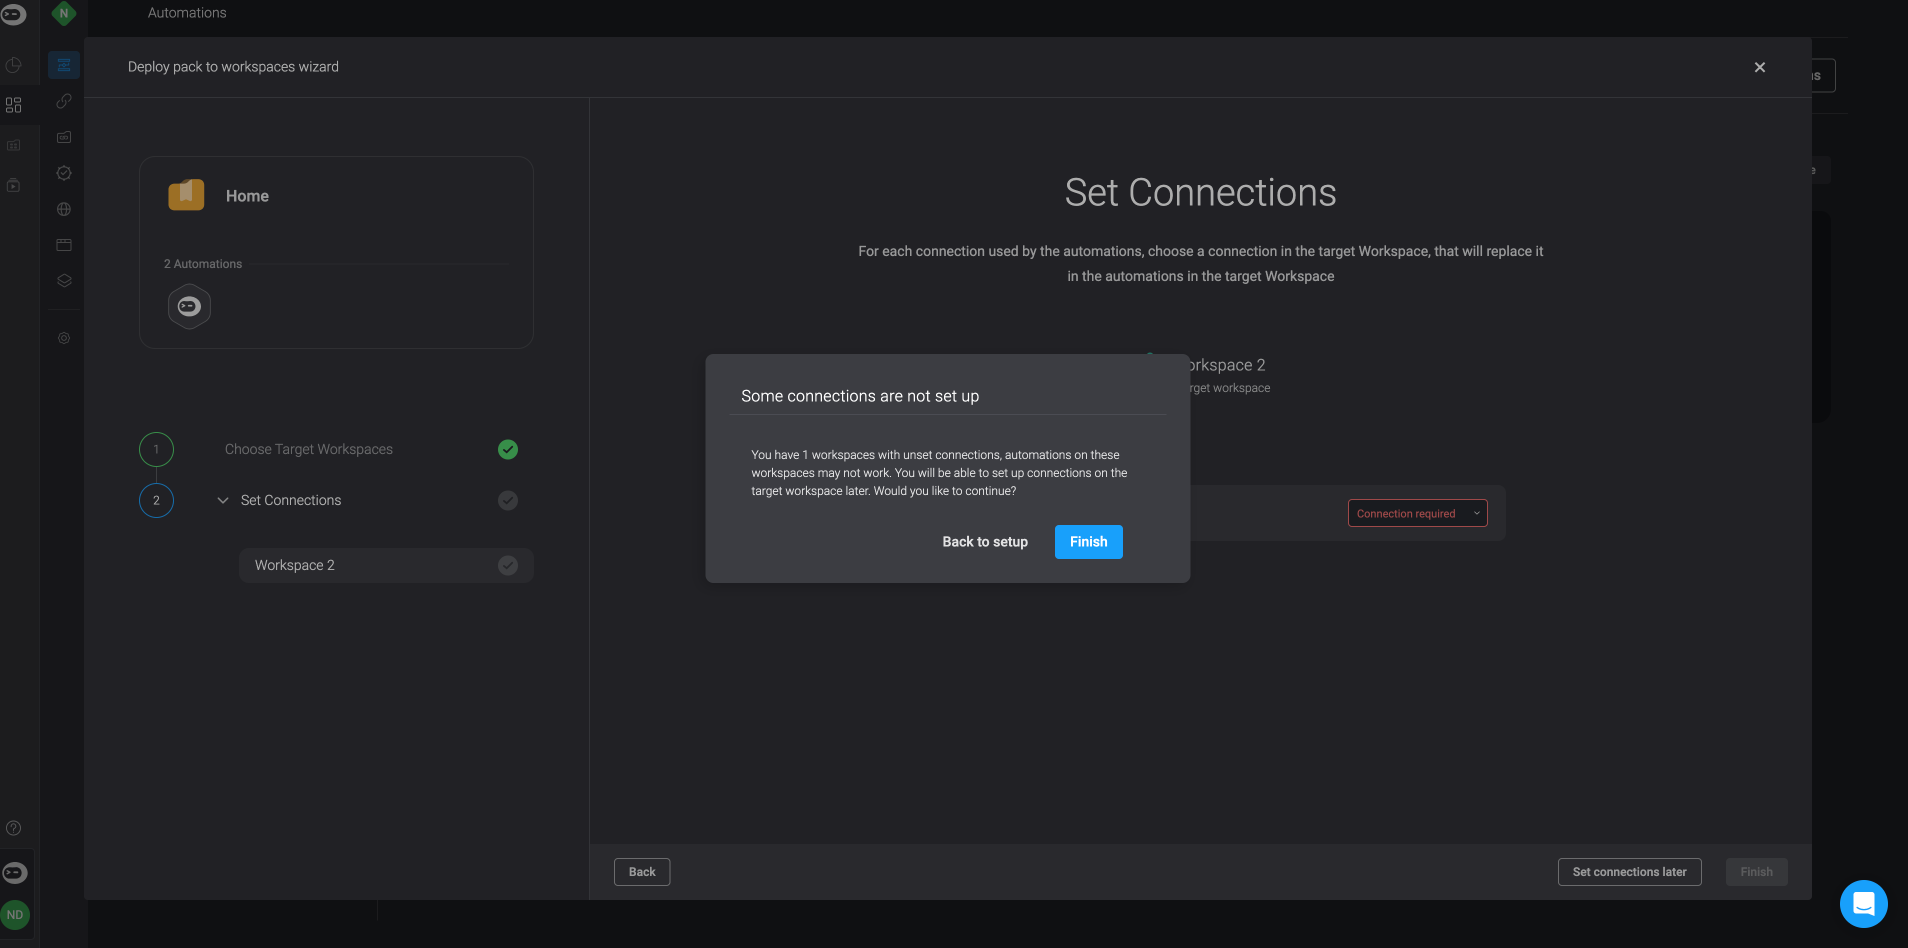
If you don't have any connections to configure at this stage, you can move on to the next step.
To complete the process, simply click the Finish button located in the bottom-right corner. An Operation-Result popup will then appear in the bottom-right corner confirming that the pack has been deployed successfully.
- You can then navigate to the target workspace where you can access the deployed pack and its automation(s).