Creating a New Automation
After selecting or creating a Pack, choose the appropriate Pack to allocate the new Automation.
Access the New Automation option located in the top-right corner of your selected pack.

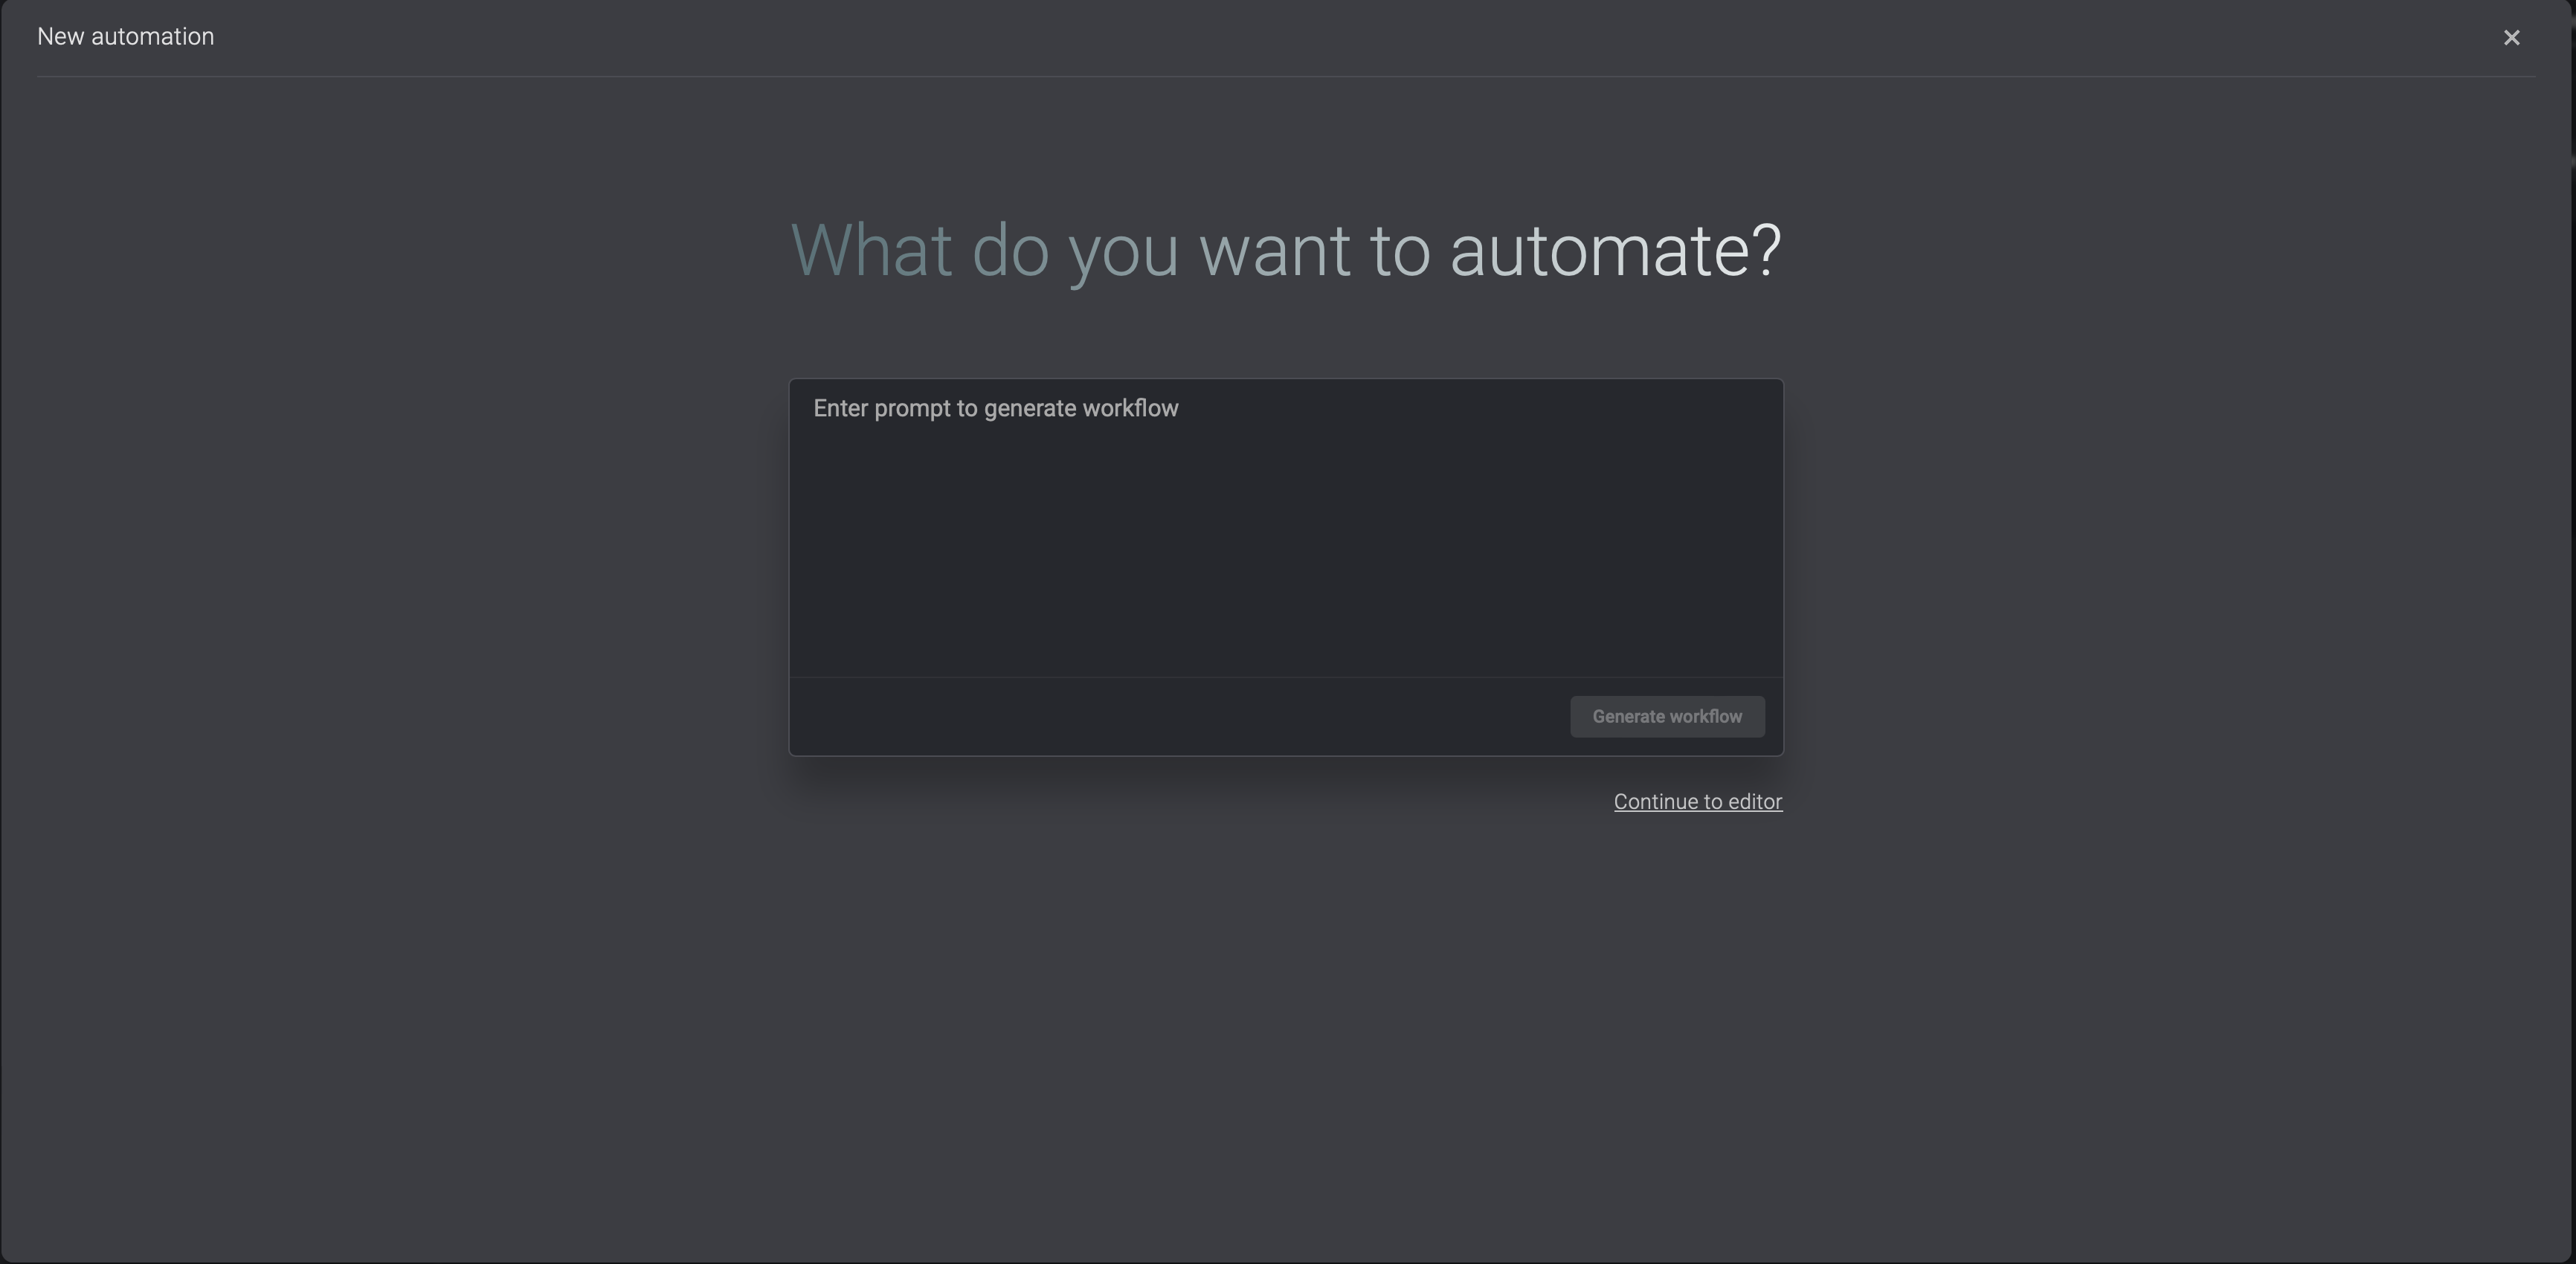
- A dialogue box will appear, presenting a text prompt where you can enter the desired instruction for Blink Co-pilot to generate.Alternatively, if you prefer to create your own automation instead of using the Blink Co-pilot, click on Continue to Editor in the bottom-right corner. This action will redirect you to the automation canvas, enabling you to build your own automation from scratch.
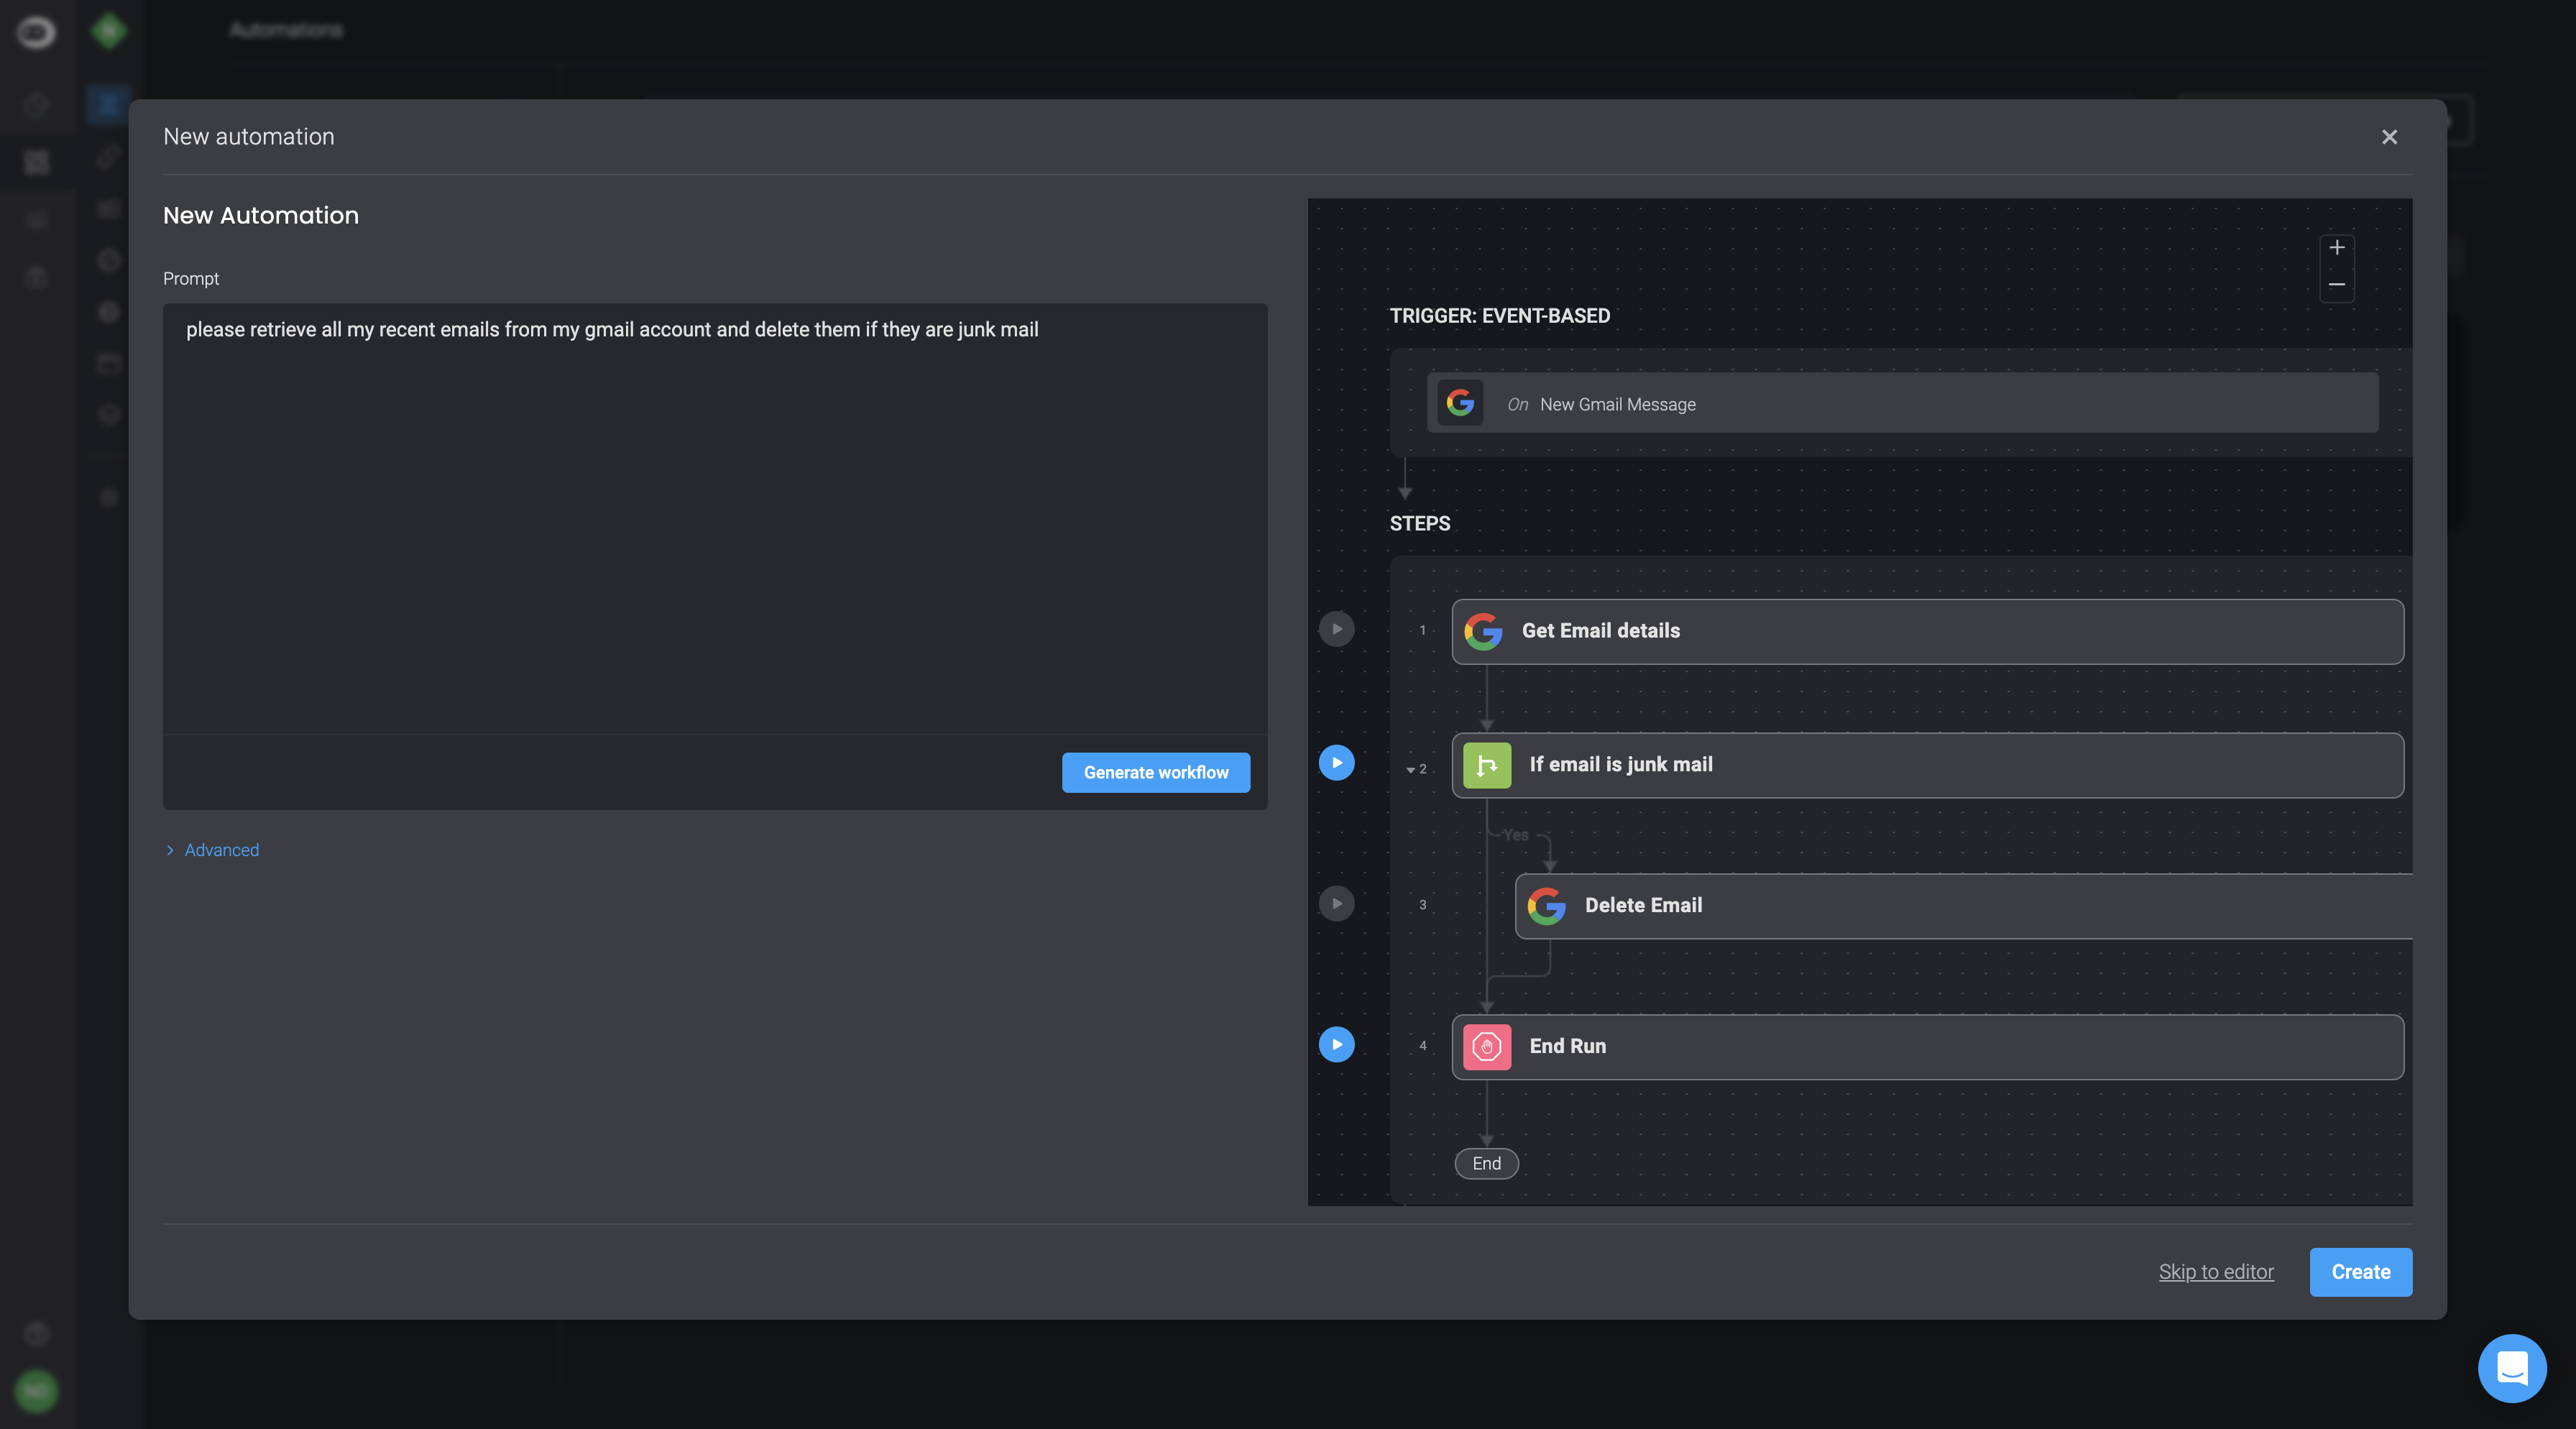
- After you have finished providing instructions for Blink Co-pilot, simply click on the generate workflow button located in the bottom-right corner. The generation process may take a few seconds.

- Upon completion, you will be directed to a dialogue box displaying a preview of your written prompt on the left-hand side and the generated automated workflow on the right-hand side. If you wish to make any changes, simply double-click on your prompt, make the desired edits, and click the "generate workflow" button to regenerate it. On the left-hand side you will also find the advanced settings where you can add a description and tags. However, if you are satisfied with Co-pilot's generated automated workflow, you can proceed to the next step by clicking on the create button.
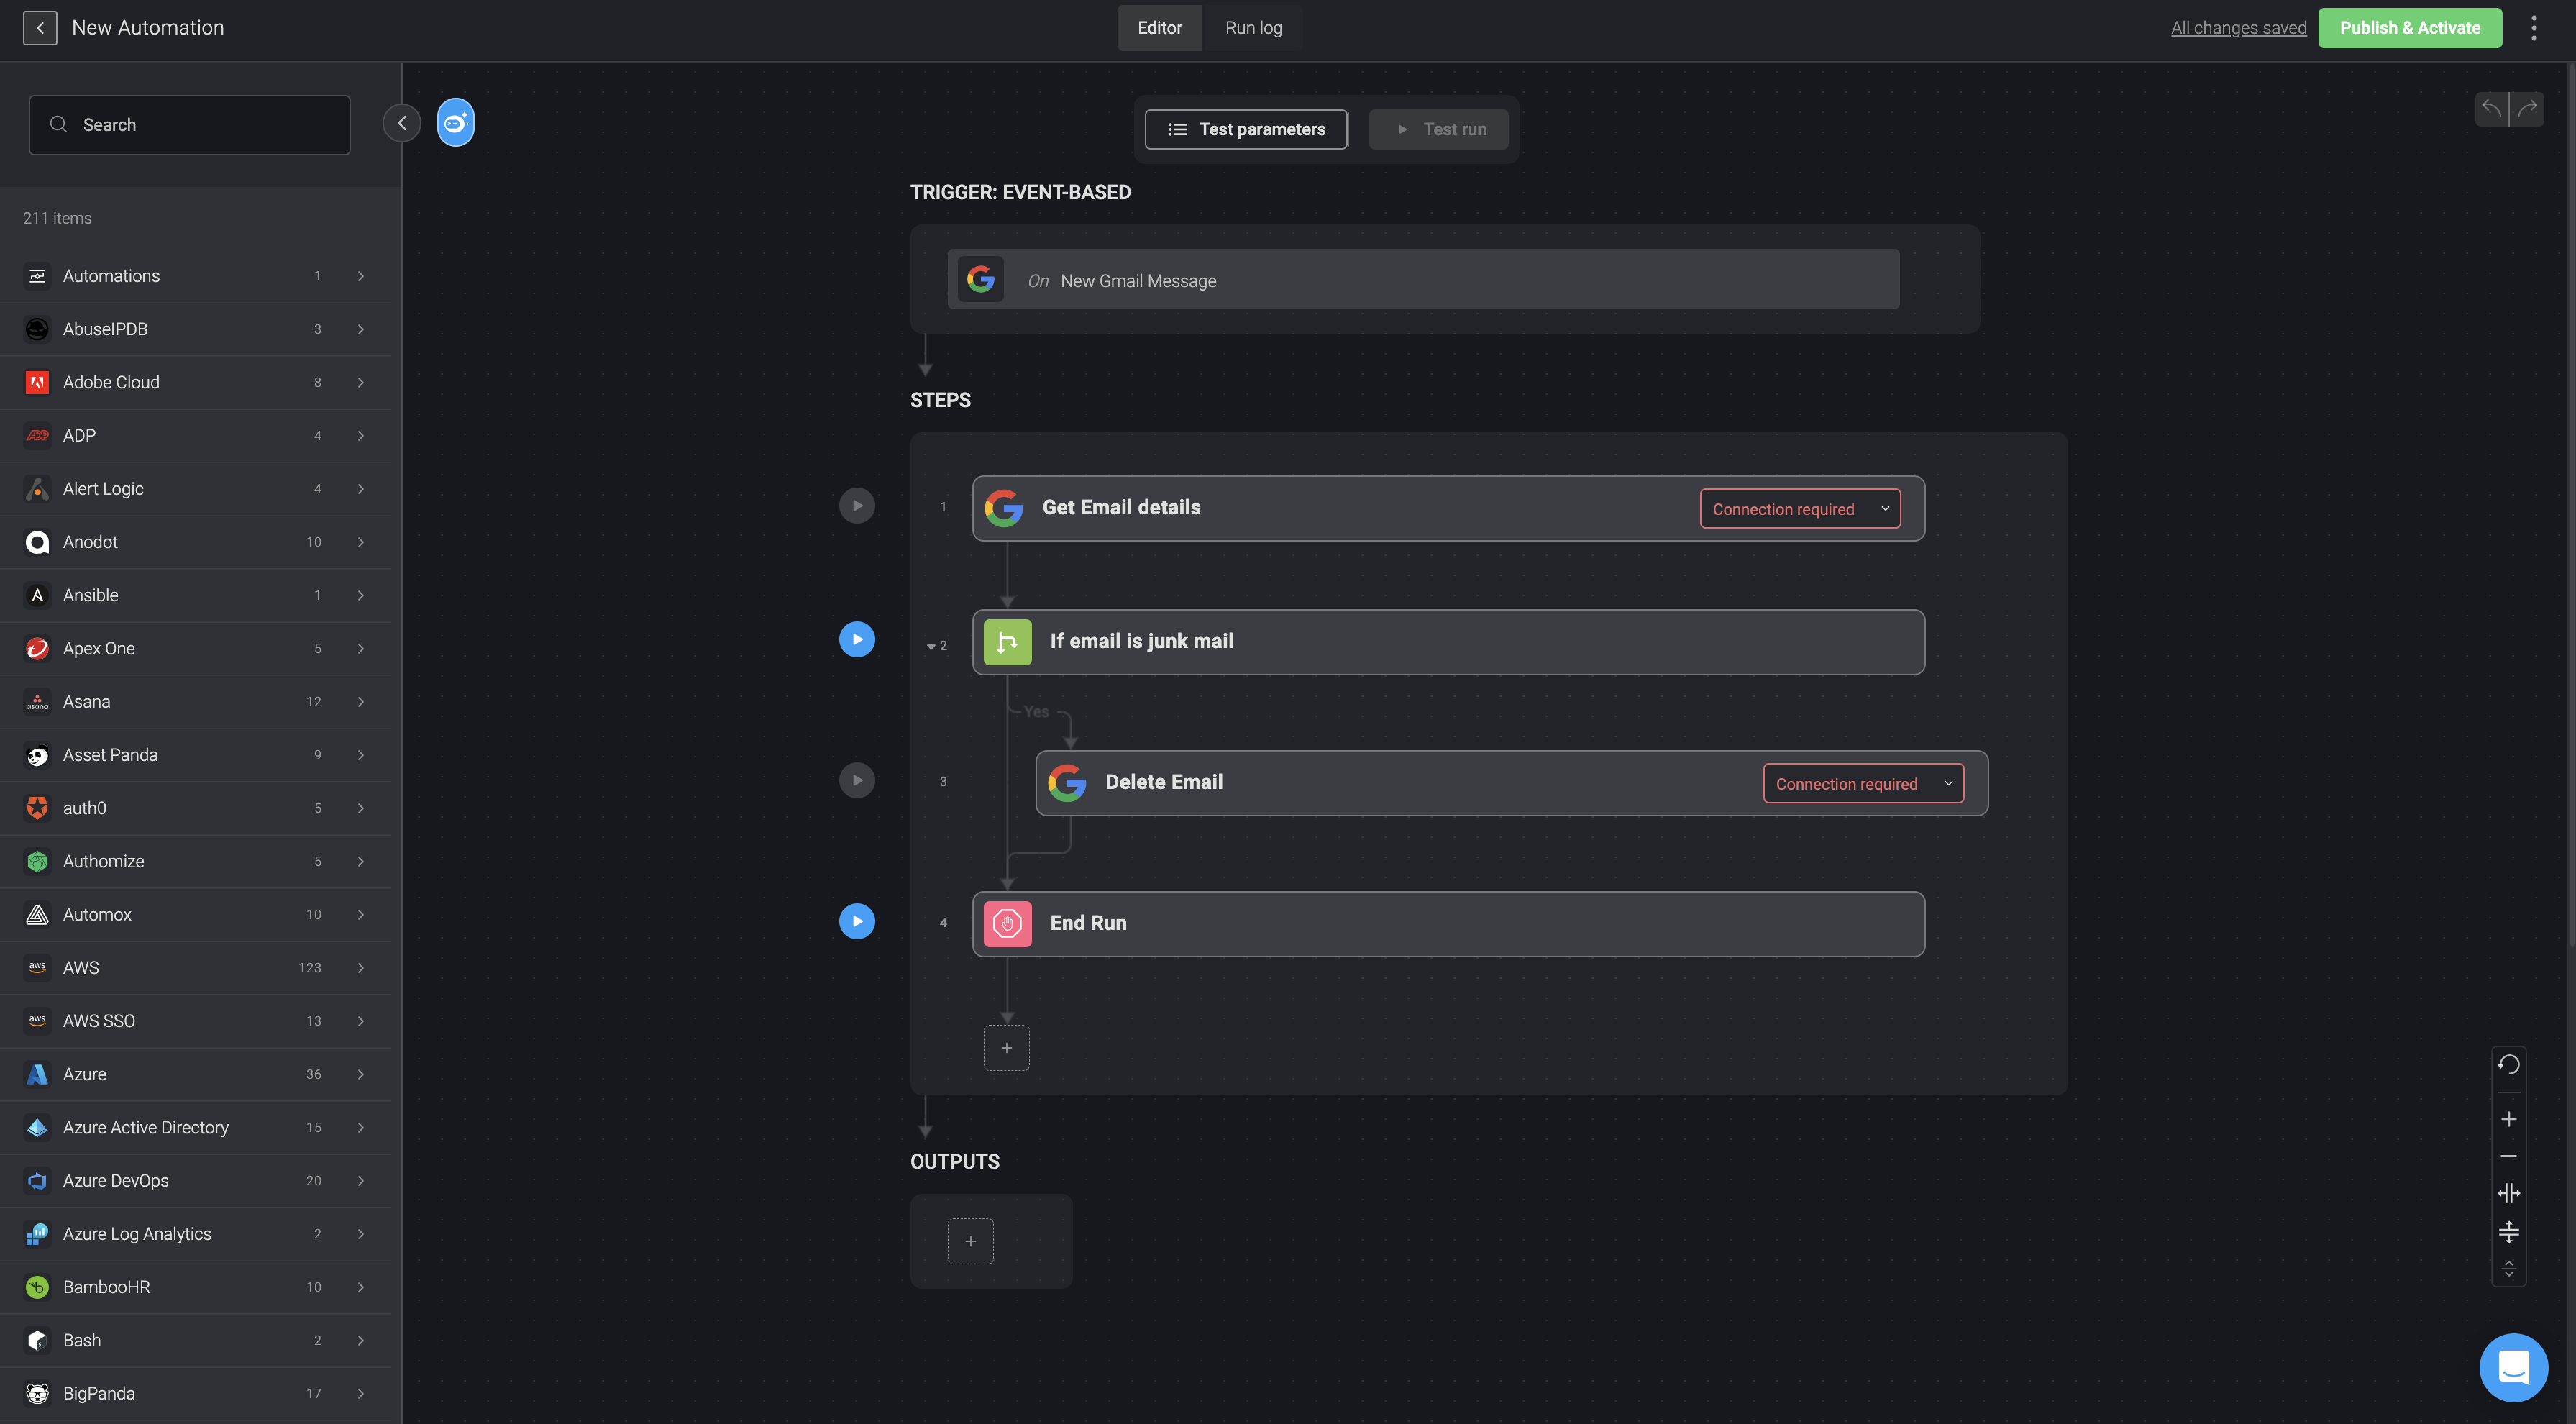
- At this stage, you will be redirected to the automation canvas, where you have the option to execute the automation and save it to your workspace.