Steps
Steps are the building blocks of an Automation. Each Step has a single goal and Steps are arranged in a logical order to complete a workflow. The user selects an Action and adds a connection, if necessary, to the Automation flow on the canvas.
Adding a Step
You can add Steps to your Automation in one of the following ways:
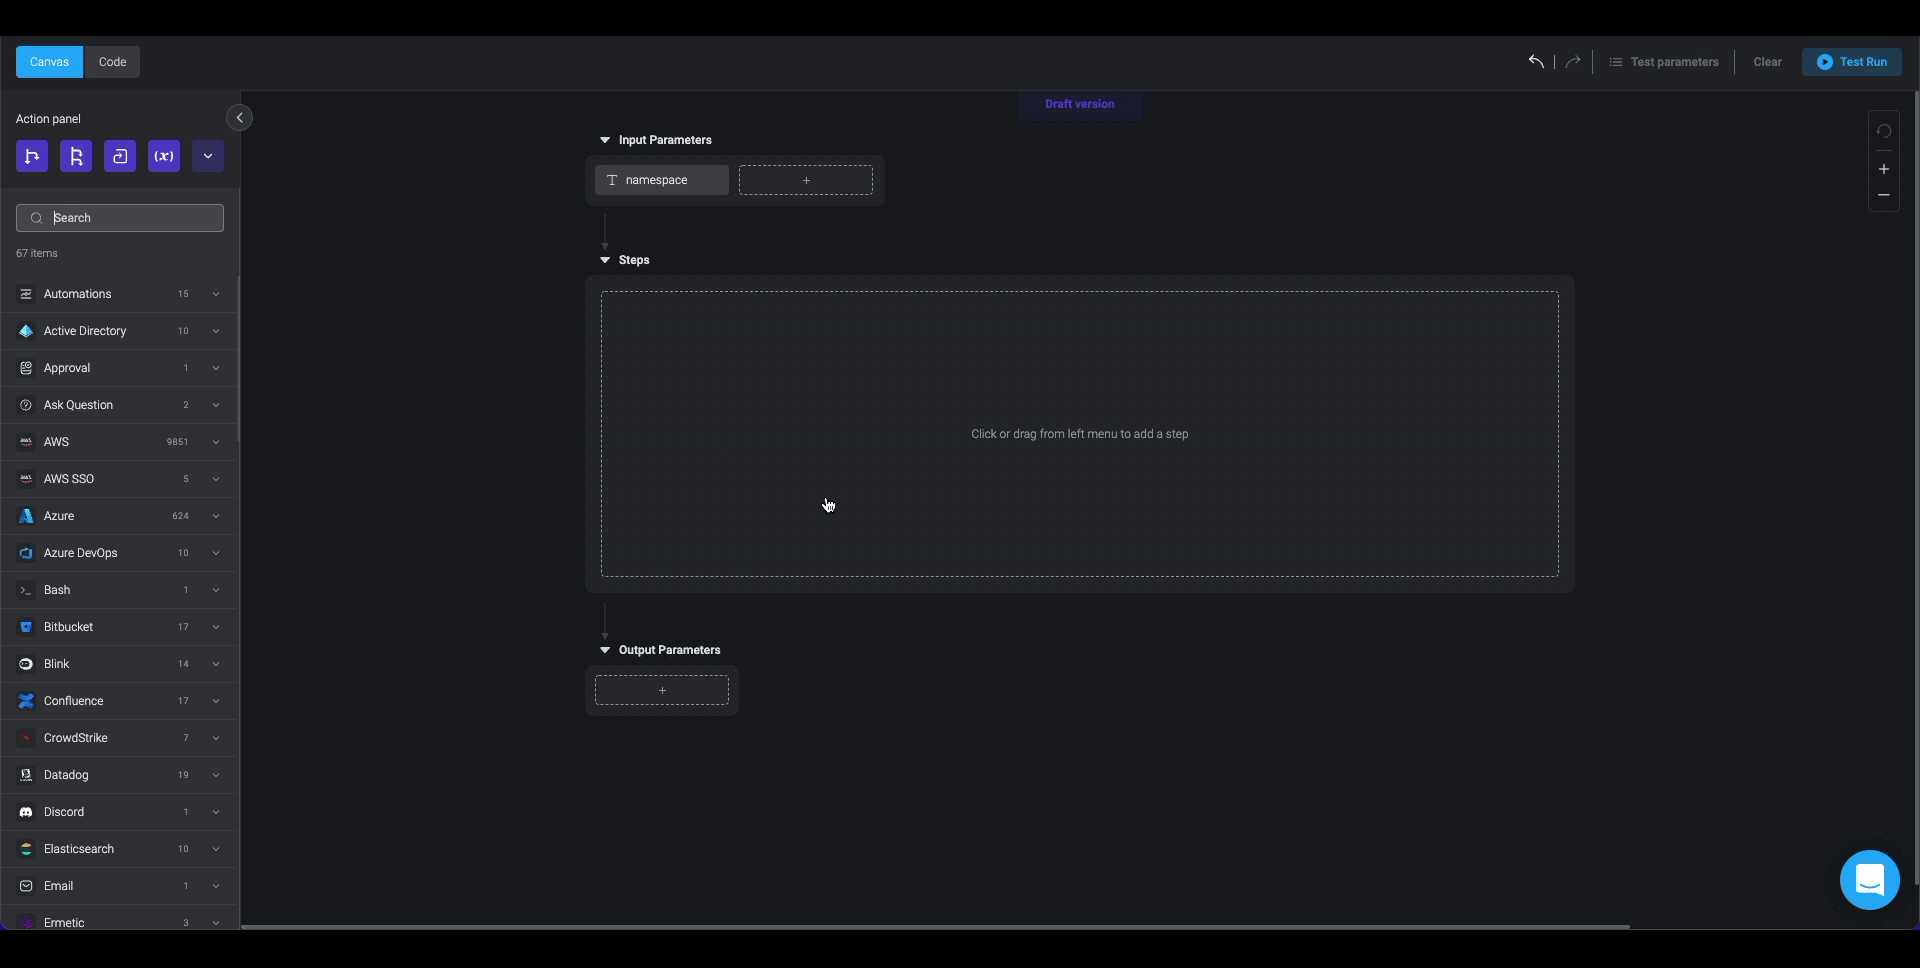
- Drag and drop: To create a Step, drag and drop Actions onto the canvas from the Action panel. At the top of the panel you can see the flow control actions and beneath them is a list of external service providers. To see the available Actions, open a service.
- Inline adding: Click on the box in the middle of the canvas. Select a flow control action, or search for an action in the search bar.
Editing a Step
You can edit an automation from the Automations screen.
- Hover over the automation you want to edit.
- A blue Run button and a grey Edit button will appear.
- If required, you will be prompted to enter input parameters.
- Click Edit.
- You will be redirected to the automation canvas where you can edit the automation as you like.

Renaming a Step
- To change the name of the Step, double click Action # and enter a name.

Defining Step inputs
Step inputs can be mandatory or optional.
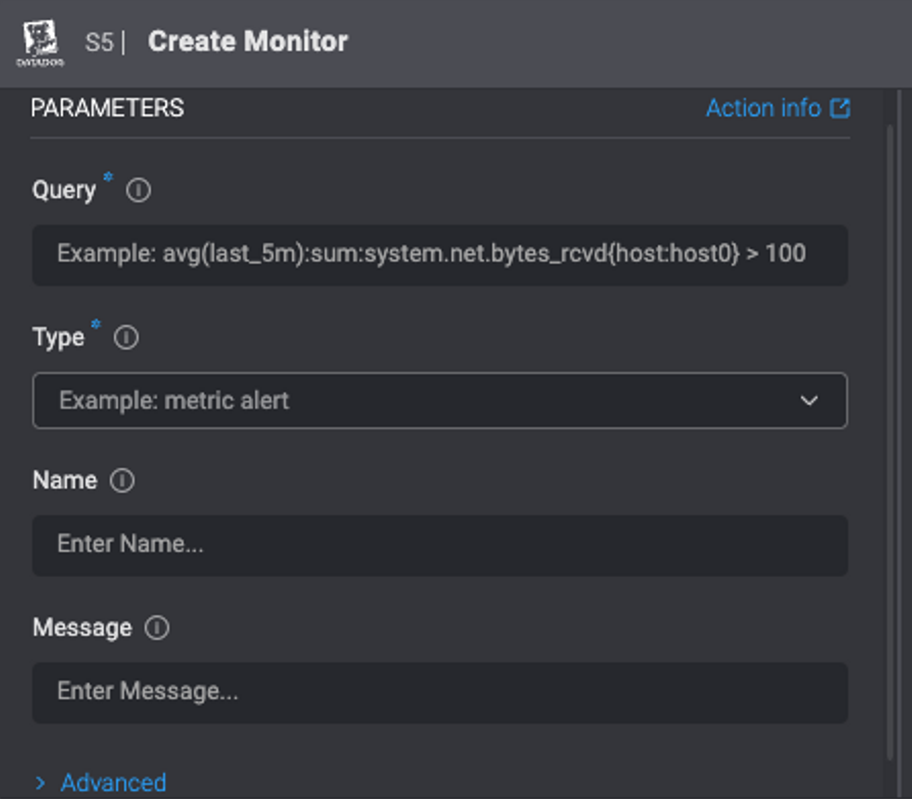
Mandatory inputs are displayed first in the Parameters section of the Step.
Optional inputs are displayed by clicking on Advanced at the bottom of the Parameters section of the Step.
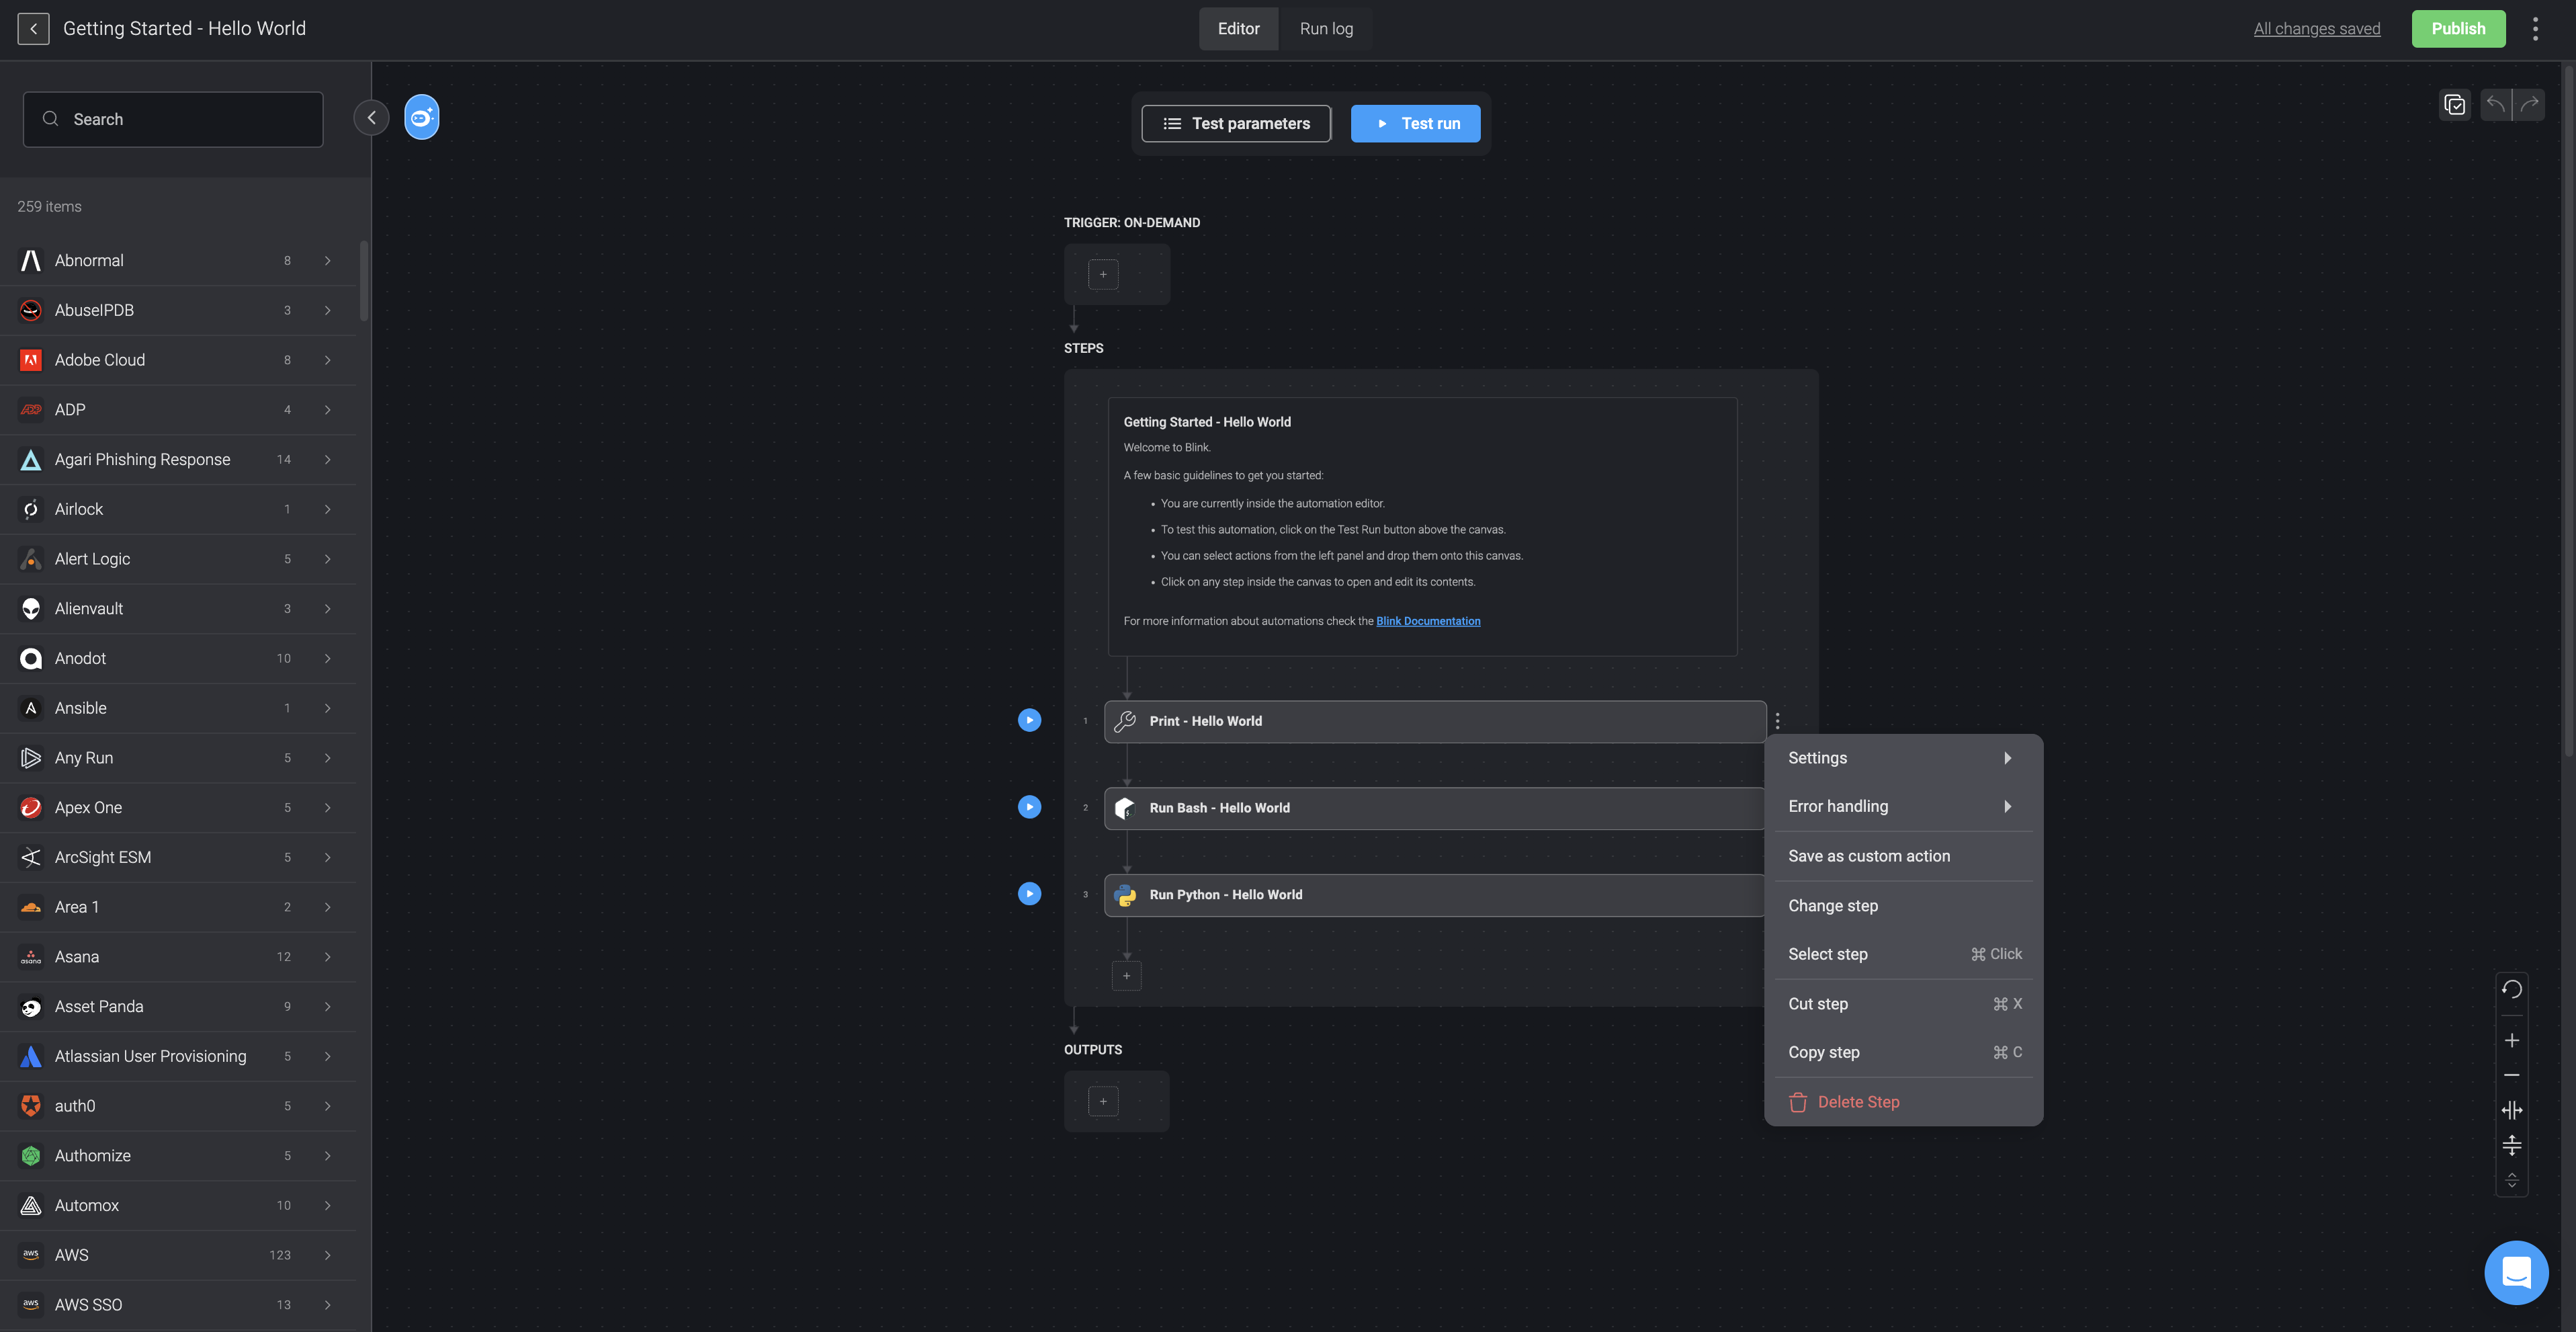
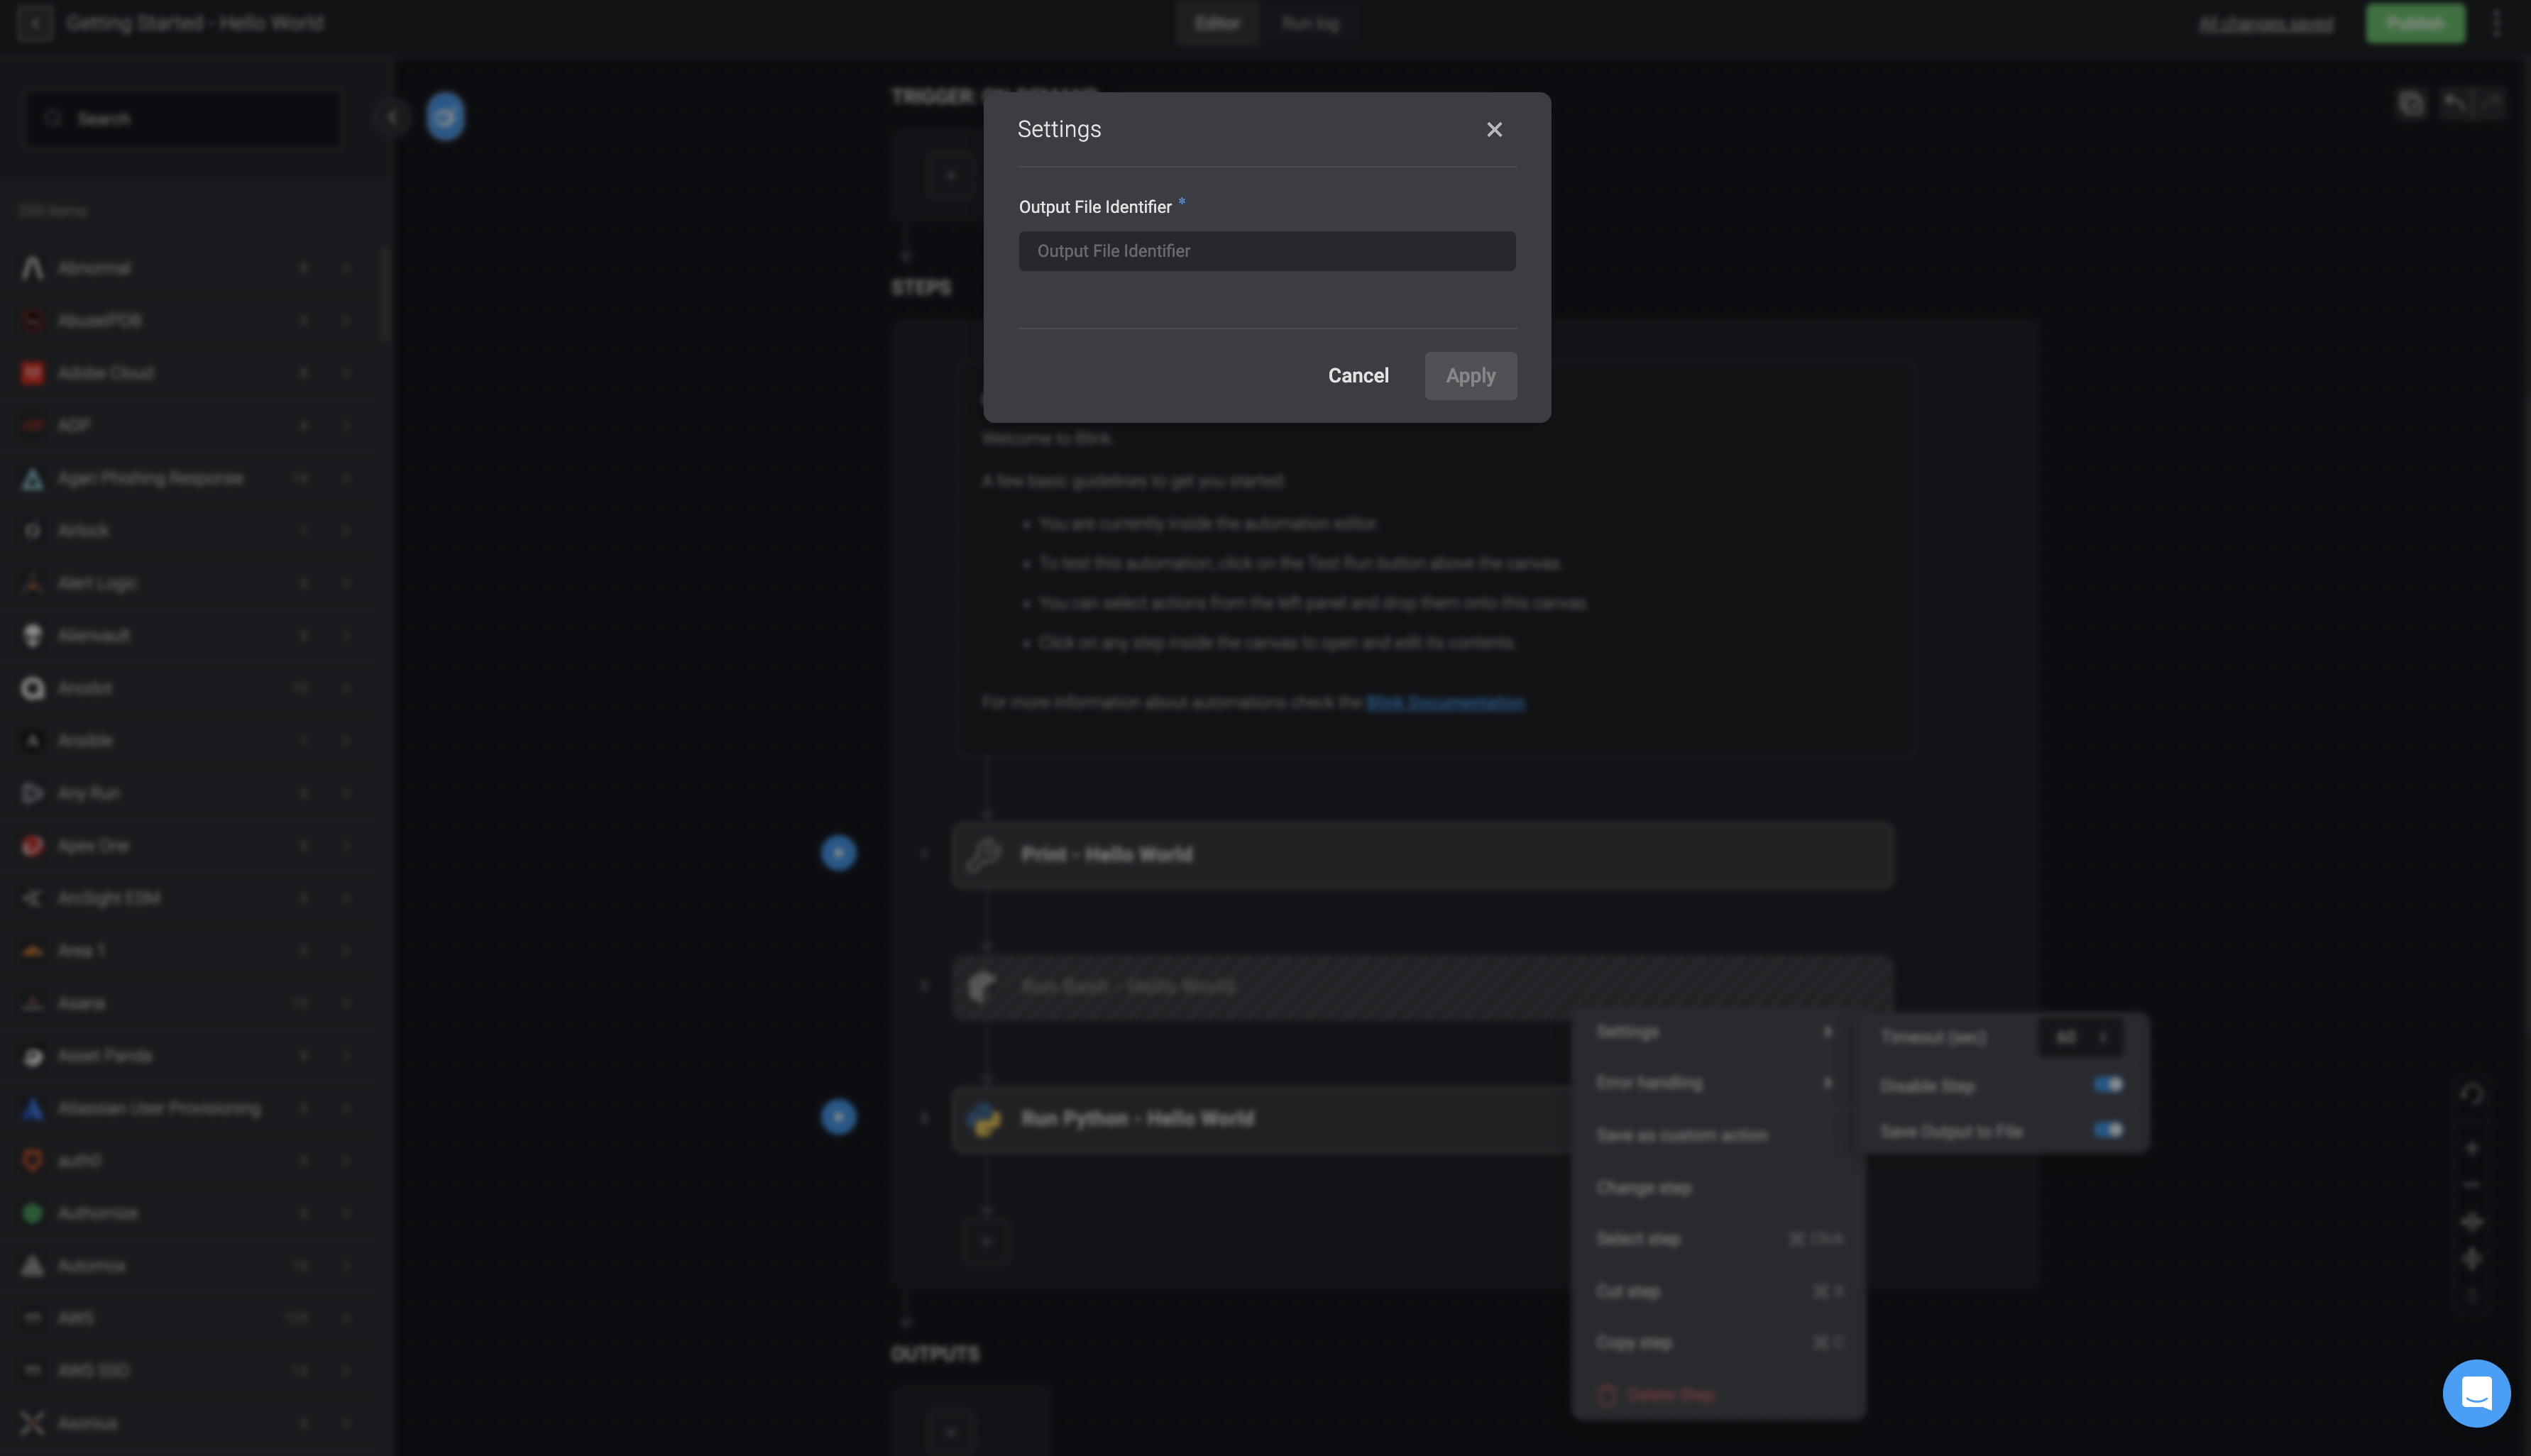
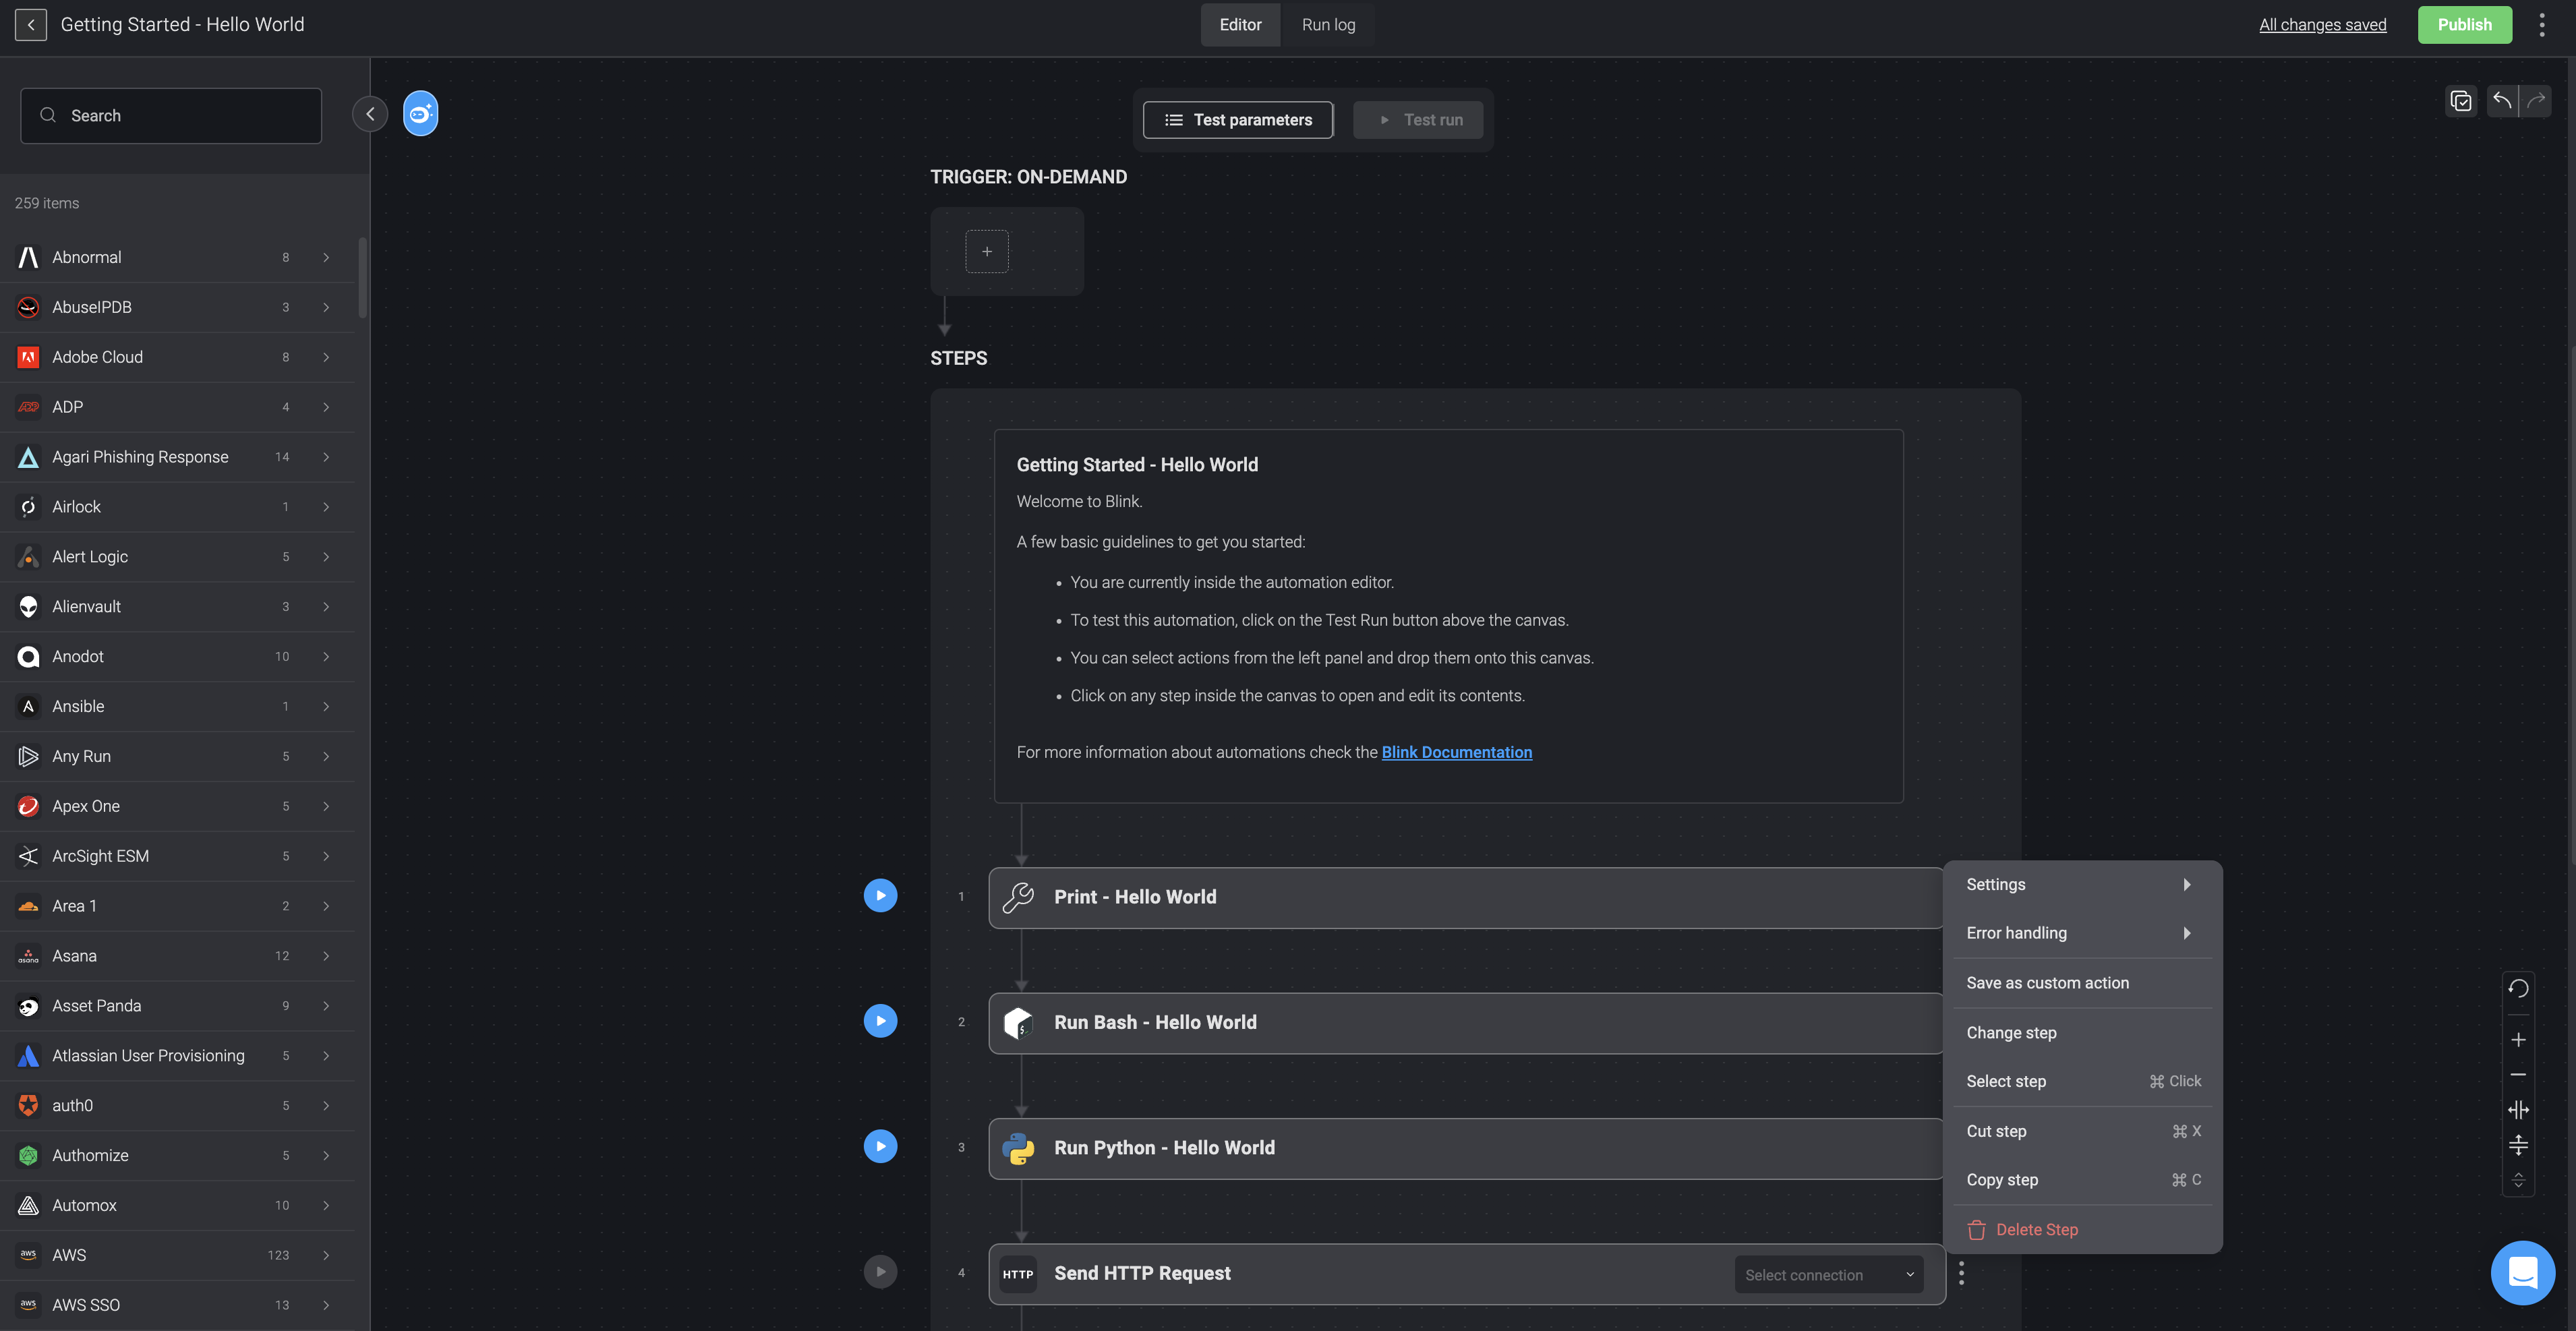
Configuring your Step settings
You can delete, change the Step or configure the settings in your Step.
- On the right of your Step, click the
 icon.
icon.

- Select one of the following options:
- Settings- Disable Step (Skips the Step when running the Automation) or Save output to file (Allows you to save the output to a file and use the file in subsequent steps).
- Error Handling- Continue on Error- executes the Automation even if the Step fails.
- Change Step: Select a different action for this step.
- Select Step : Selects one or multiple steps.
- Cut Step: Cuts the selected step from the automated workflow.
- Copy Step: Copies the selected step.
- Save as Custom Action: Saves the step as a custom action.
- Delete: Deletes the Step.
- To activate any of the options in Settings, simply toggle the button, as shown in the following example below:
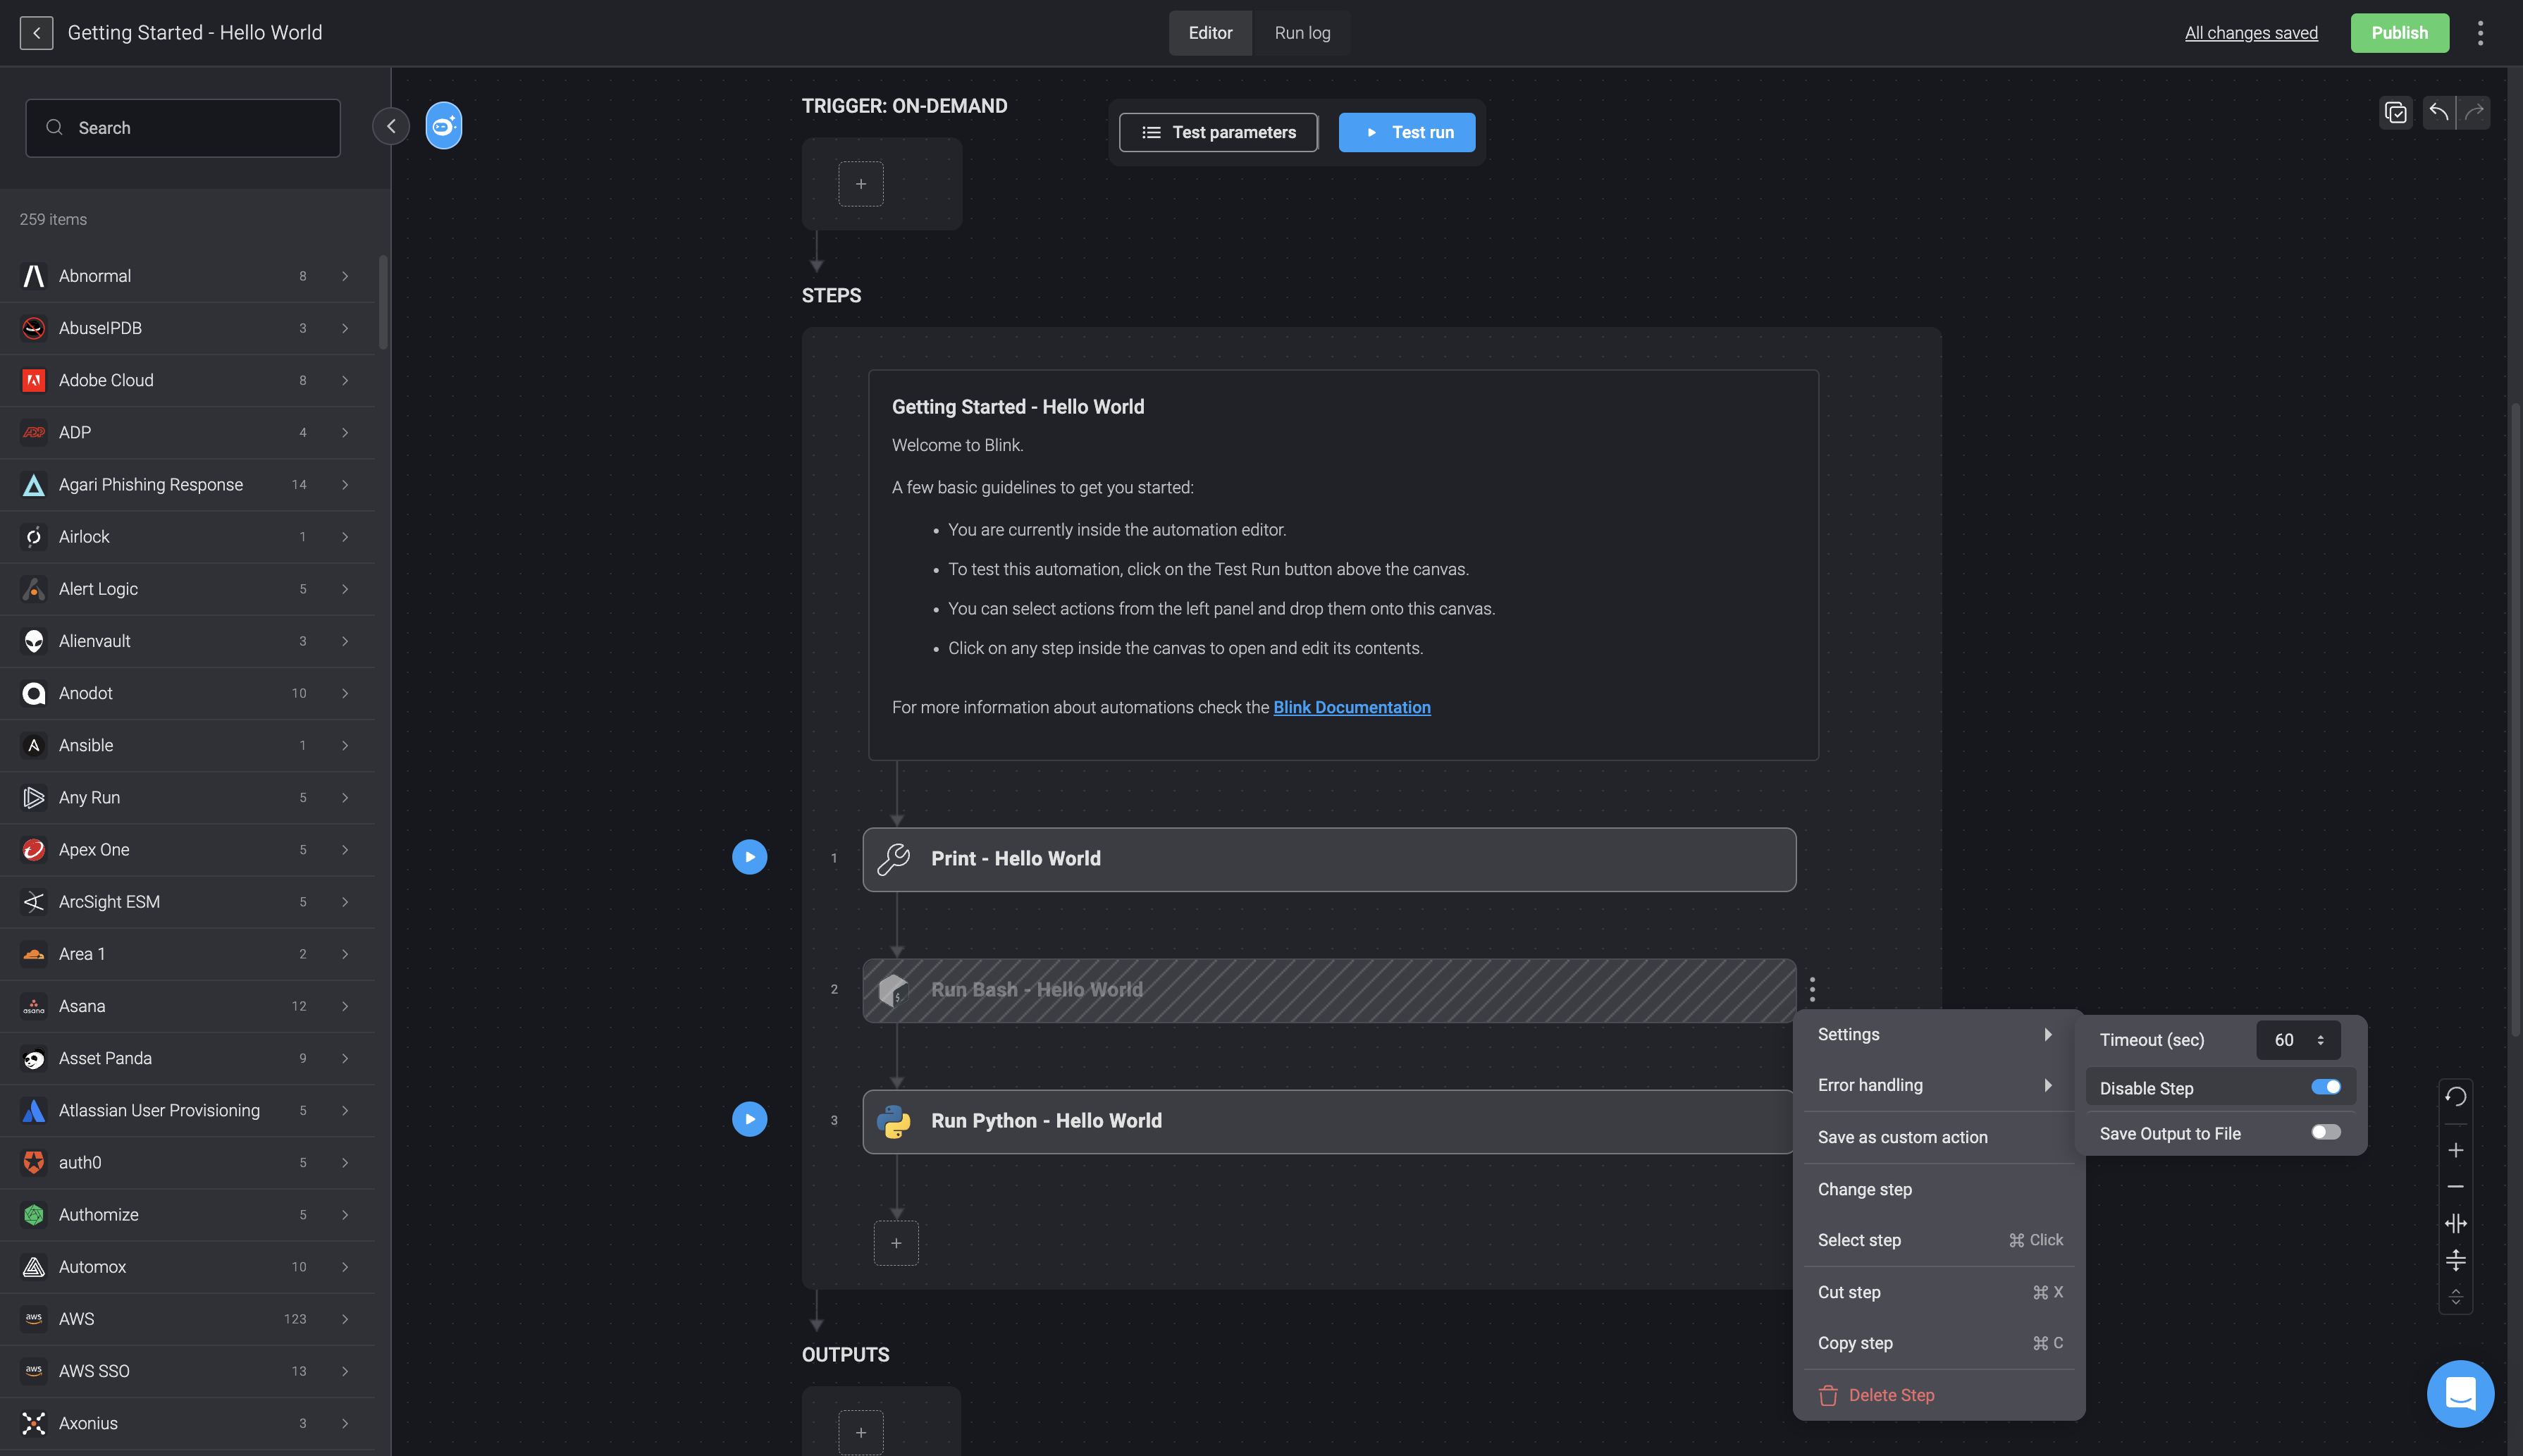
- If you select the Save output to file option, you will be required to fill out an additional step by entering Output File Identifier and then clicking apply.
Configurable Retry at Step Level
Occasional failures in the target system can lead to the failure of certain actions, causing the entire automation process to fail. However, this issue can be effectively addressed by implementing the configurable retry mechanism on individual steps, ensuring a smoother operation even when errors occur.
The Retry option is only available on HTTP actions.
- On the right of your Step, click the icon.
- Choose the error handling option, then simply toggle the Retry button.

- Proceed by filling in the following parameters:
| Parameter | Description |
|---|---|
| Number of retries | The number of retries. The minimum number of retries is 1 and the maximum number of retries is 5. The default is set as 1. |
| Interval- Exponential | The duration between each retry attempt. The Exponential Interval uses default logic where the exponential backoff starts at 200ms and multiplies by 2 each iteration. |
| Interval-Constant: Time between retries(in ms) | The duration in milliseconds between each retry attempt which is entered manually. |
| Retry on Status | The error codes that will trigger retries. |
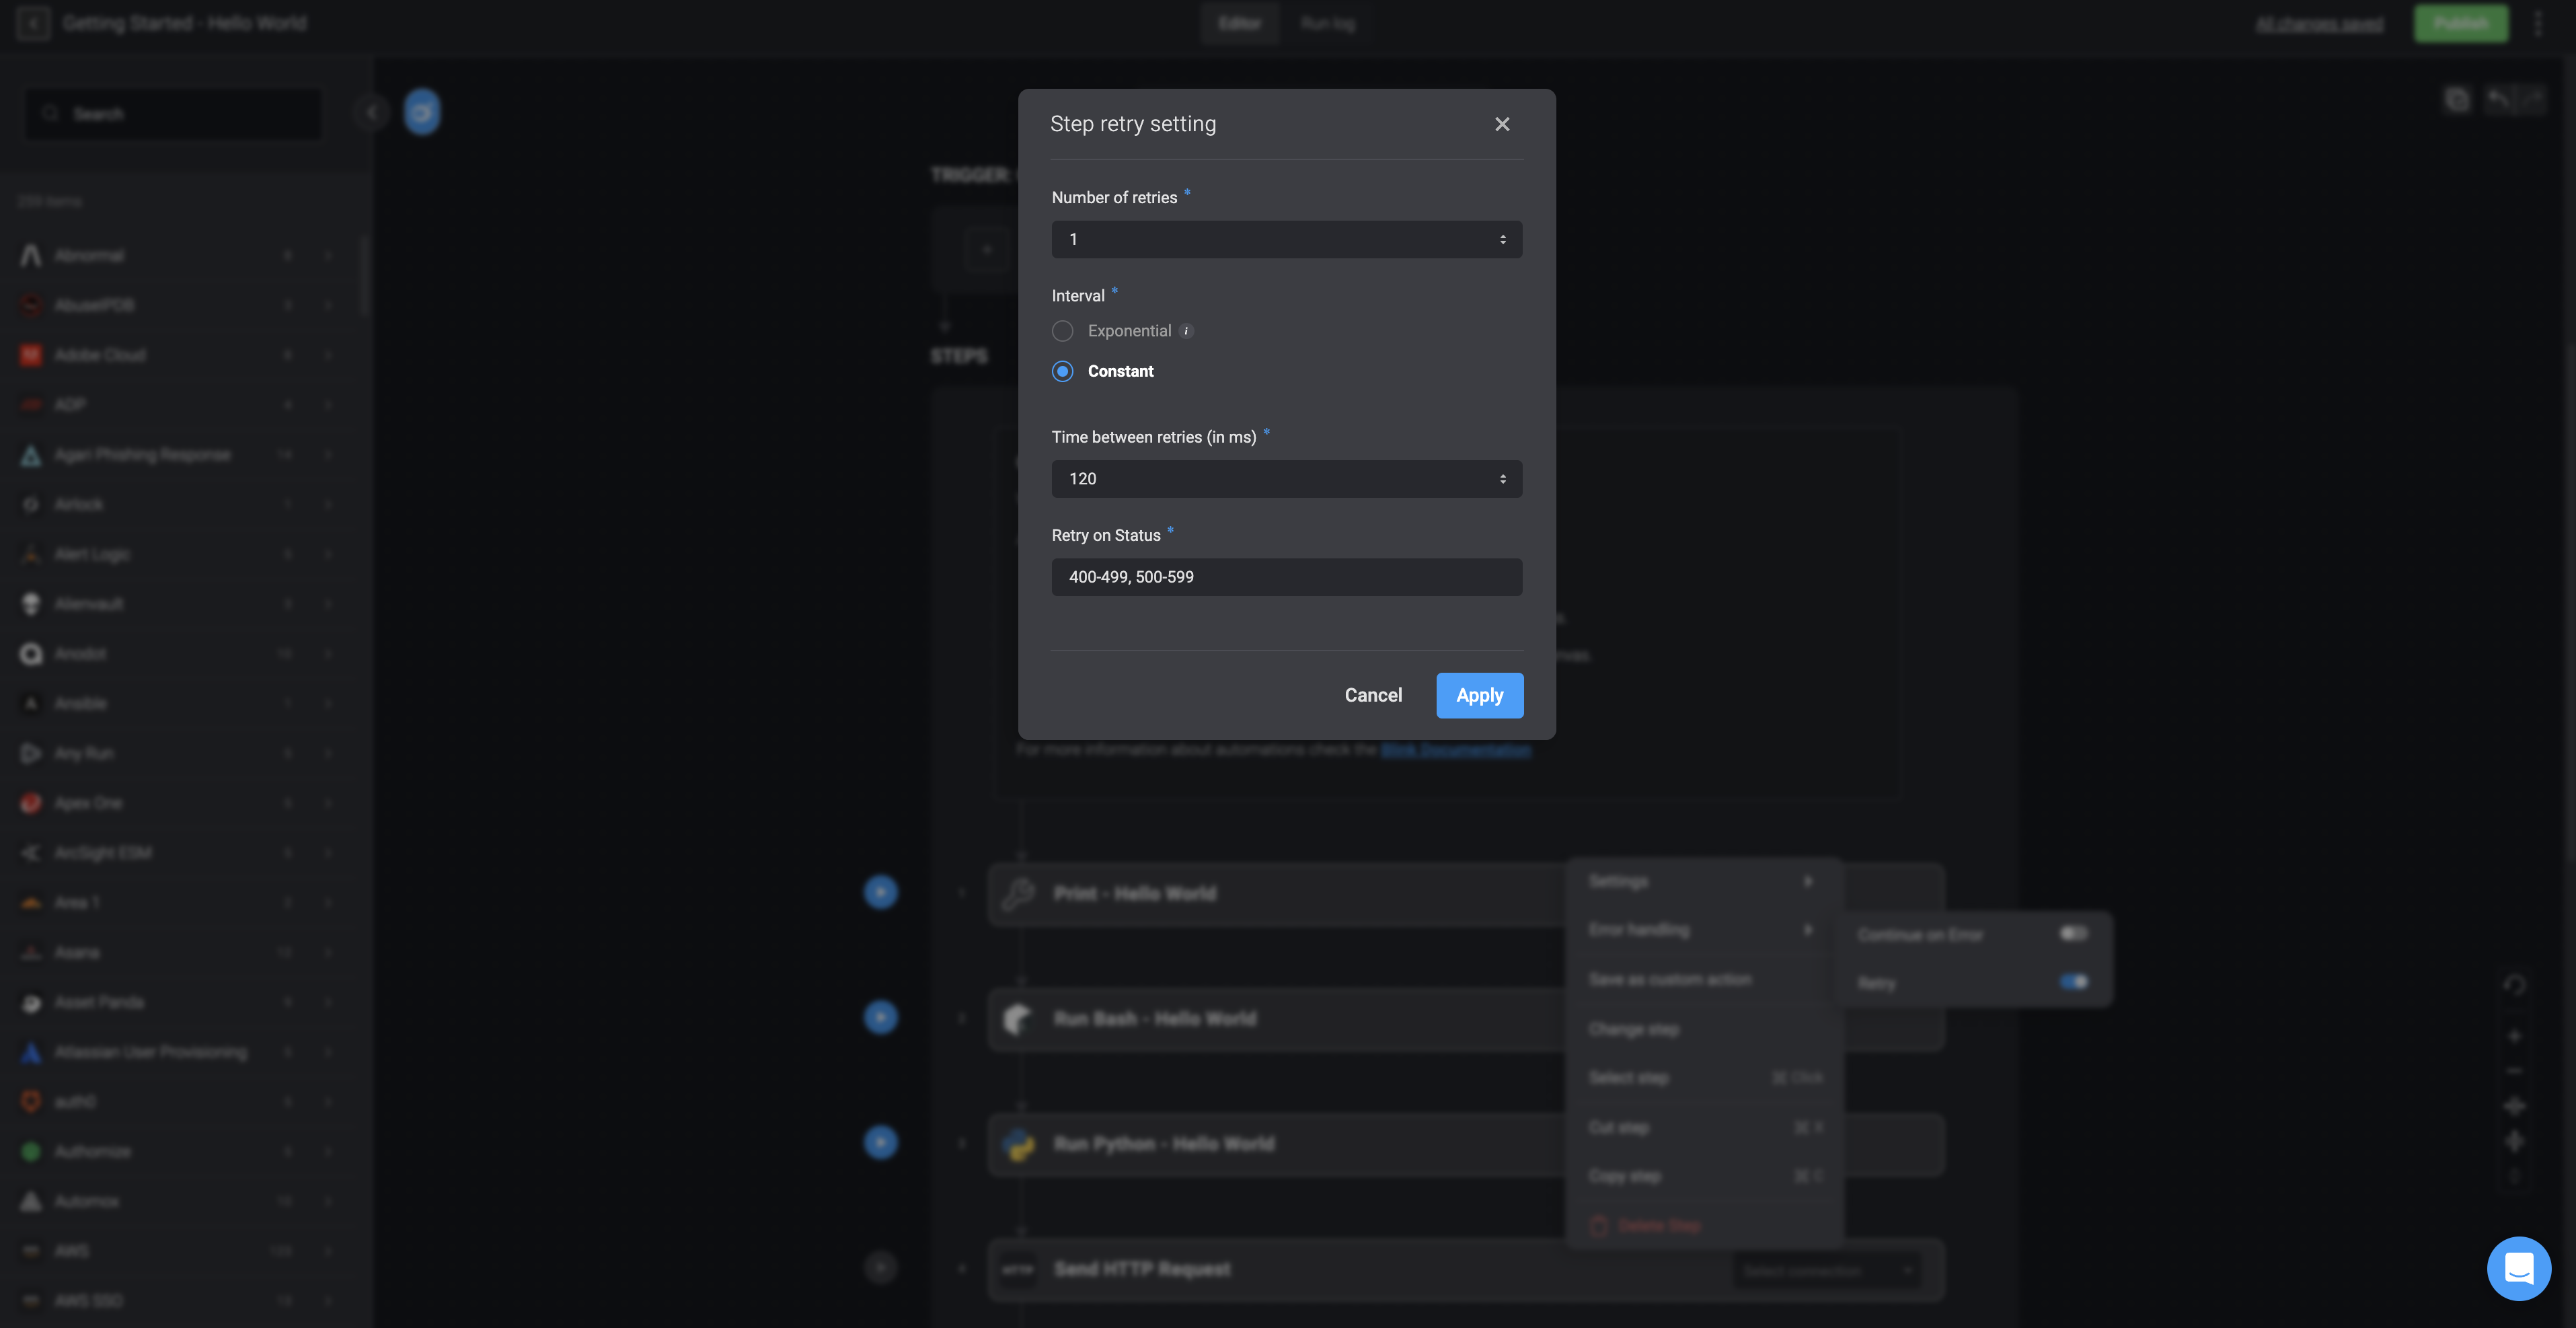
- Then select the apply button.
Multiselect Step and Bulk Actions
The Multiselect Step and Bulk Actions feature allows you to select multiple steps at once in the automation editor and preform bulk actions on the selected step such as delete, copy and cut as well as dragging the selected steps to a new position.
Enabling the Multi-selection Step Mode
Initiating the Multi-selection Step Mode can be done in a few ways:
Selecting the checkbox icon on the top right corner of the canvas.
Command/control + clicking a step
Right-click and select the Select step from the step contextual menu.
![]()
- Checkboxes will appear next the automation steps replacing the run step buttons.
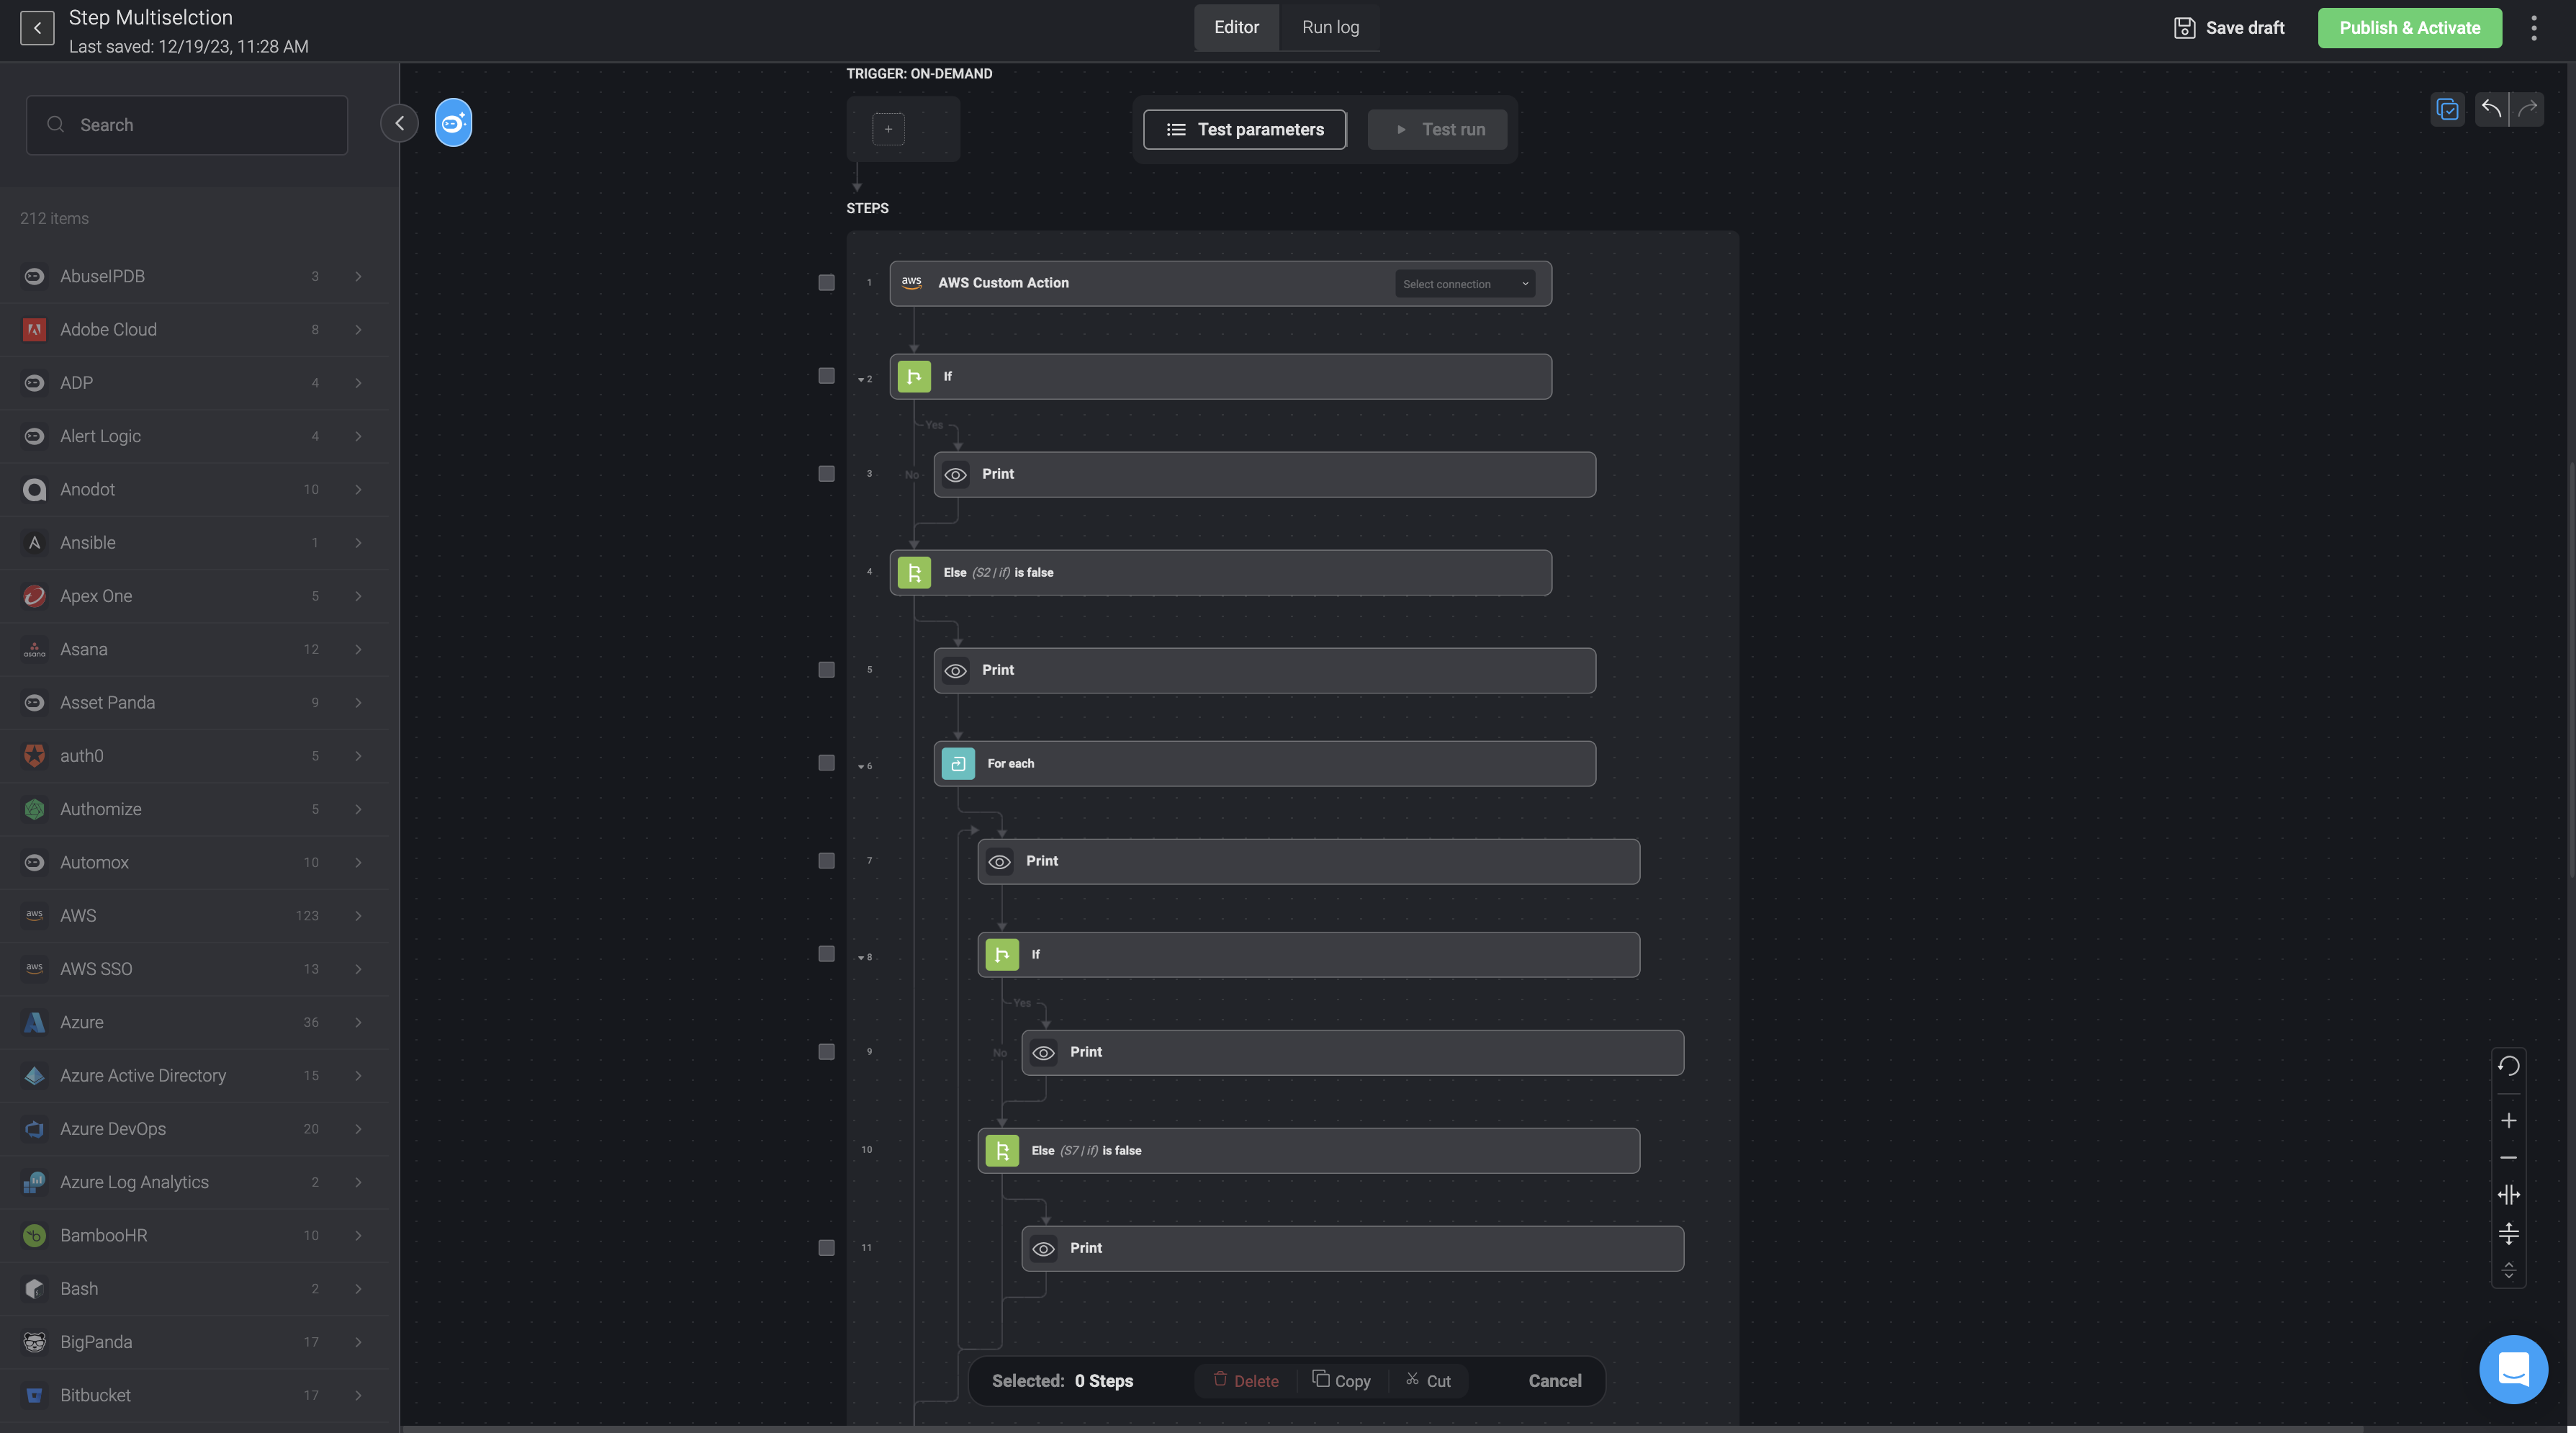
- Select the steps by checking the box. The selected steps will be highlighted in blue for a clear selected indication. You can also use Shift and click on the mouse to select consecutive steps.
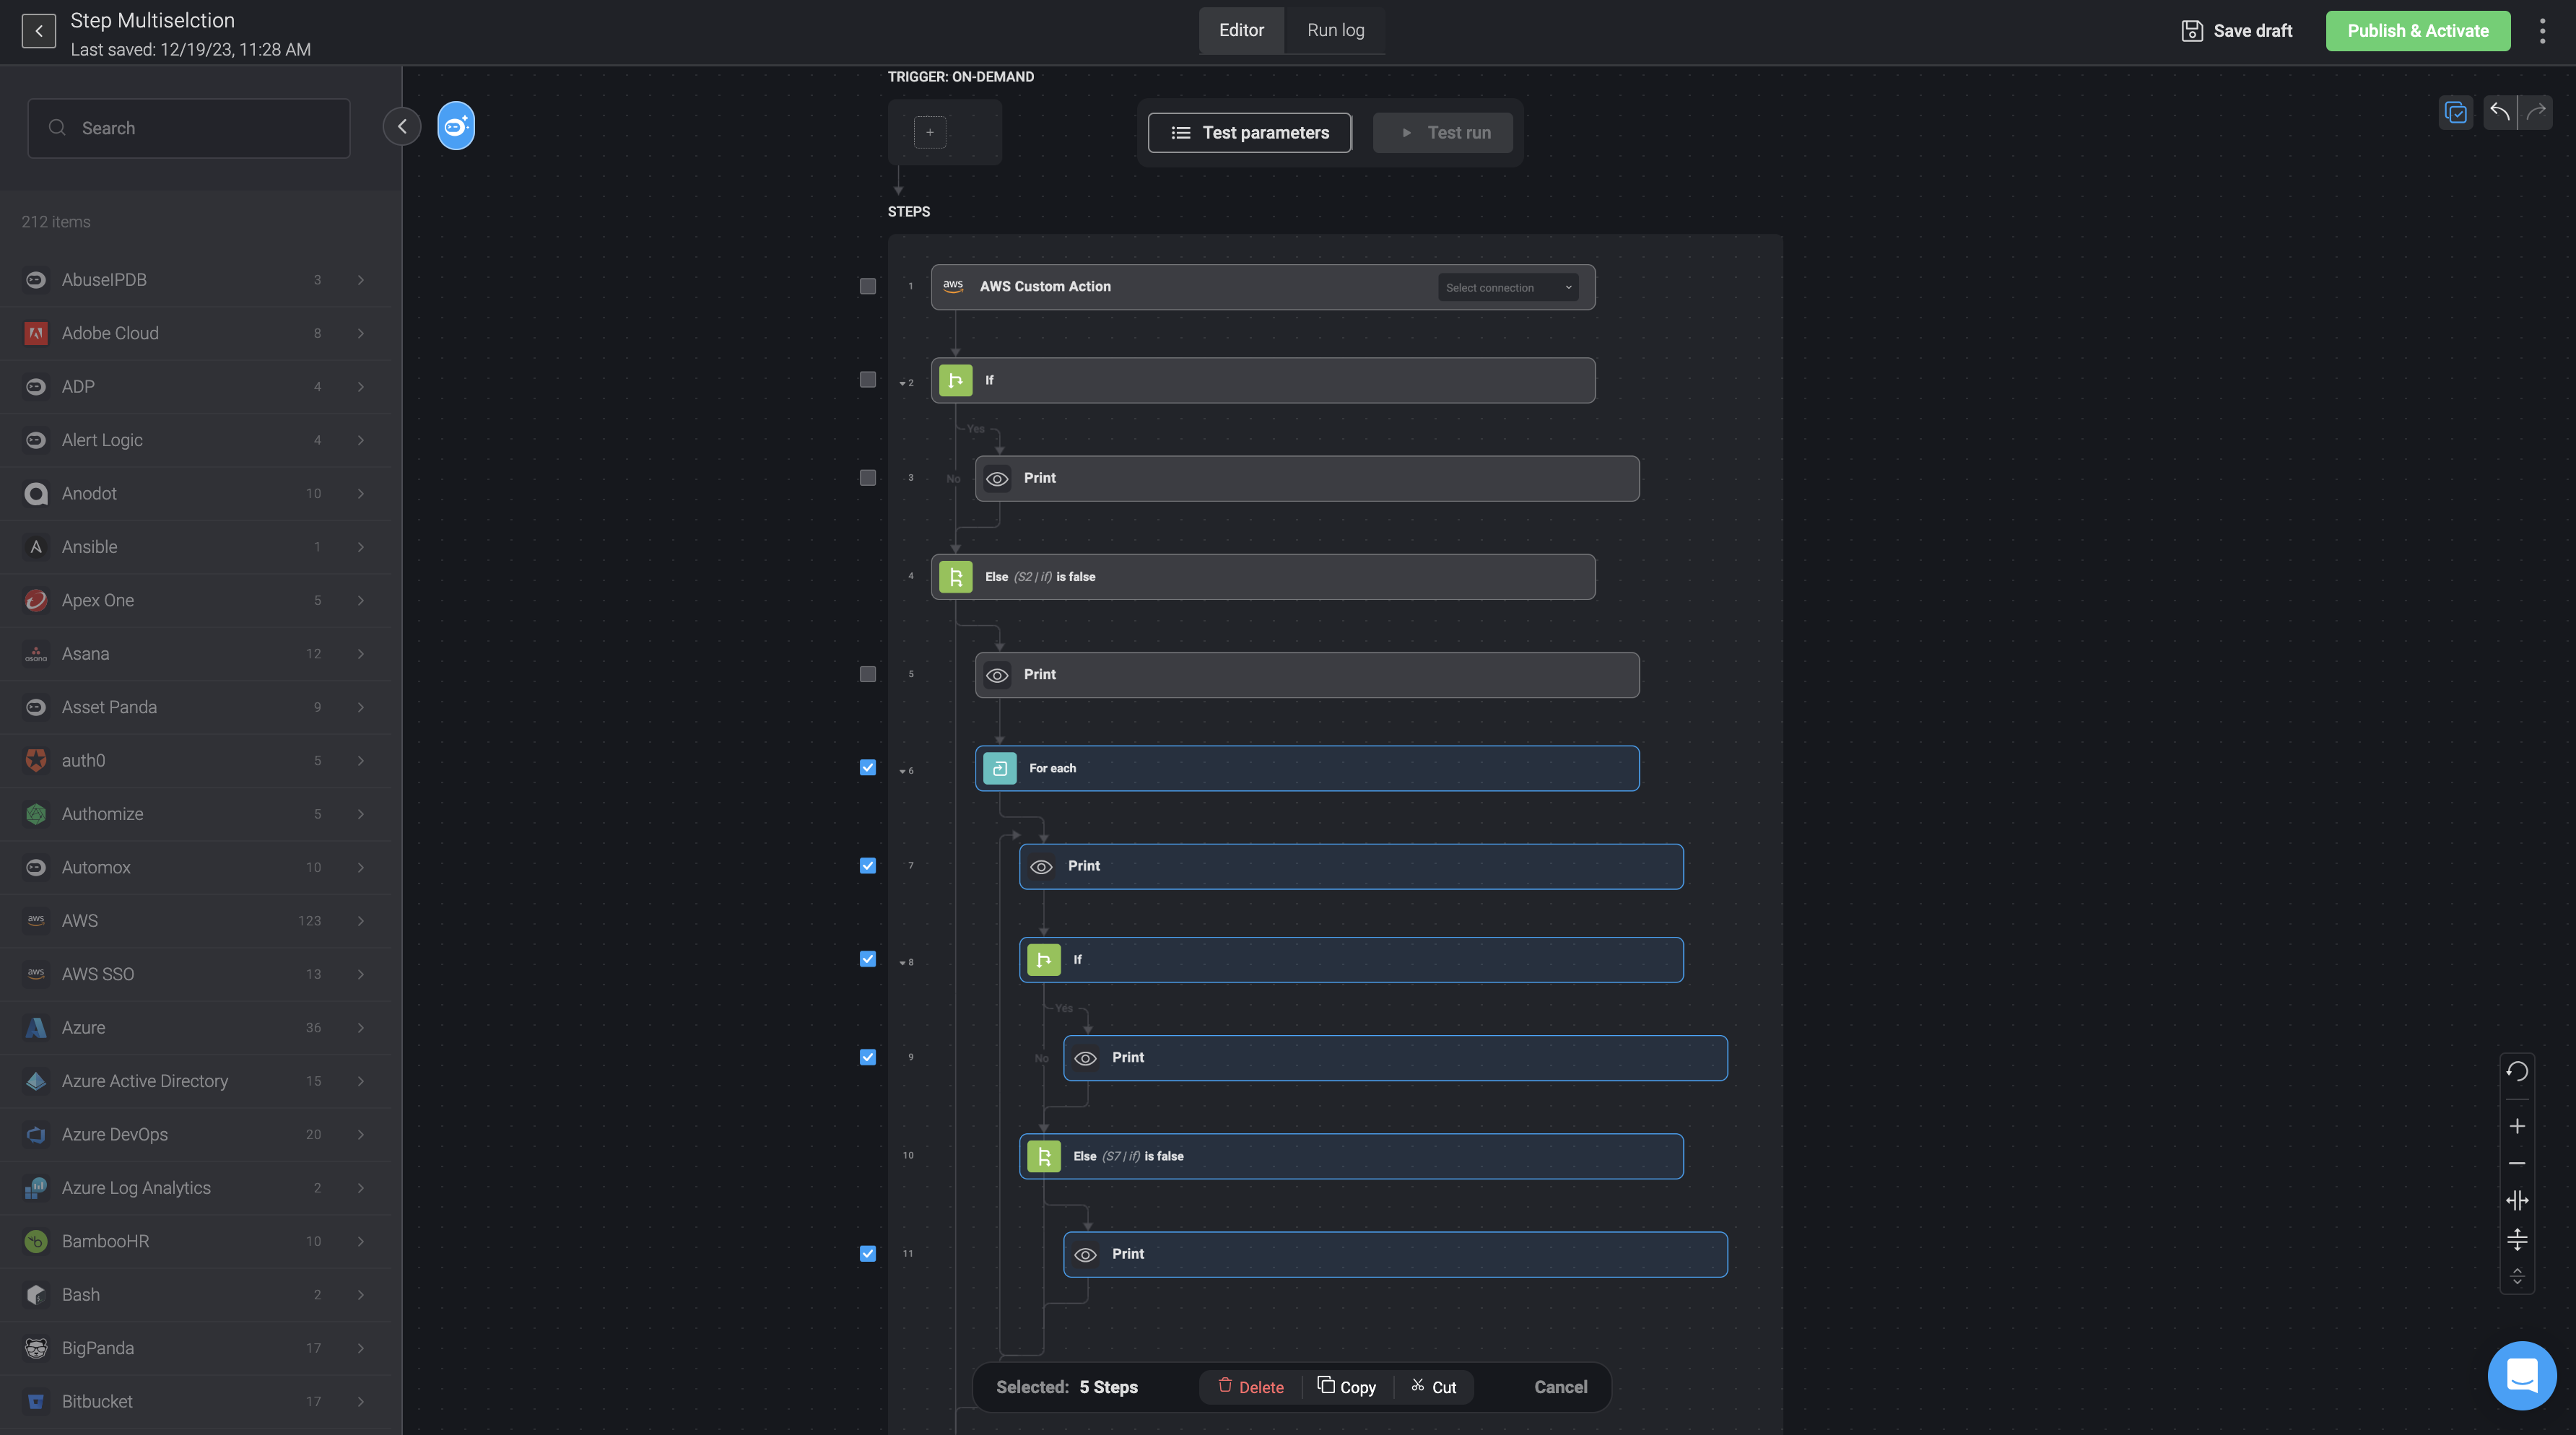
- During the selection mode, a floating toolbar will appear towards the bottom of the screen, displaying the delete, copy, and cut bulk actions, the number of selected steps and a cancel button which will revert to the normal mode.
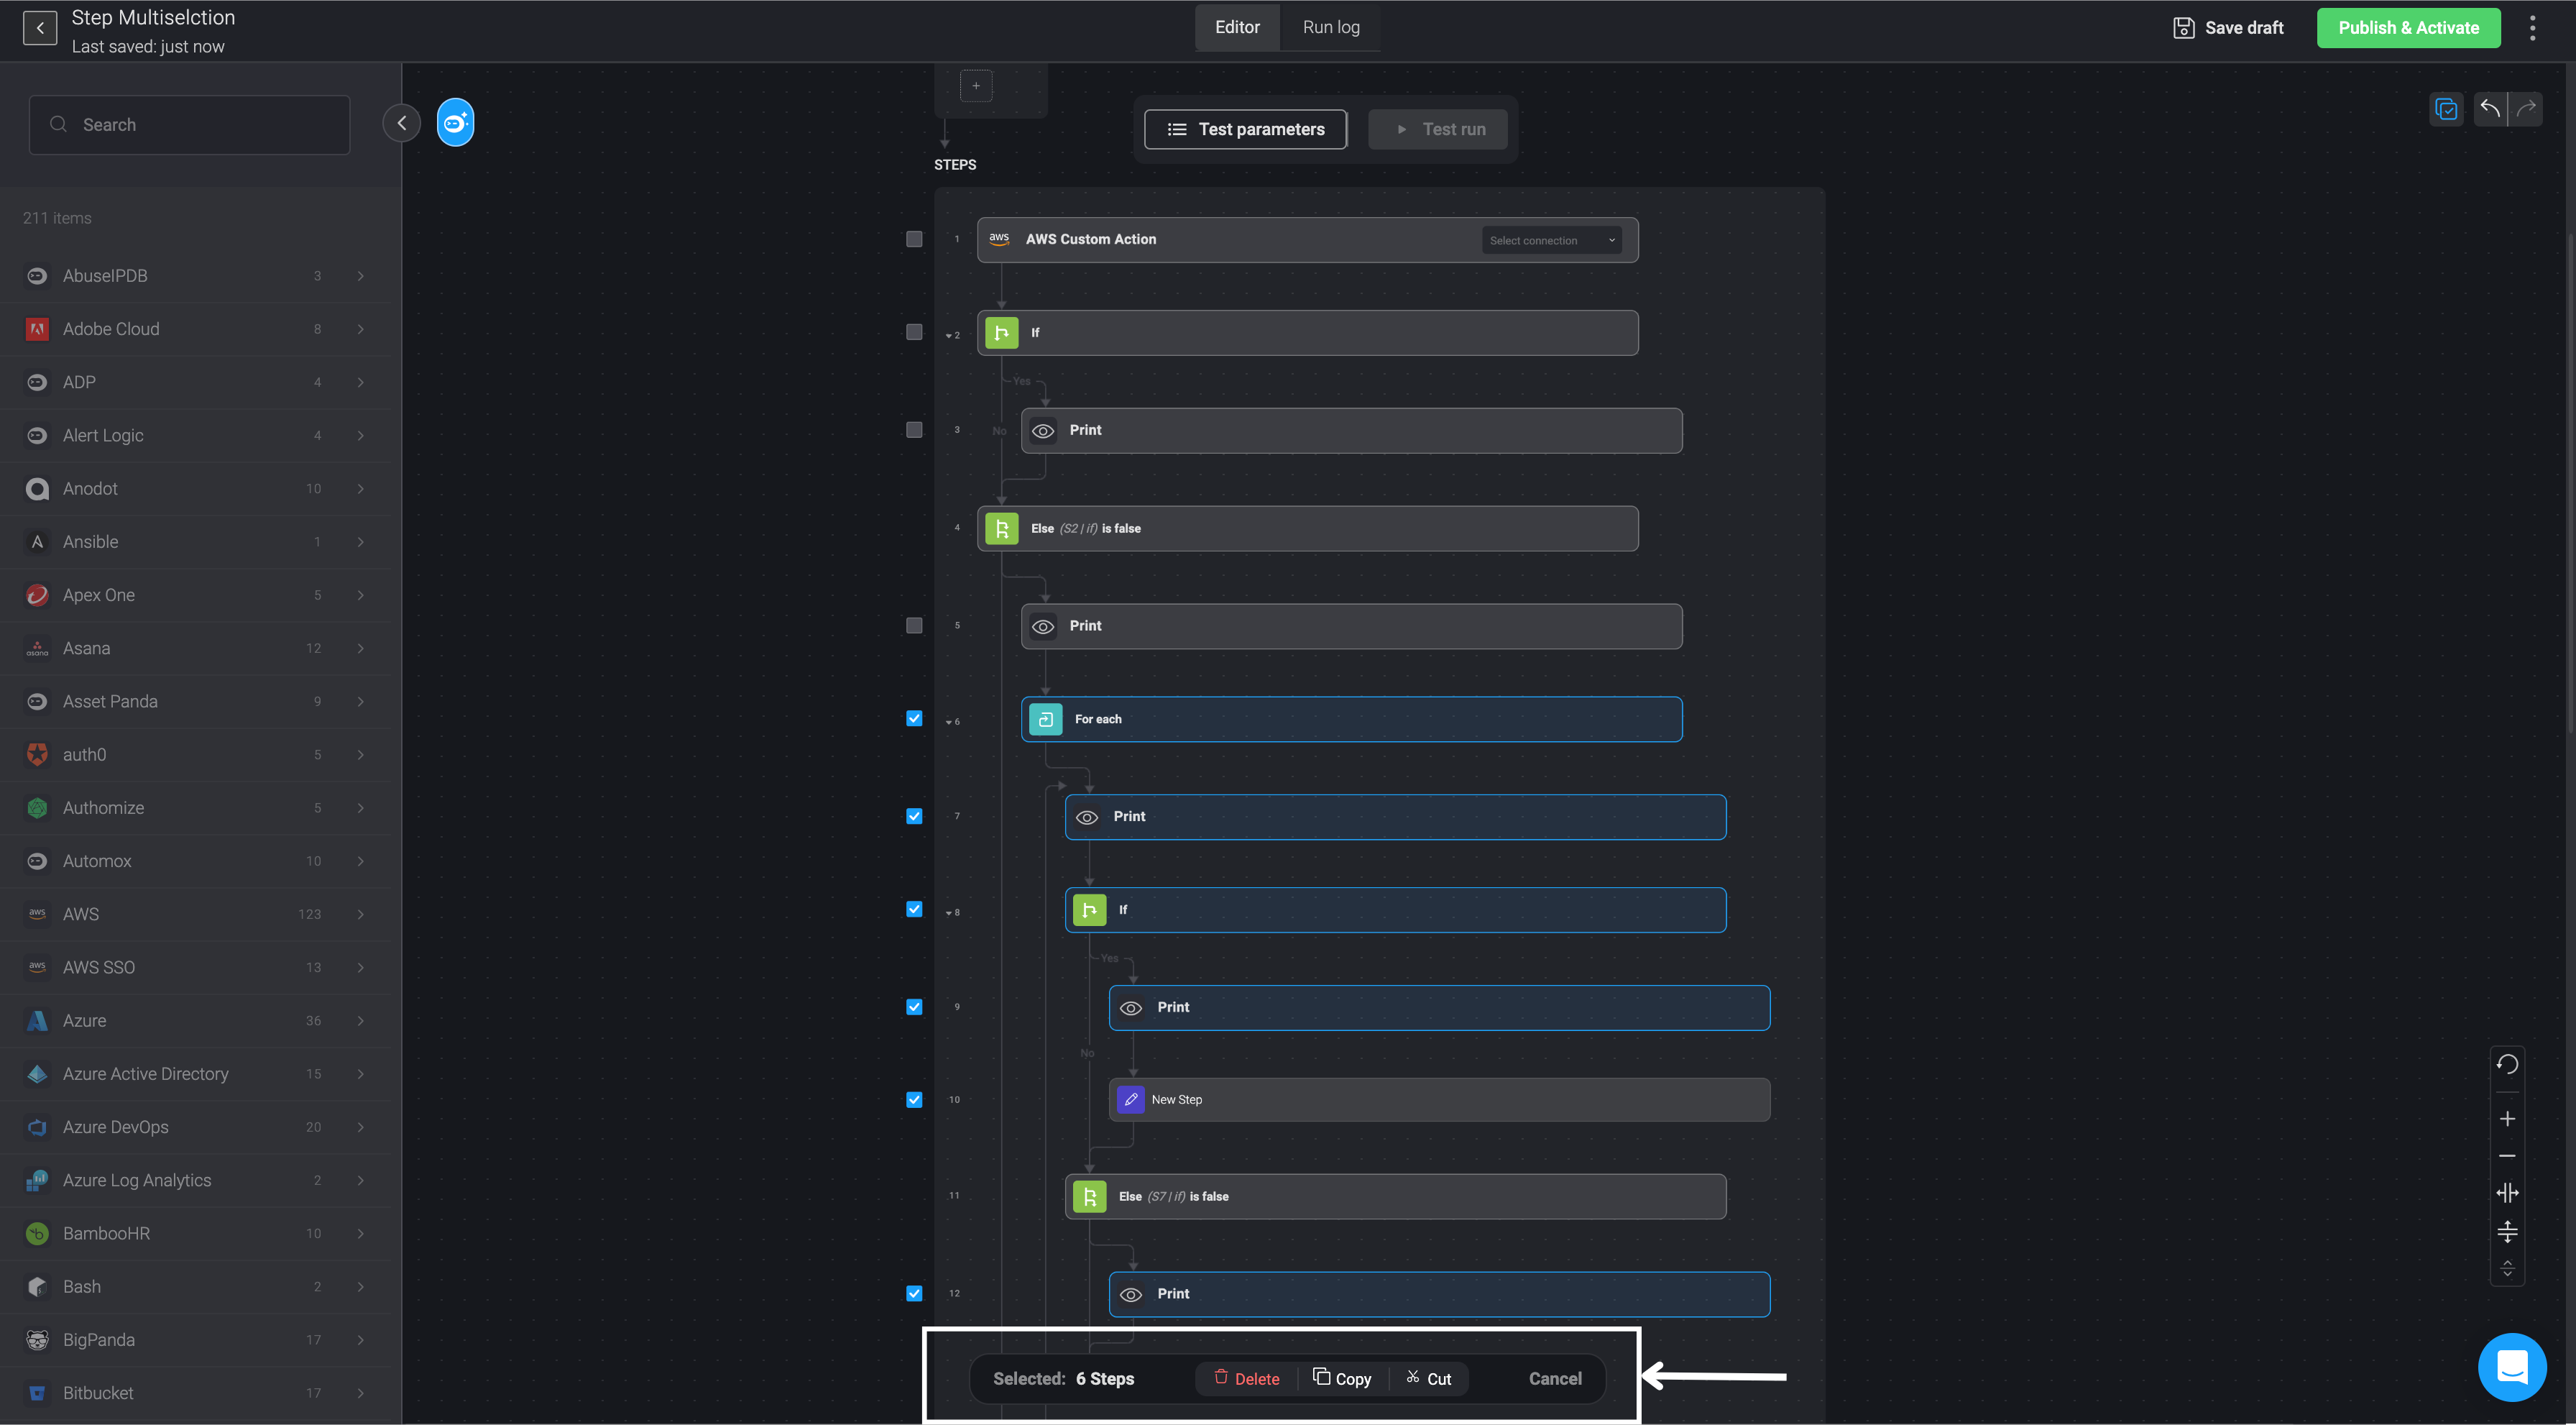
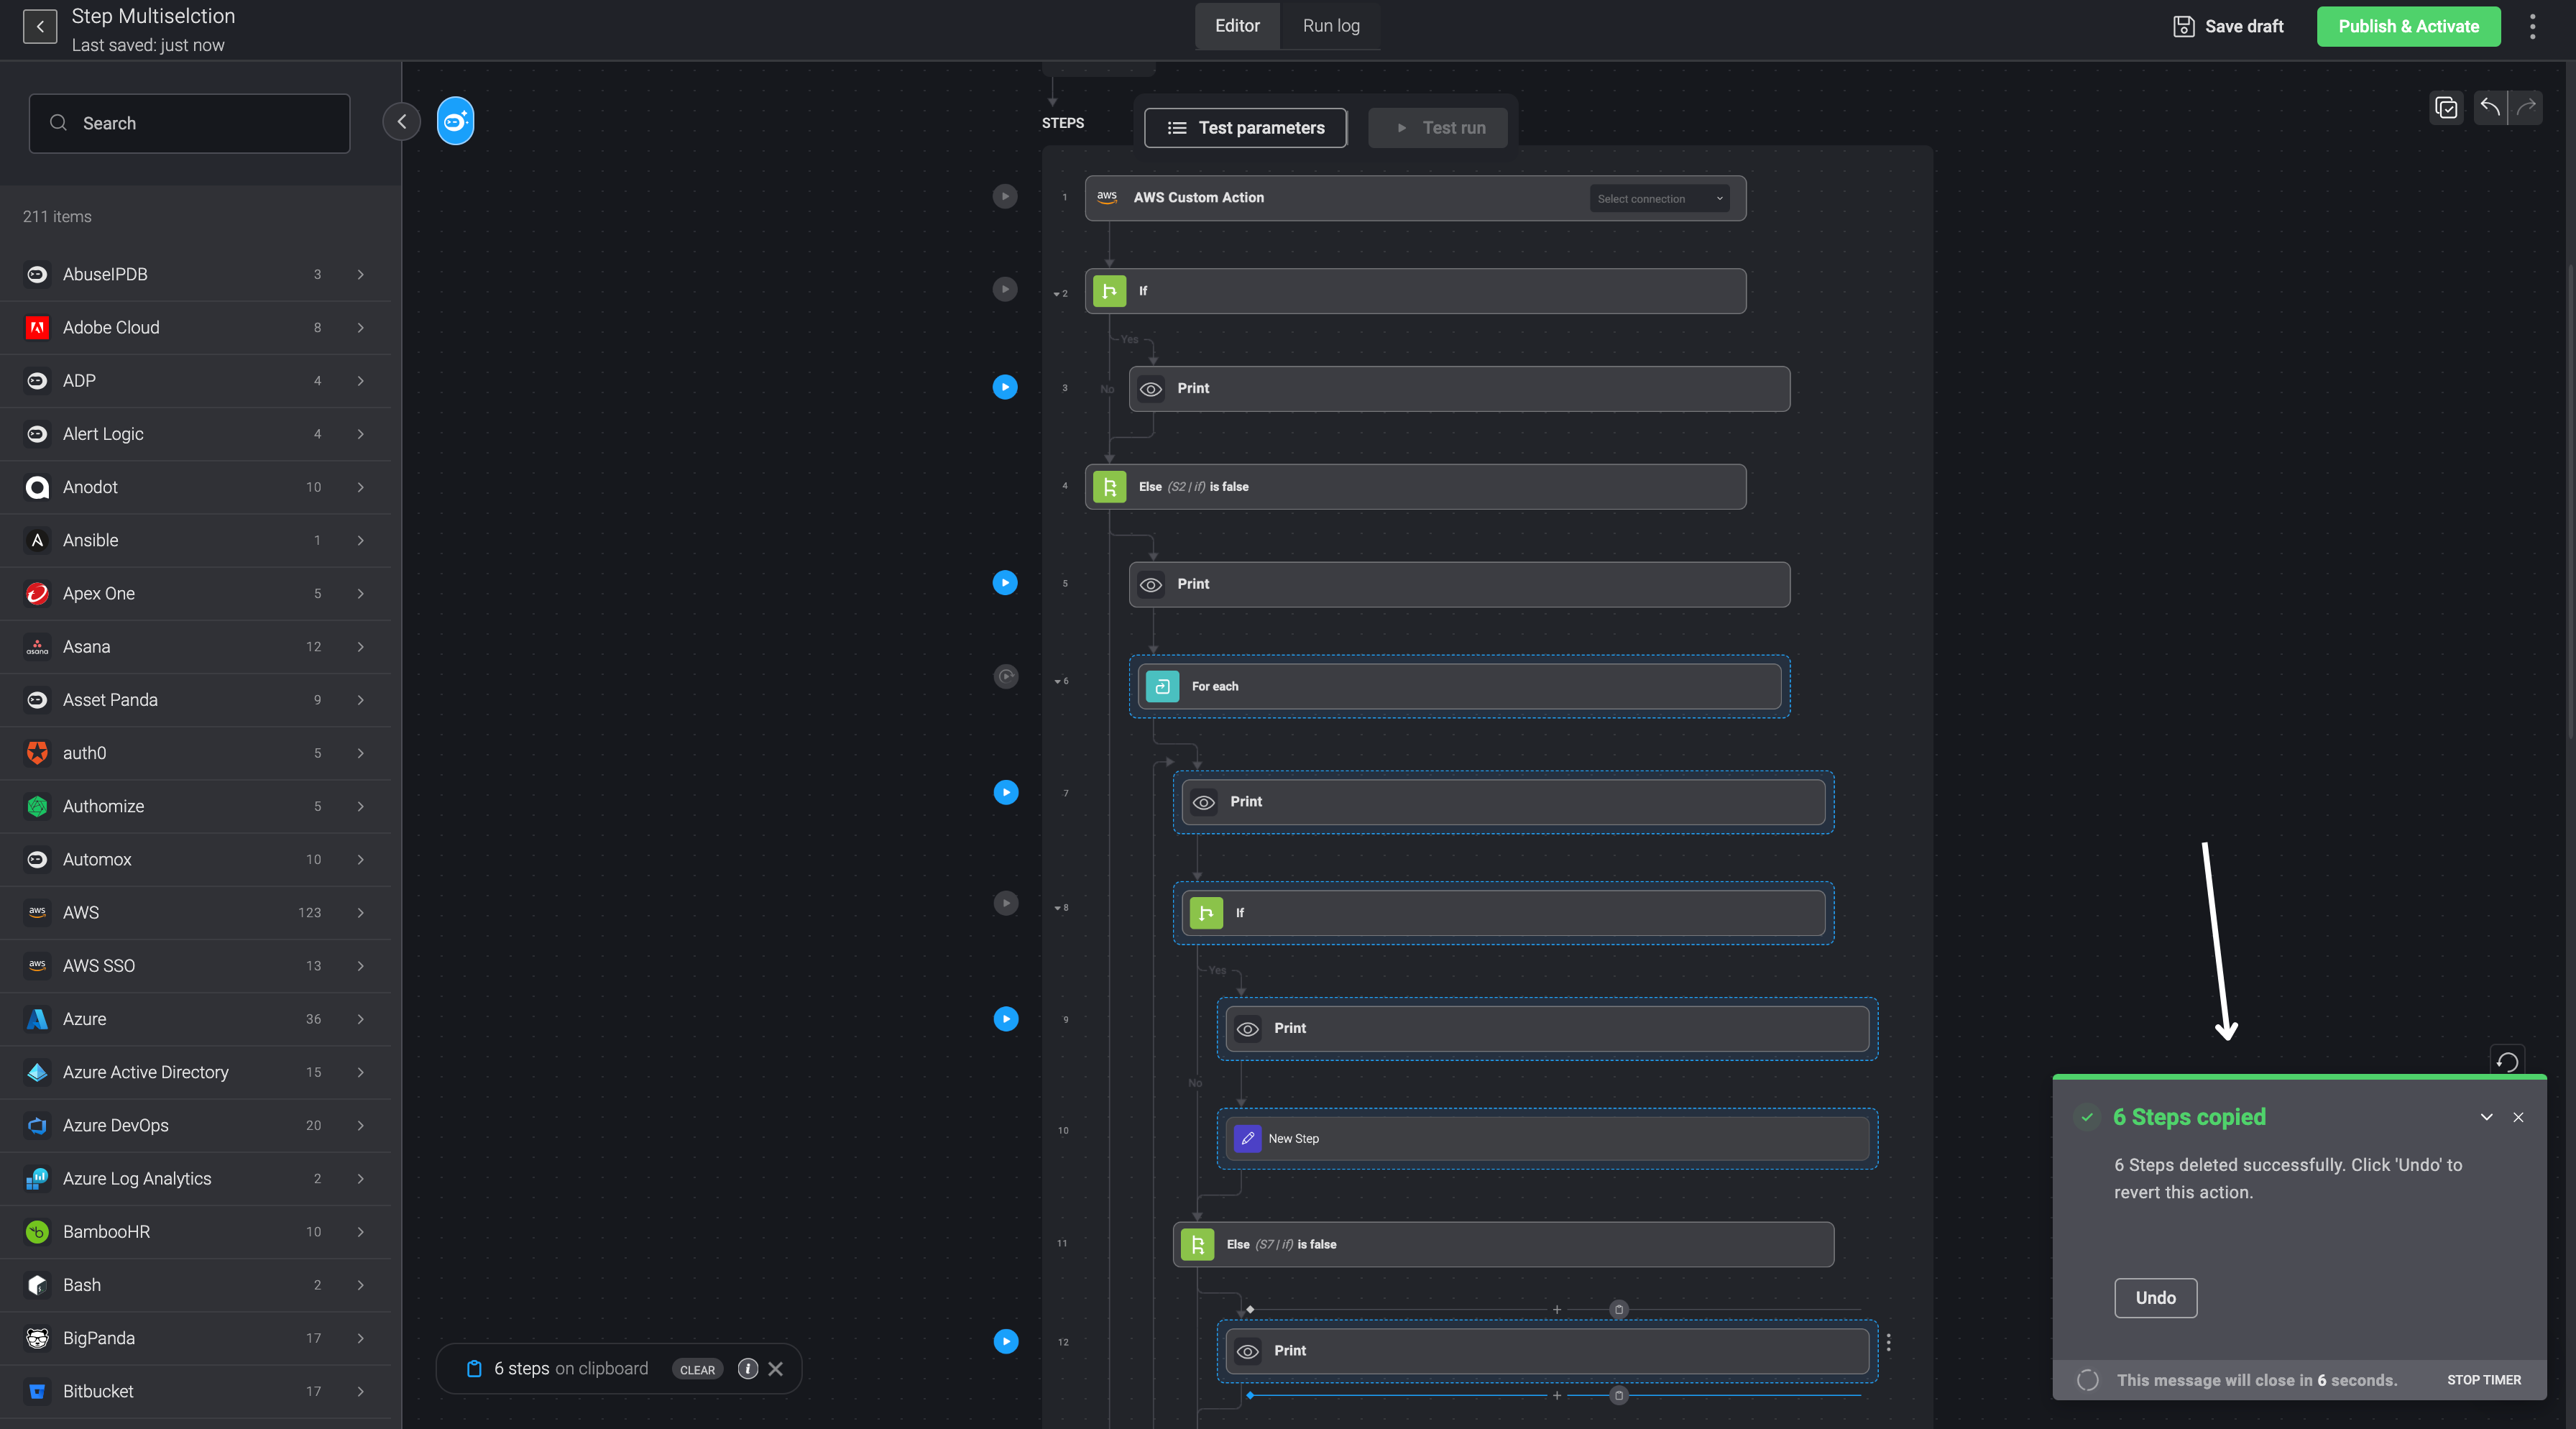
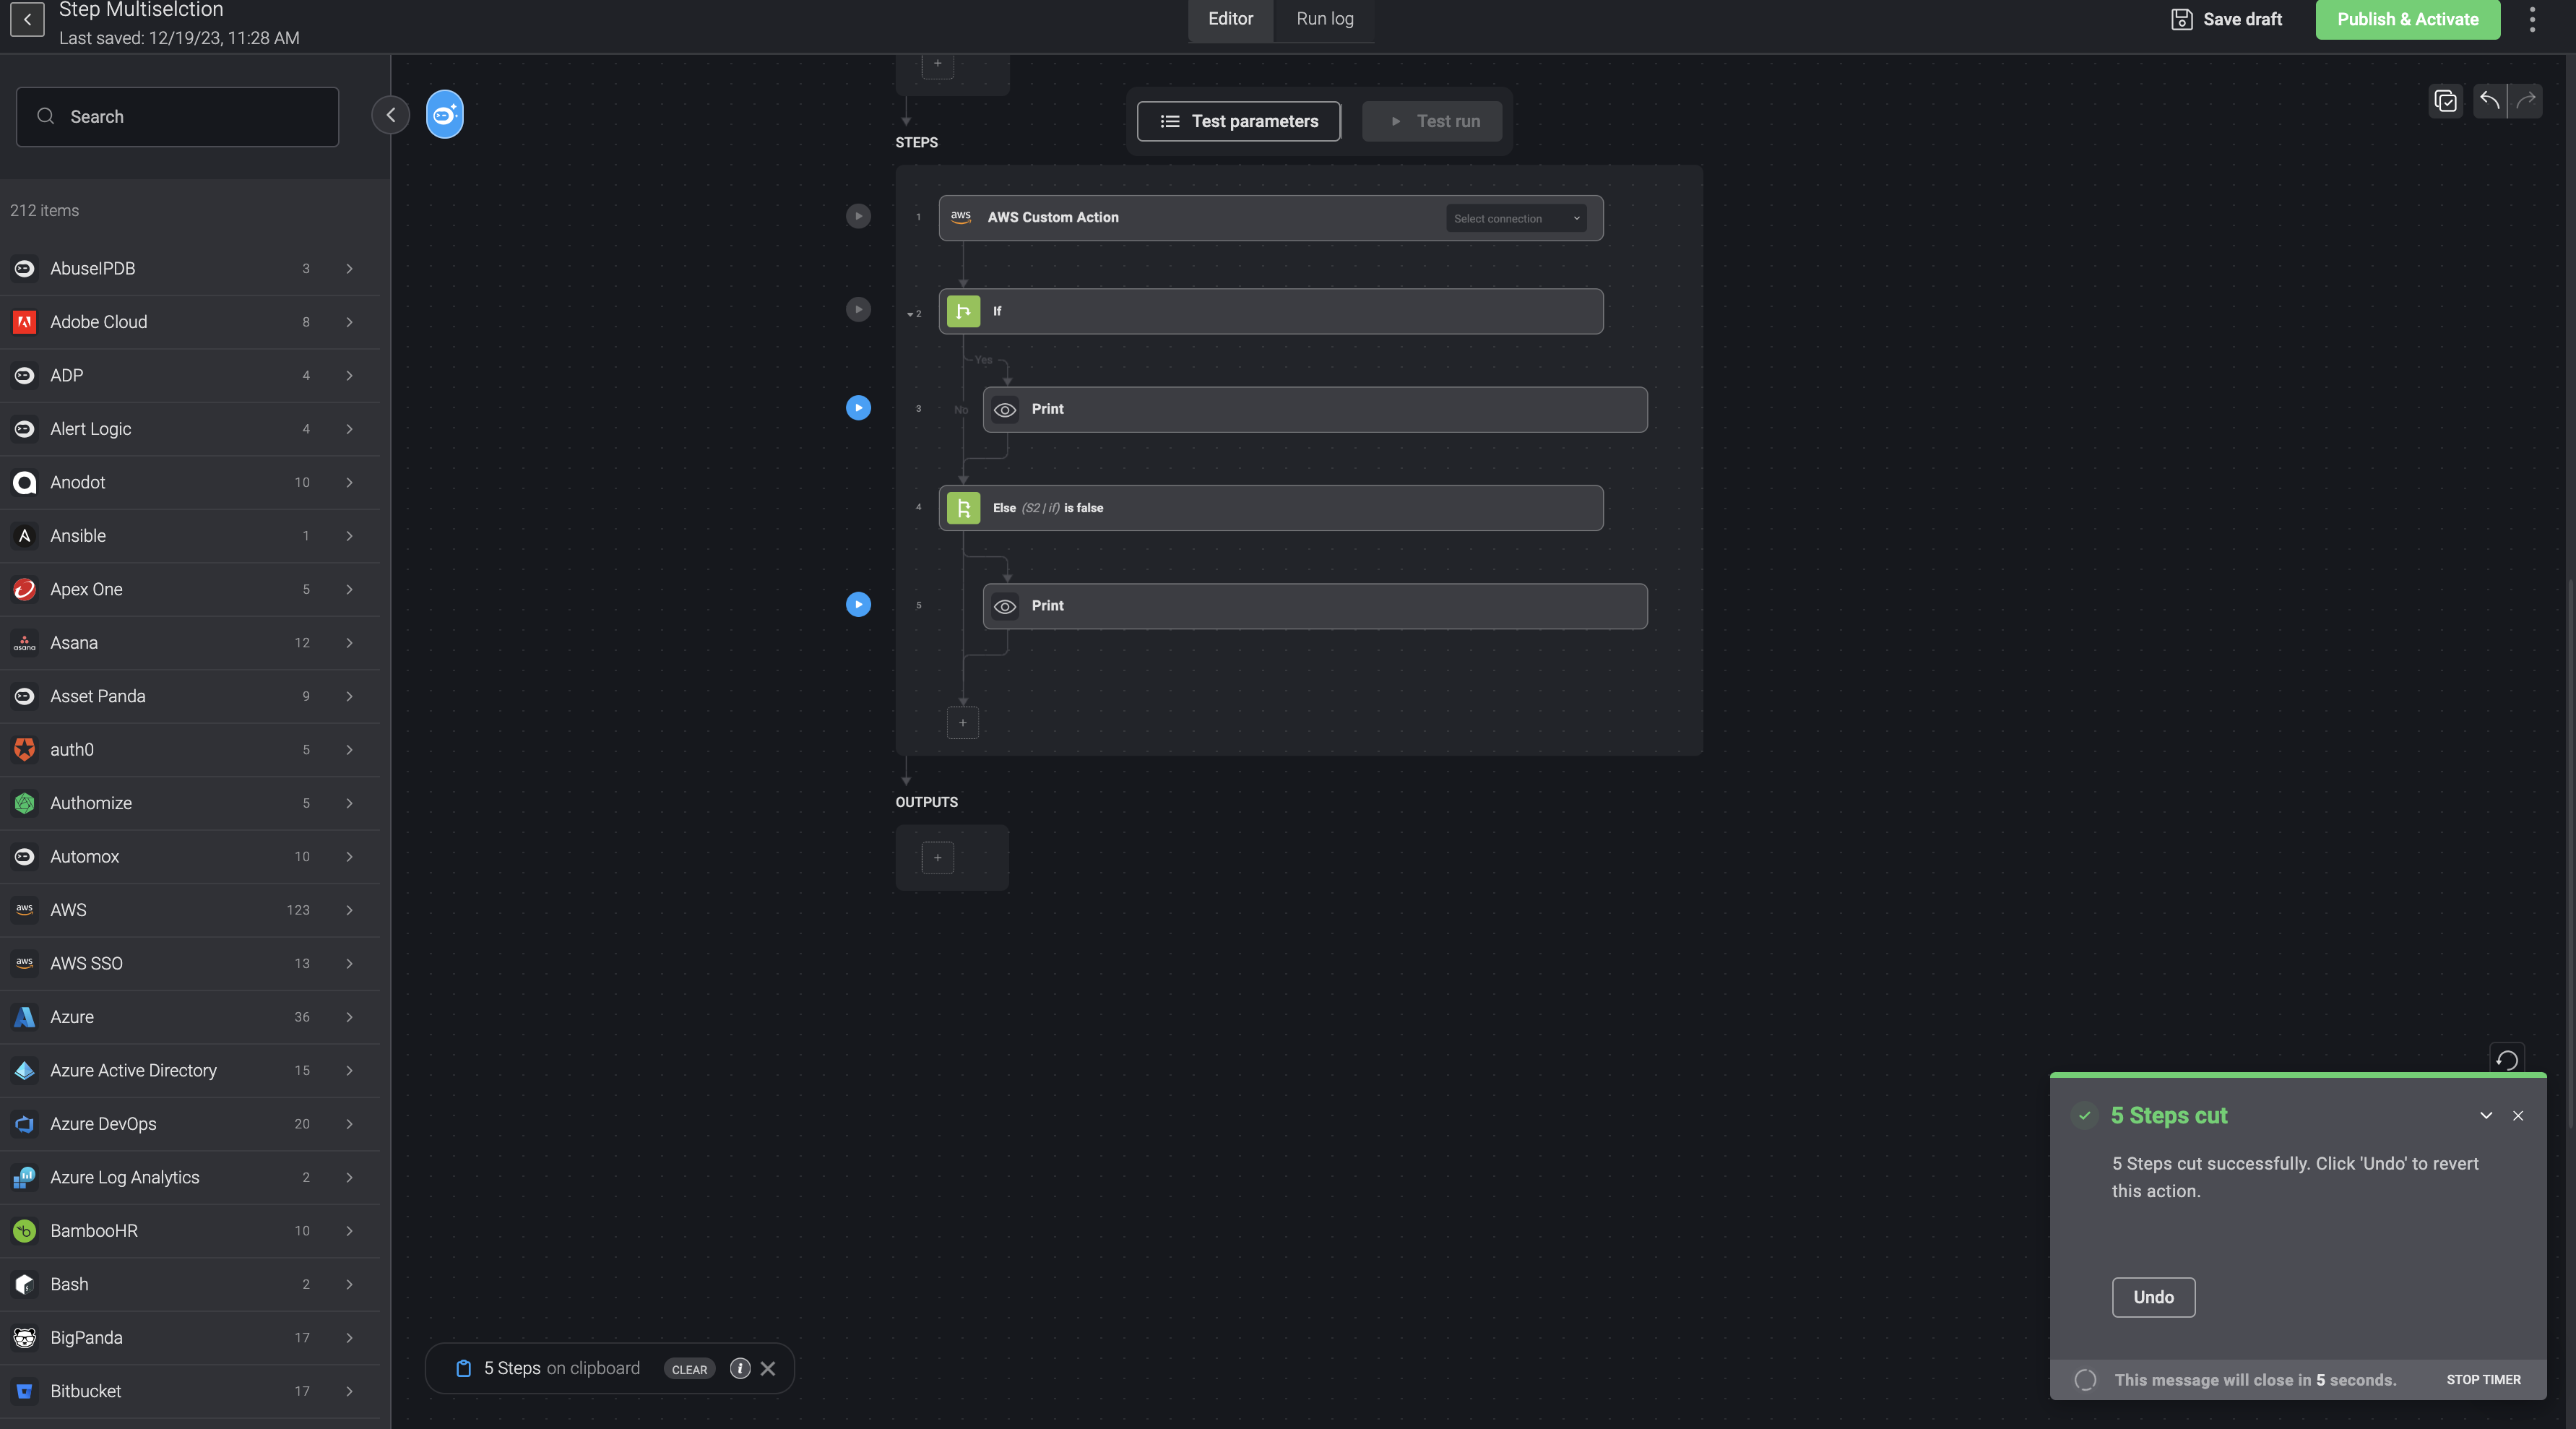
- Upon choosing a bulk action for your selected steps, a notification pop-up will appear in the bottom-right corner. It will confirm the successful completion of the chosen bulk action and provide you with the option to revert it by selecting the undo button.
The Delete Bulk Action
The Delete Bulk Action allows you select multiple steps and delete them from the automation canvas.

The Copy Bulk Action
The Copy Bulk Action enables you to copy selected steps for pasting in either the same or a different automation canvas.
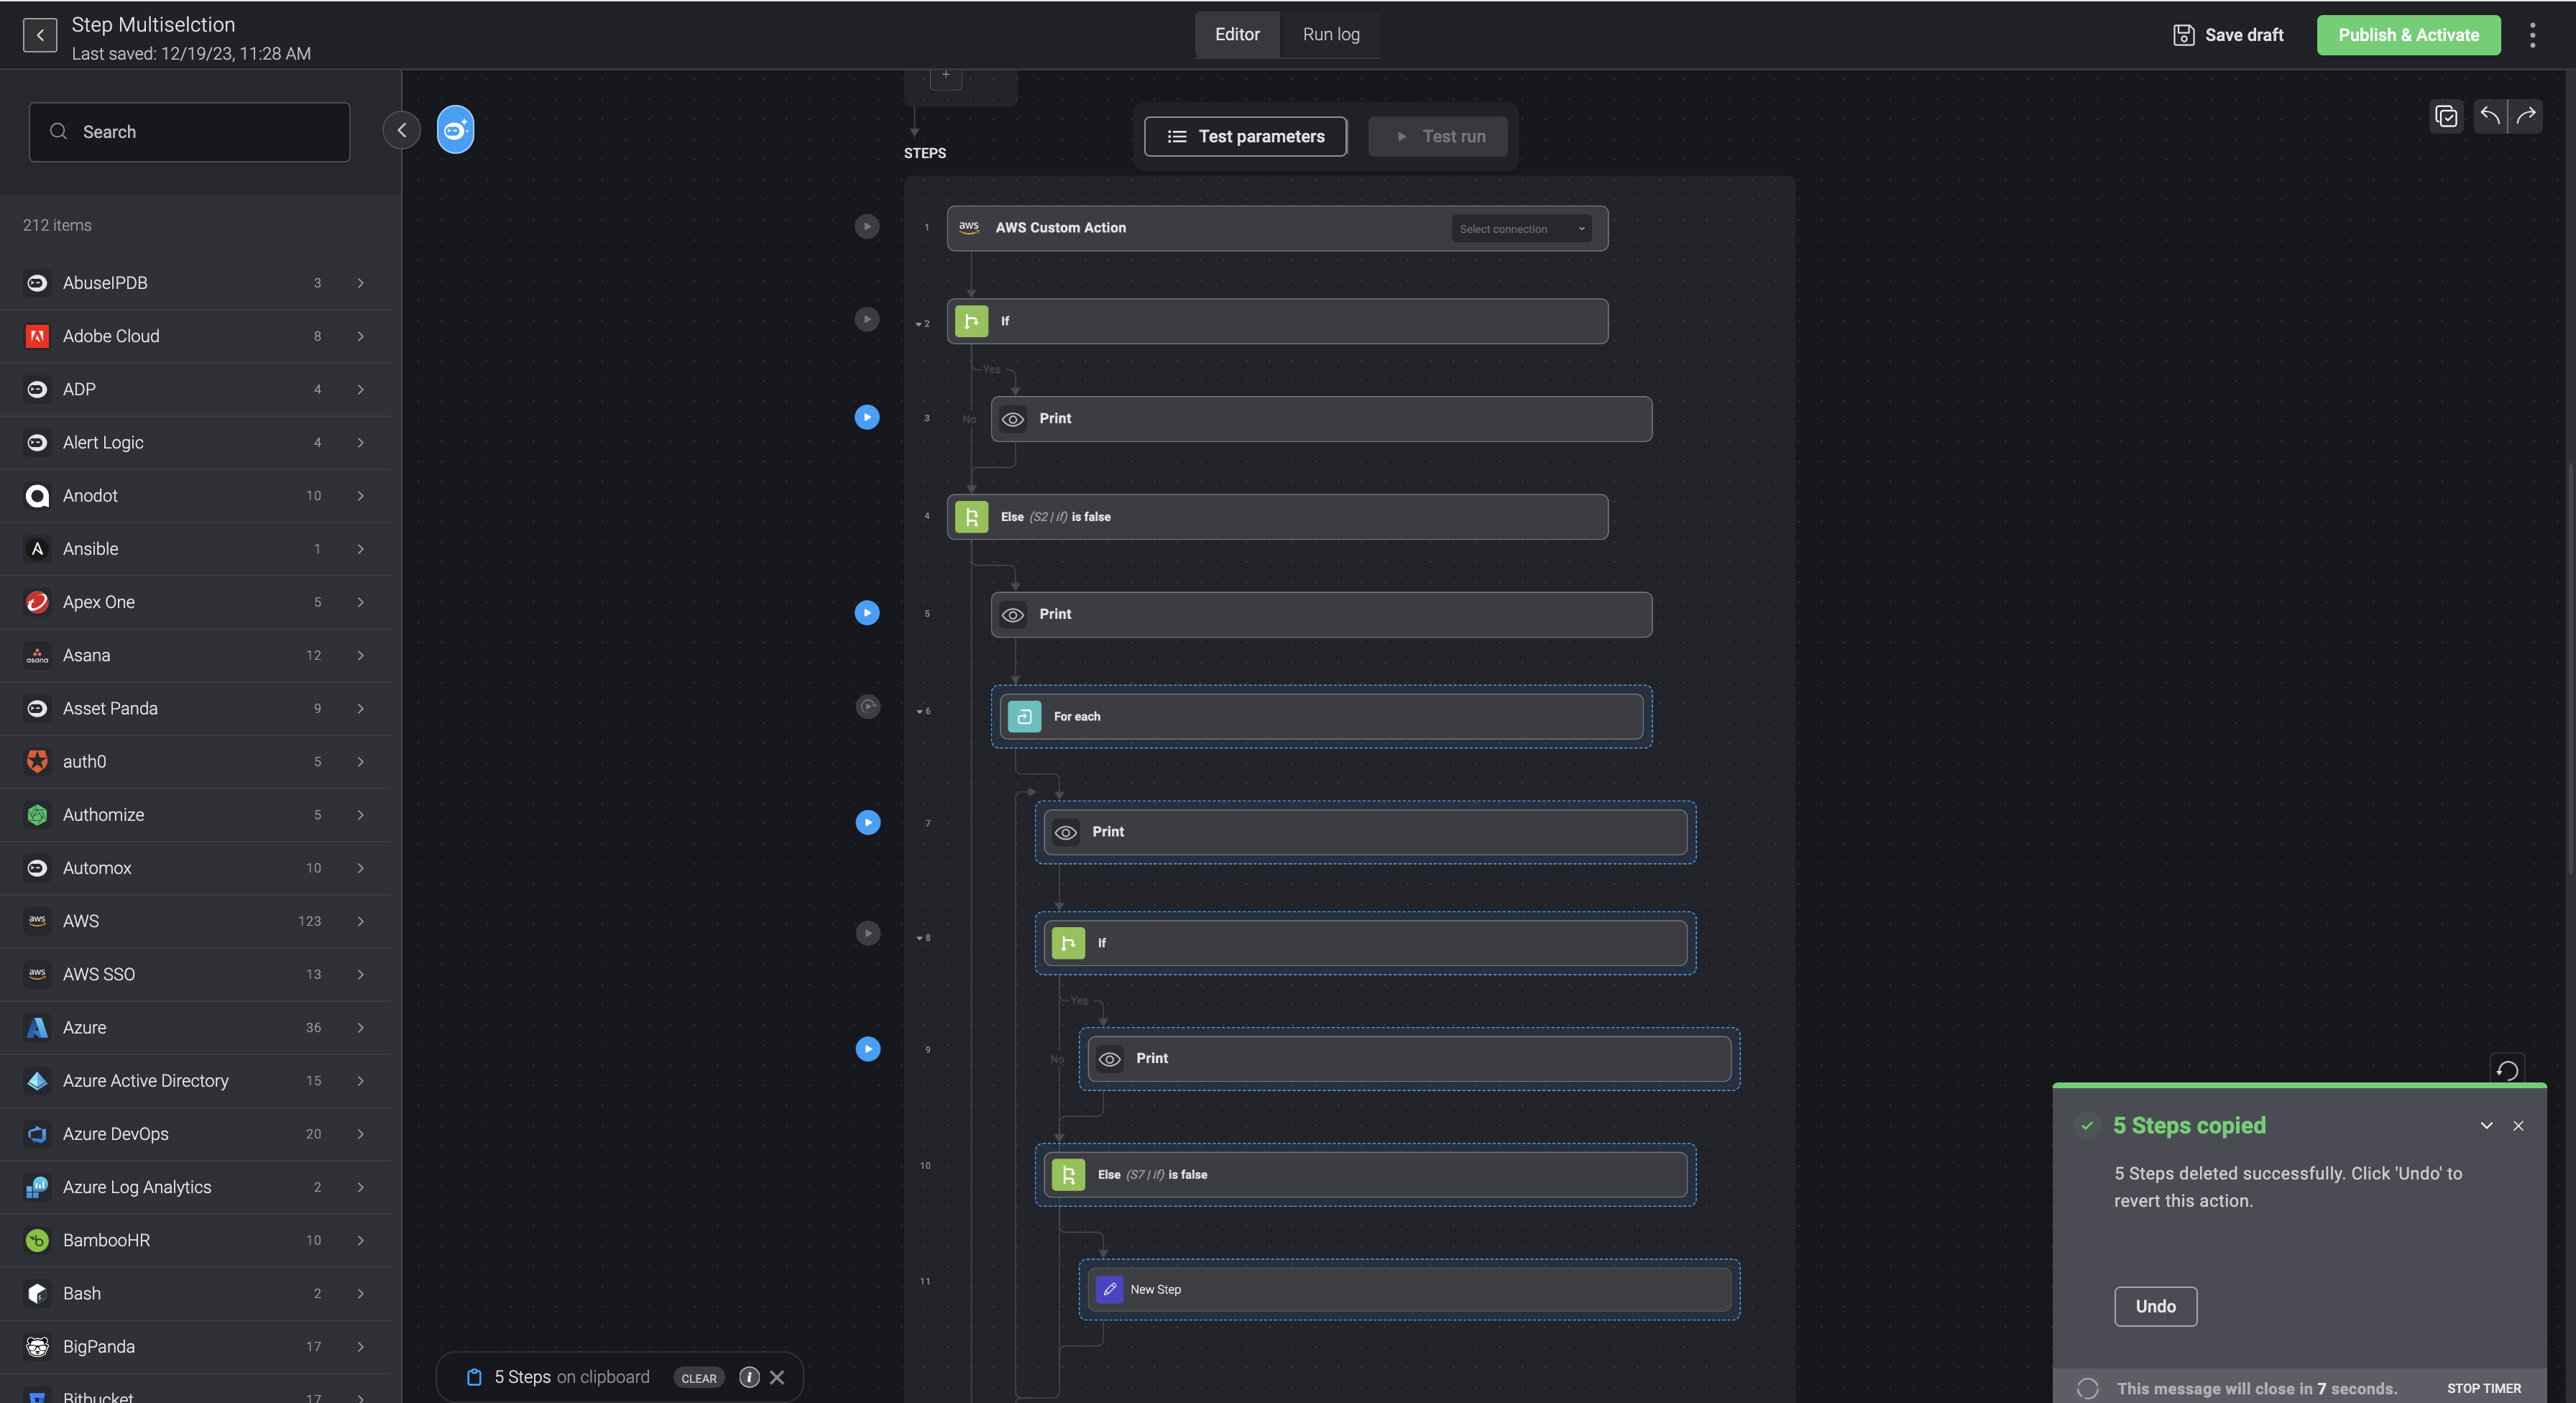
Upon selecting the Copy Bulk Action, the copied steps will be outlined with dots, a visual cue that persists until you perform one of the actions outlined in the leaving the multi-selection mode.
The Cut Bulk Action
The Cut Bulk Action removes the selected steps from the automation canvas, copies them to the clipboard, and enables you to paste them elsewhere on the same canvas or in a different automation.
Leaving Multi-selection Mode
- In order to exit the Multi-selection Step Mode and return to the original mode you can preform the following actions:
- Clicking on the cancel button on the floating selection element.
OR
- Clicking on the multi-select icon in the top-right corner.
Engaging in unrelated actions within the editor may close the multi-select mode.
Mouse and Keyboard shortcuts
Right-clicking a step will open the step contextual menu.
Holding down the Command key (for Mac users) or the Control key (for Windows users) and clicking on specific steps, will transition the canvas to selection mode and mark the steps as selected.
Pressing Command/Control + C will copy steps.
Pressing Command/Control + X will cut steps.
Pressing Command/Control + V will paste steps from the clipboard to the bottom of the canvas.
Pressing Shift+click will select all in-between steps from the last selected checkbox.