Configuring a SAML application on Okta
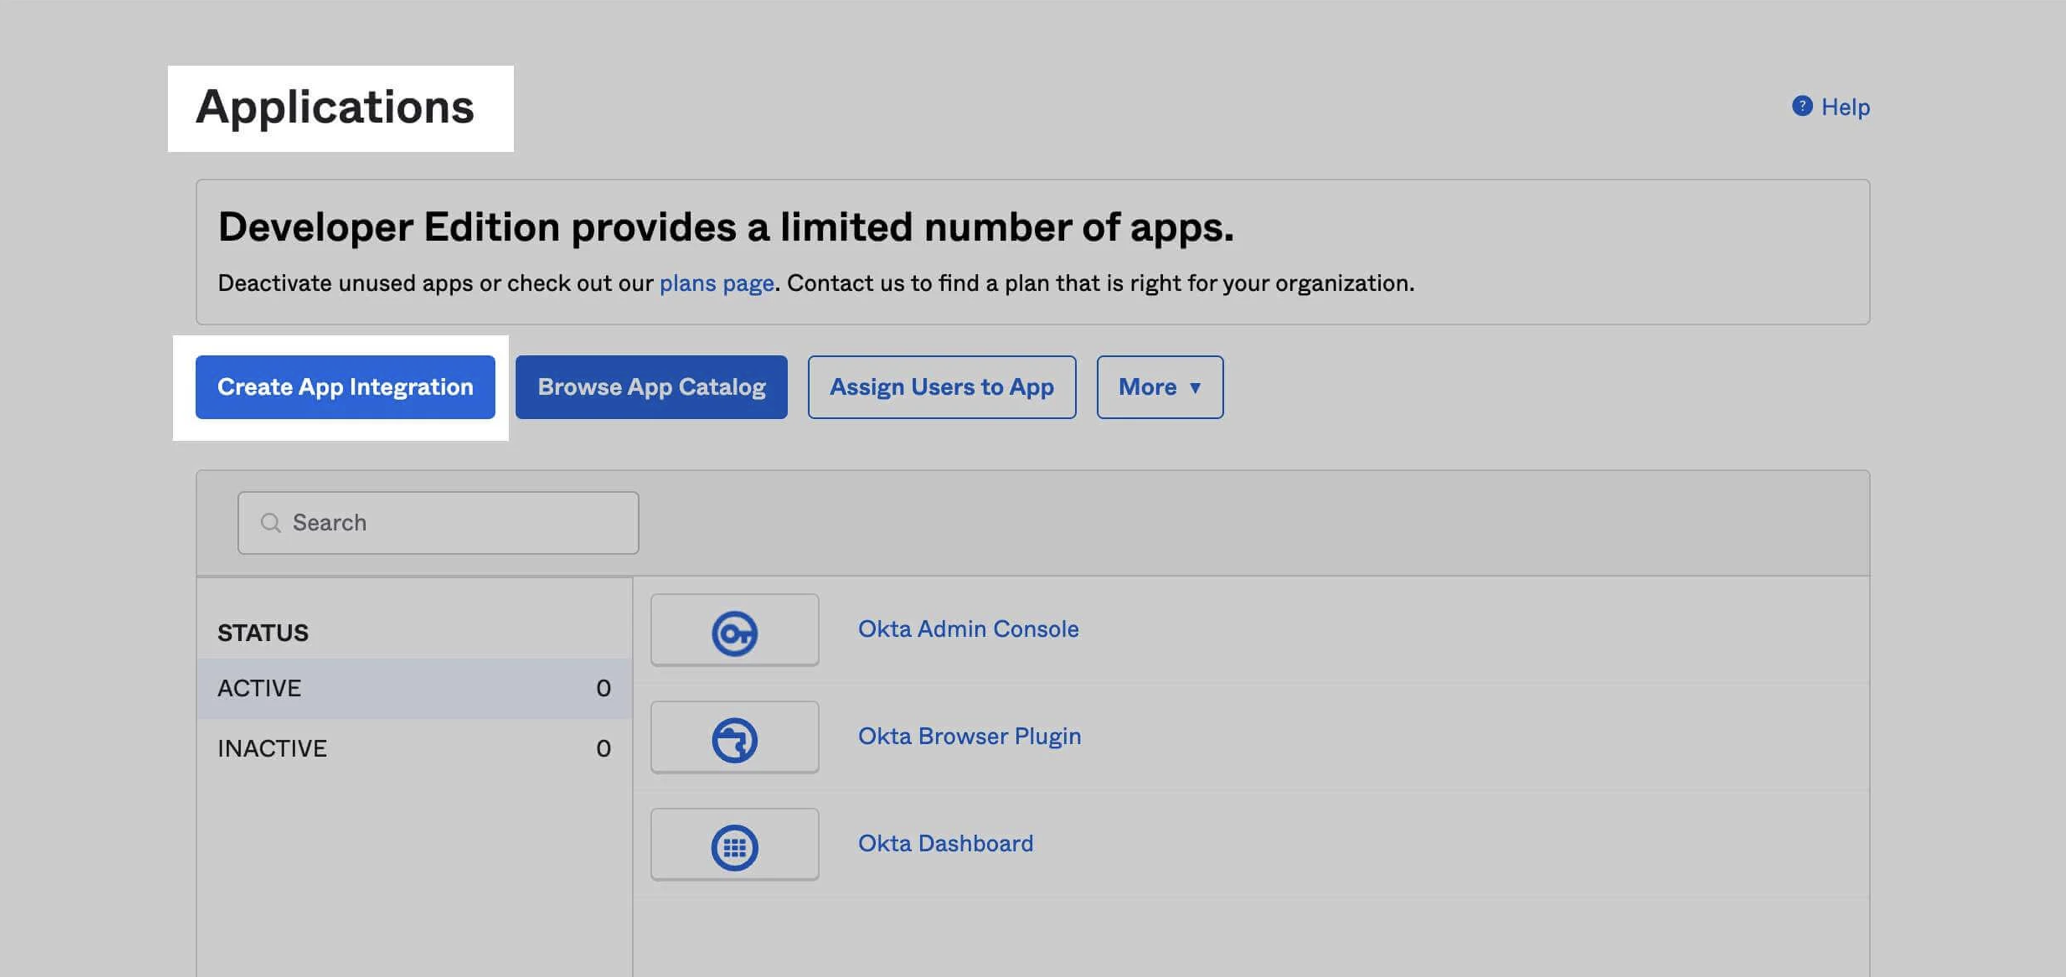
- Log in to Okta, go to the admin dashboard, and select "Applications" in the navigation panel.
- Select "Create App Integration".
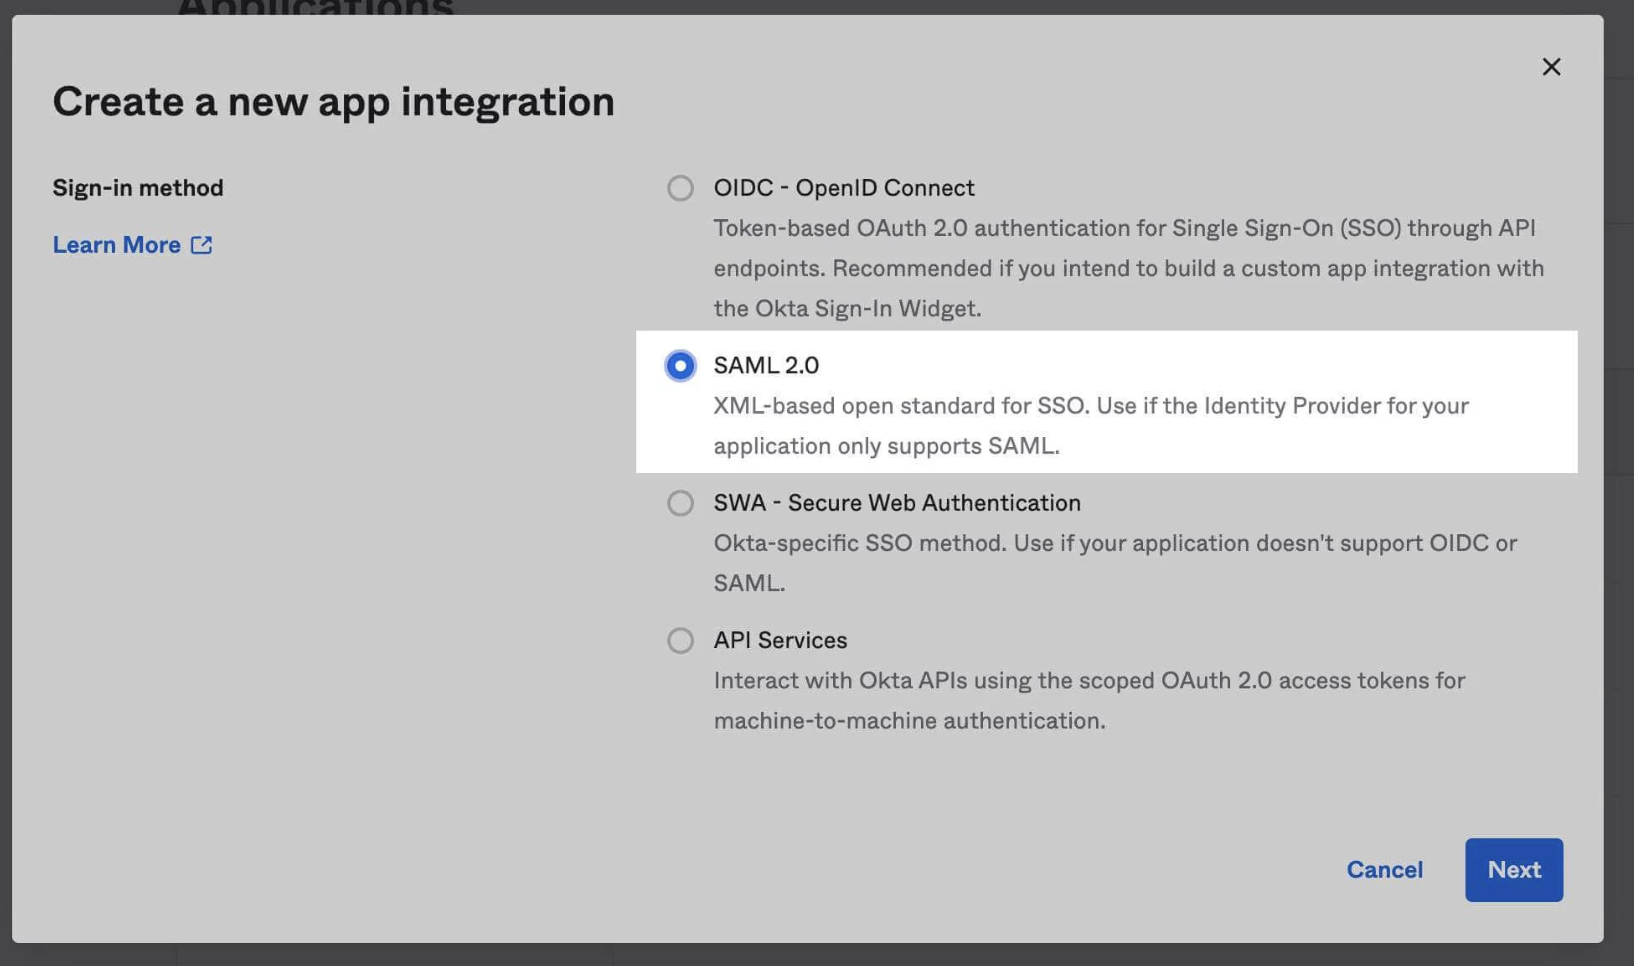
- Select "SAML 2.0" and click Next.
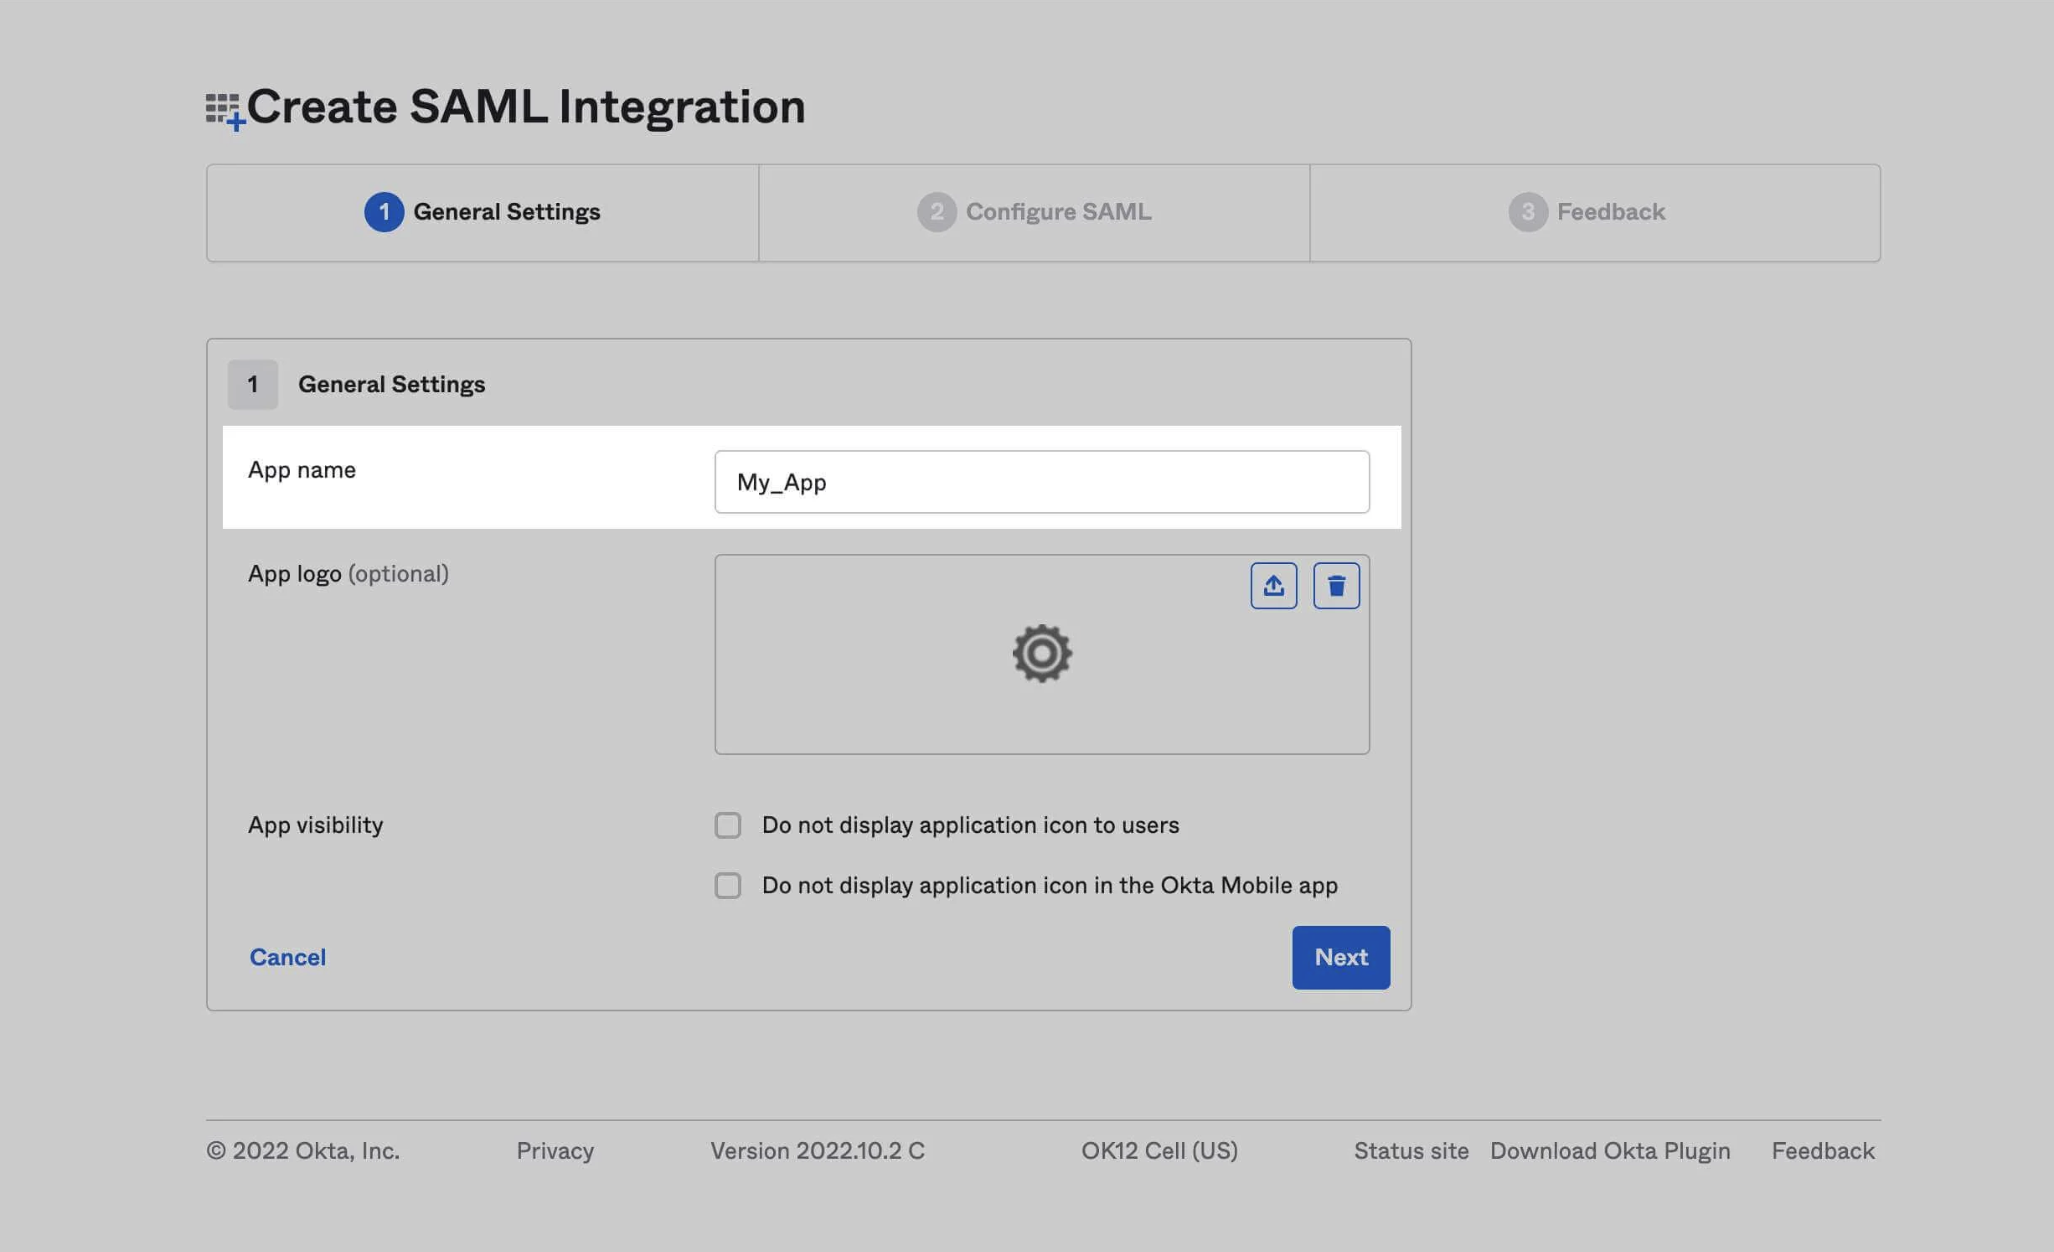
- Enter an "App Name" and click Next.
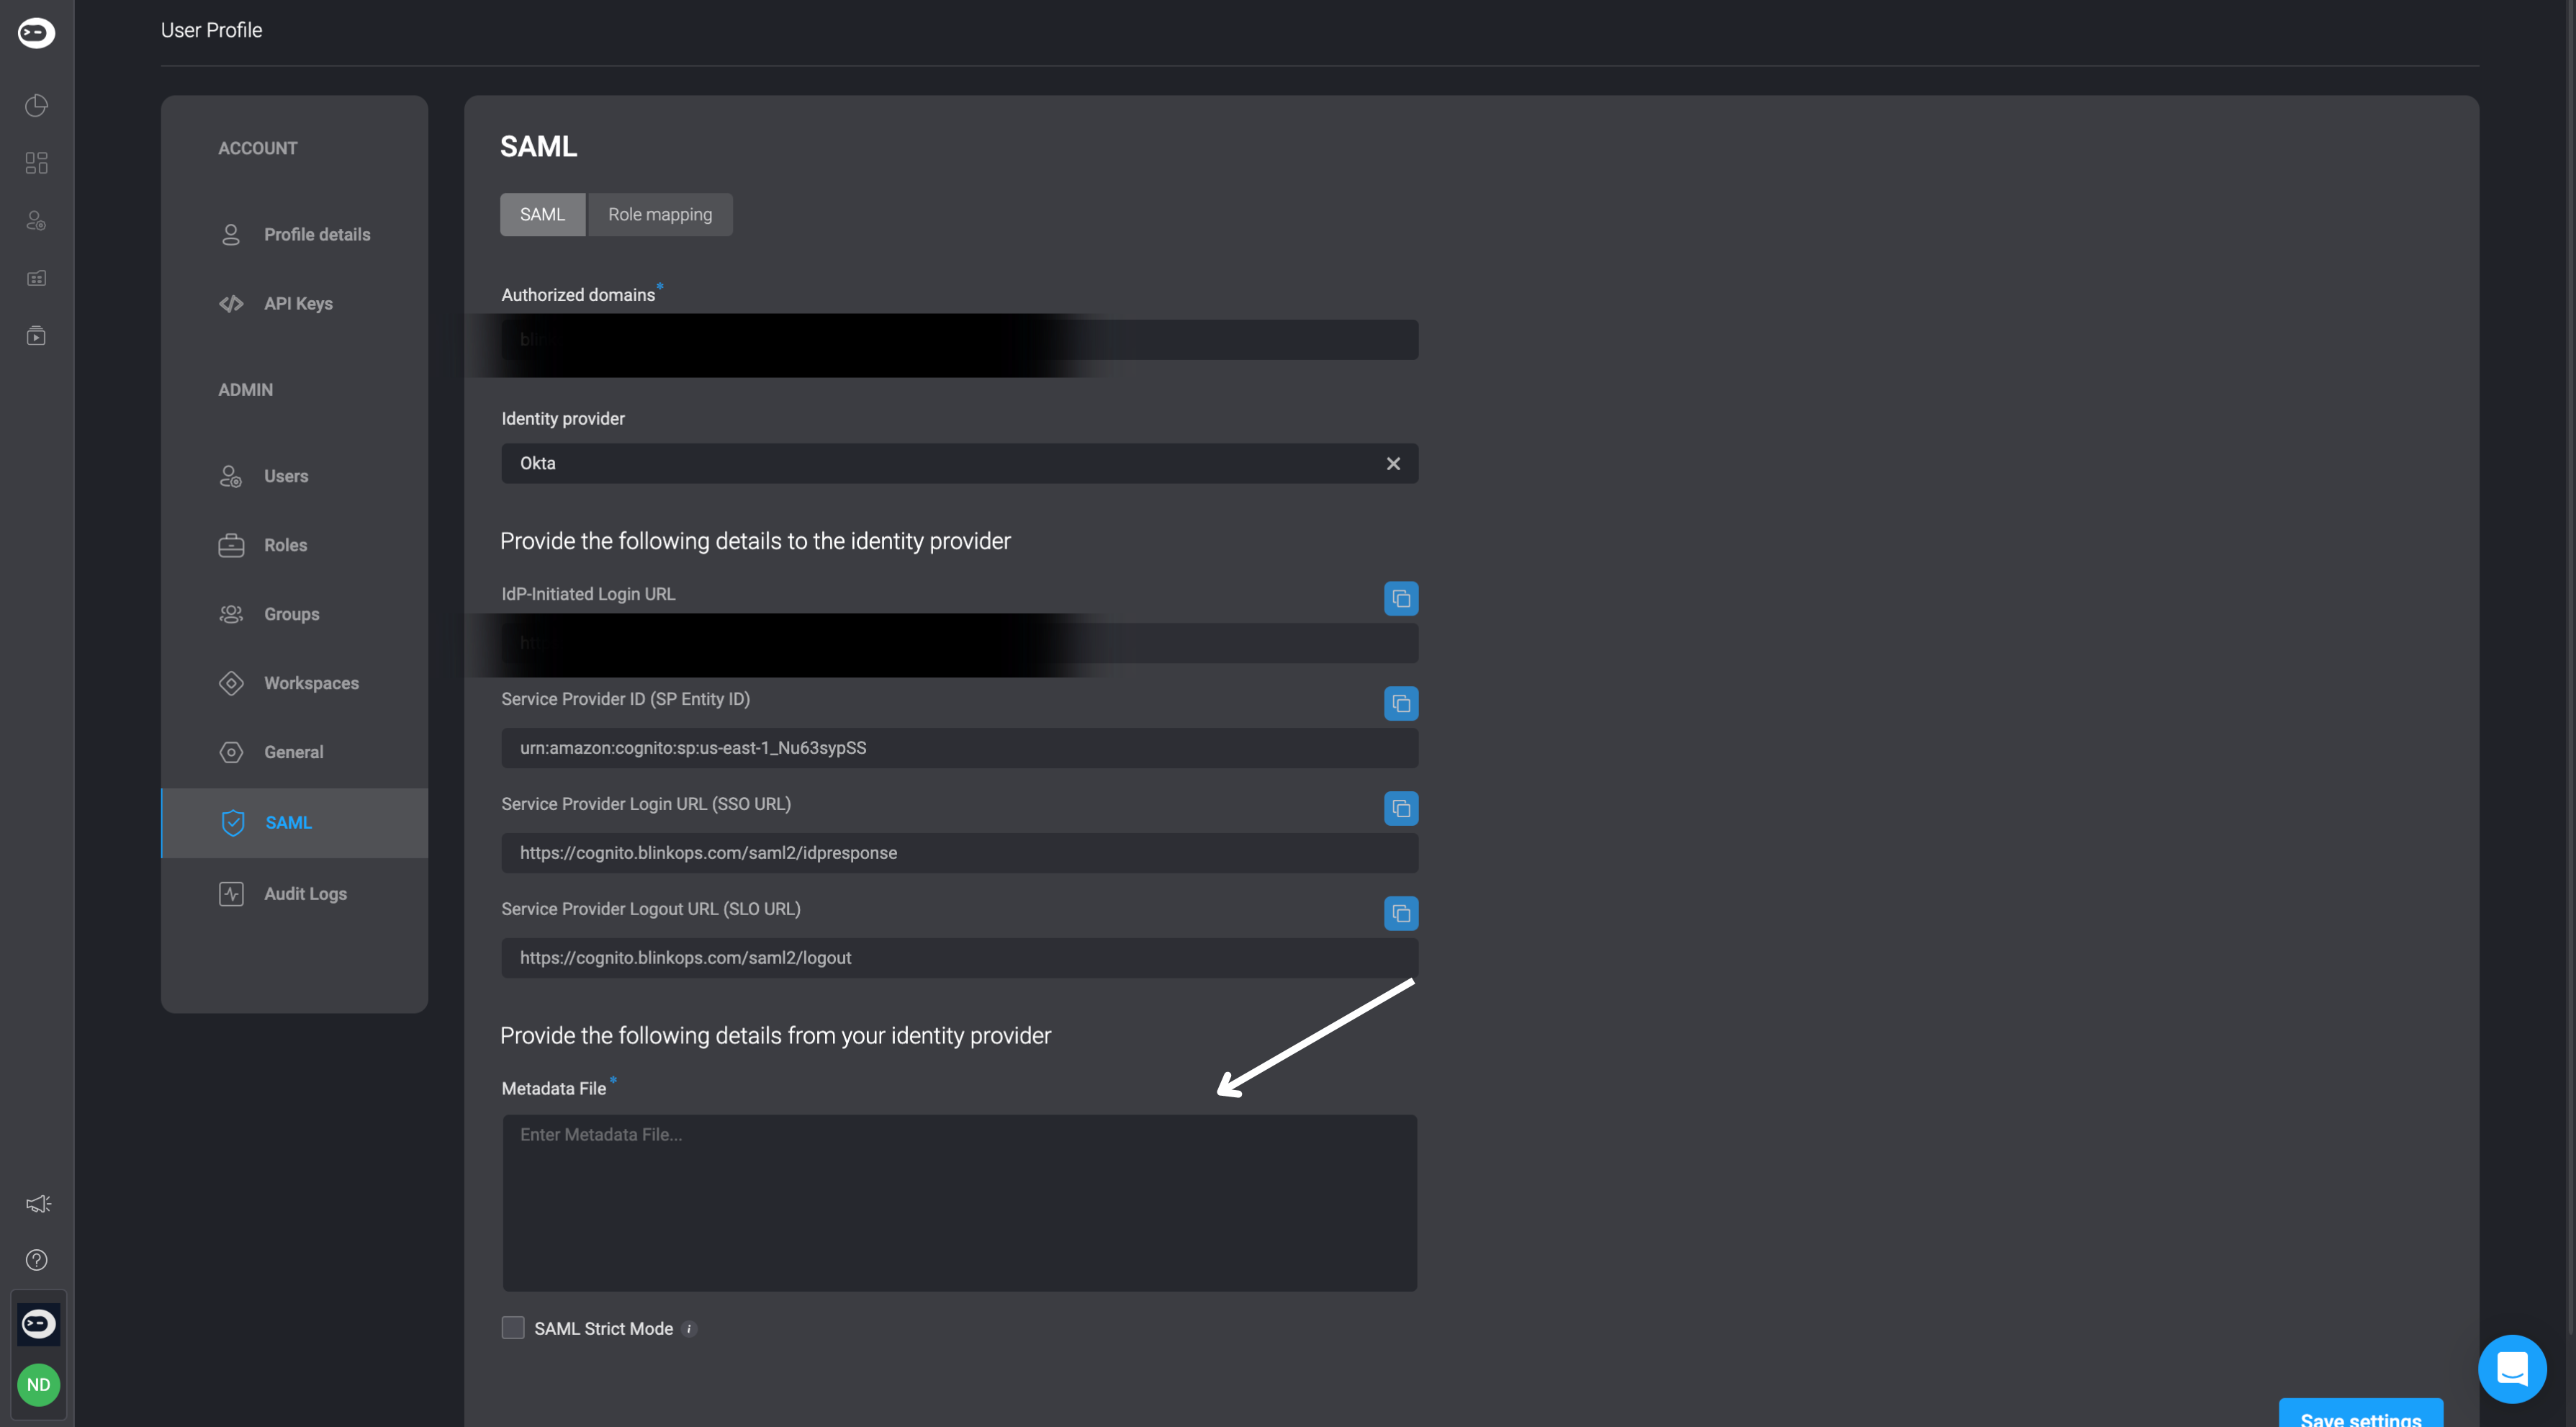
Please note that the IdP-Initiated Login URL, Service Provider ID (SP Entity ID),Service Provider Login URL (SSO URL) and Service Provider Logout URL (SLO URL) can be located within the SAML tab under the Account Management Settings section within the Blink Platform.
IdP-Initiated Login URL : Please look in the Account Management Settings section within the Blink Platform to find your unique IdP-Initiated Login URL.
Service Provider ID (SP Entity ID) : urn:amazon:cognito:sp:us-east-1_Nu63sypSS
Service Provider Login URL (SSO URL) : https://cognito.blinkops.com/saml2/idpresponse
Service Provider Logout URL (SLO URL) : https://cognito.blinkops.com/saml2/logout
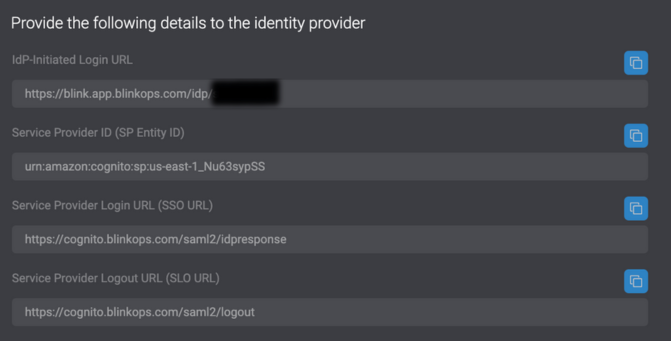
Please Note users who use on-premise deployment , please do not use the above values to complete the Create SAML Integration section of the Okta application, instead you should login to your own on-premise deployment app and use the unique values provided in the SAML tab under the Account Management Settings.
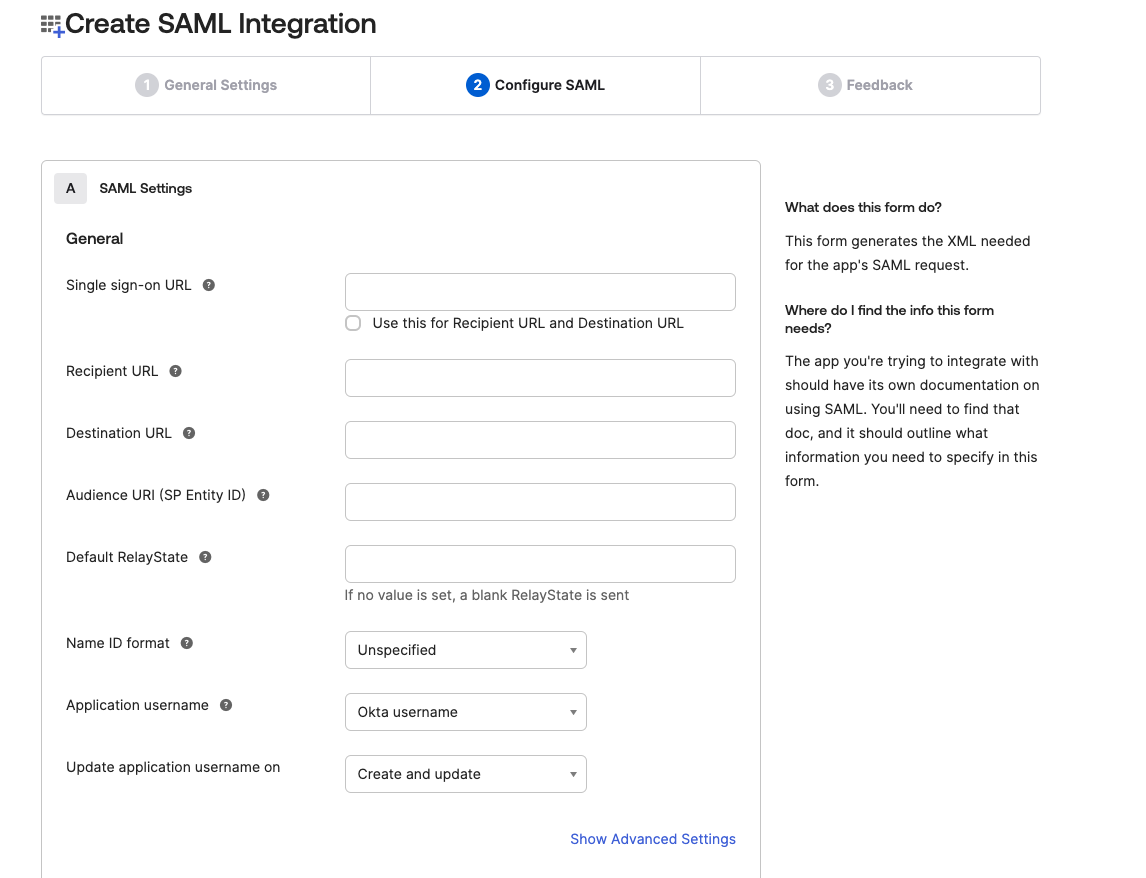
- Using the unique IdP-Initiated Login URL available in the SAML tab under the Account Management Settings section within the Blink Platform, proceed to the Create SAML Integration section of the application and copy and paste the URL value in the Single Sign-On URL text field. Then copy and paste the Service Provider Login URL (SSO URL) value in both the Recipient URL text field and the Destination URL text field. Lastly copy and paste the Service Provider ID (SP Entity ID) value in the the Audience URI (SP Entity ID) text field.
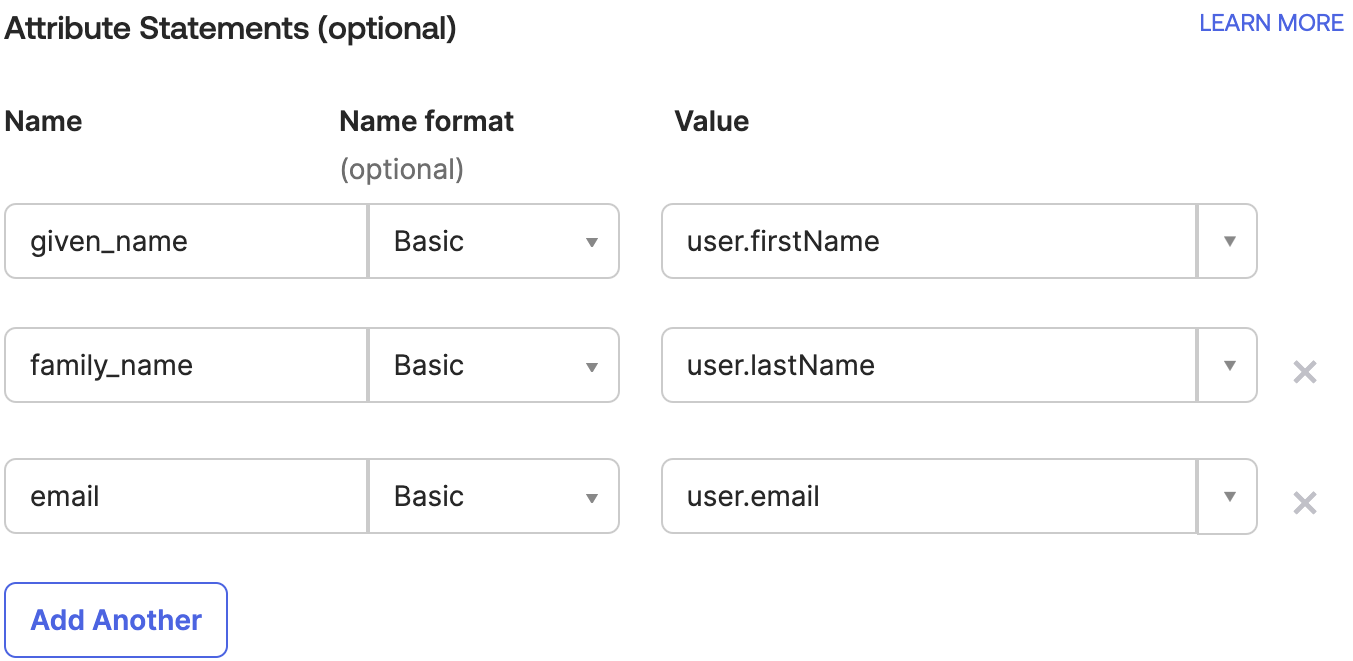
- Scroll down to the “Attribute Statements” section and add the following key-value pairs, and then click Next.
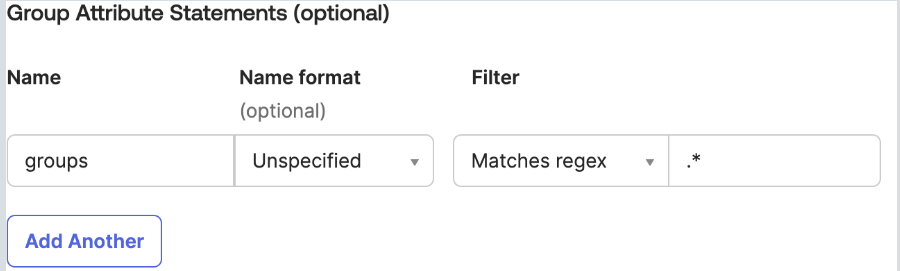
- Then scroll down to the "Group Attribute Statement" section and fill out the following fields like portrayed in the following image
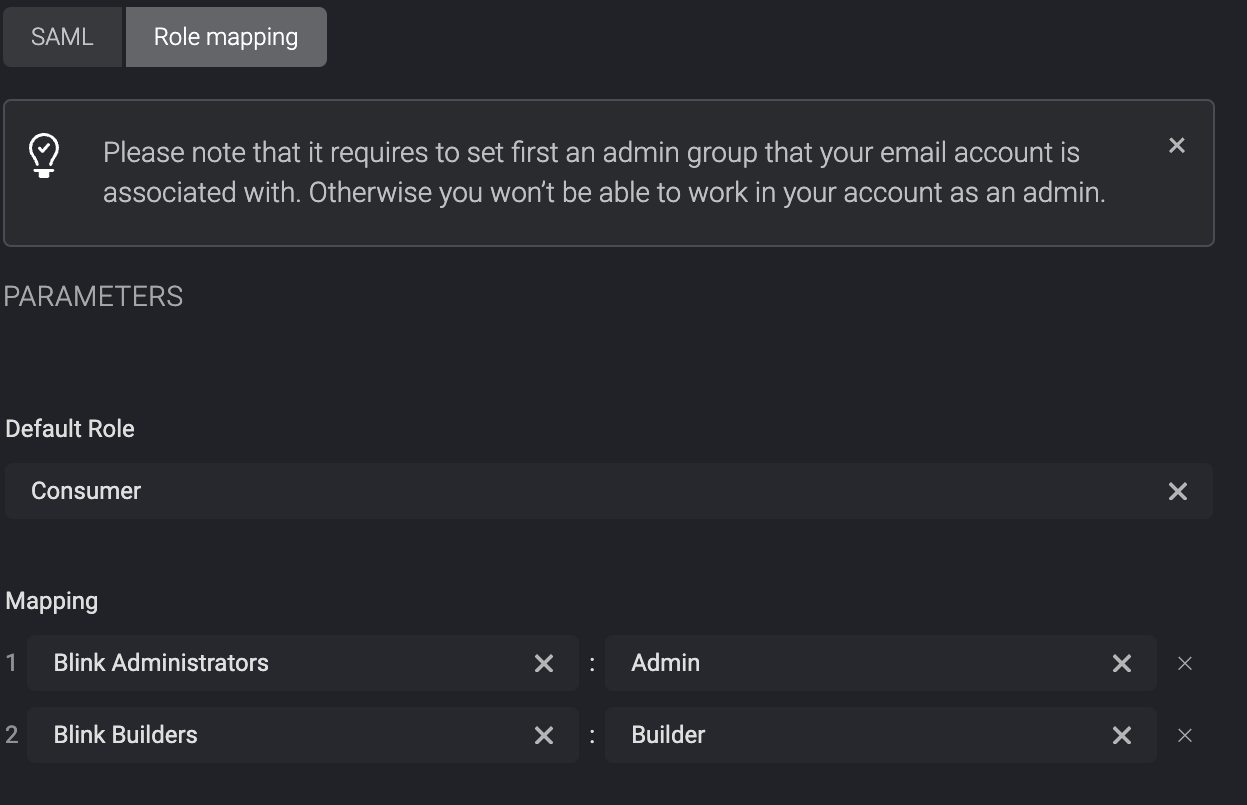
- Then head to the SAML tab under the Account Management Settings section within the Blink Platform and click the Role Mapping section and select the applicable values.
Please note that within the mapping section, it's necessary to designate at least one mapping role as an admin with administrative privileges. Otherwise, you will not have the ability to operate within your account as an administrator.
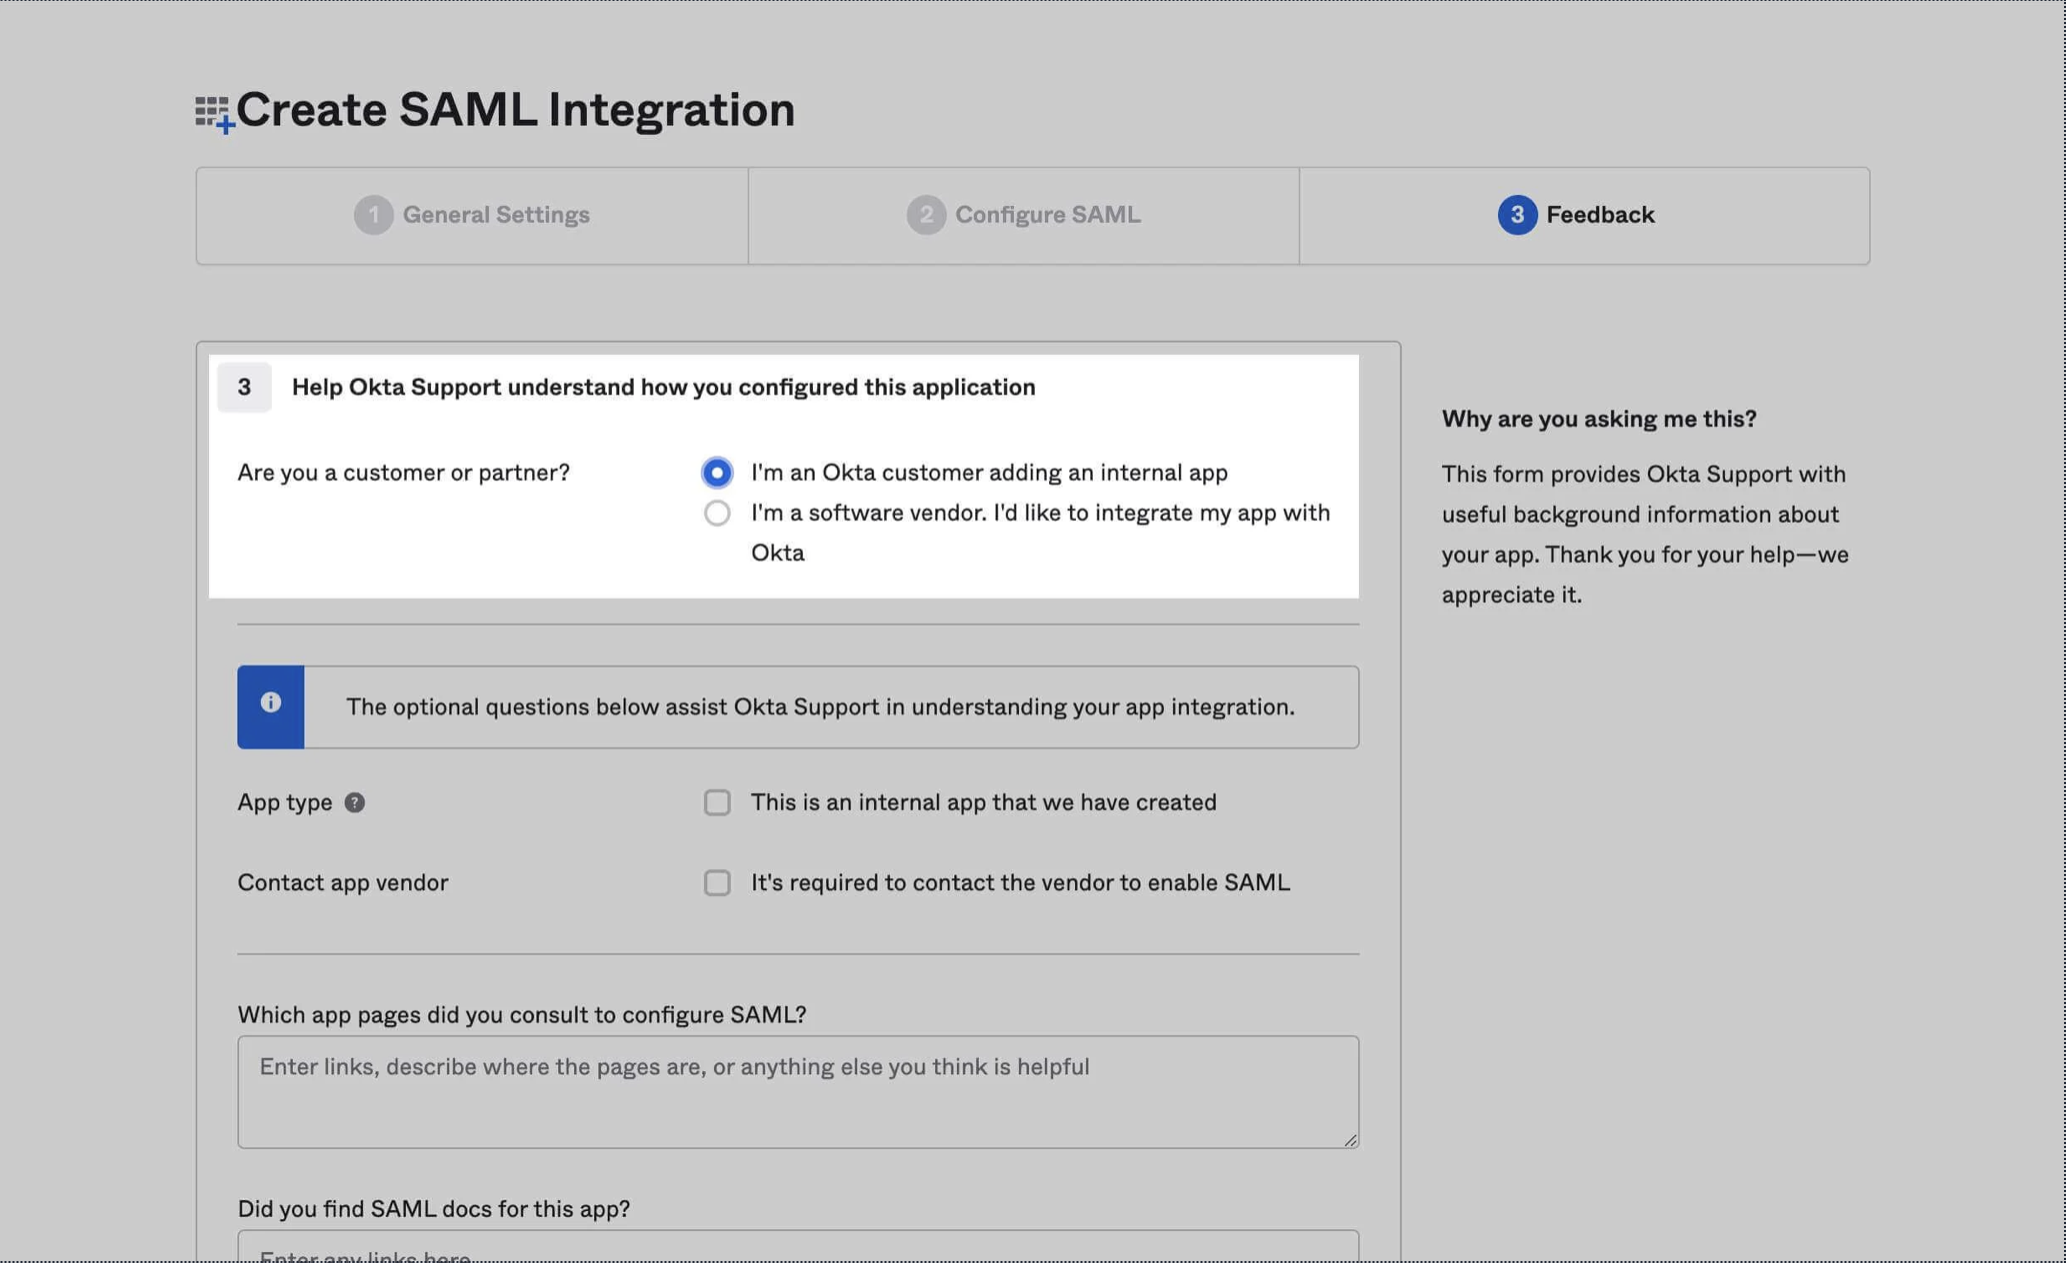
- Select “I’m an Okta customer adding an internal app” from the options menu, and then click Finish.
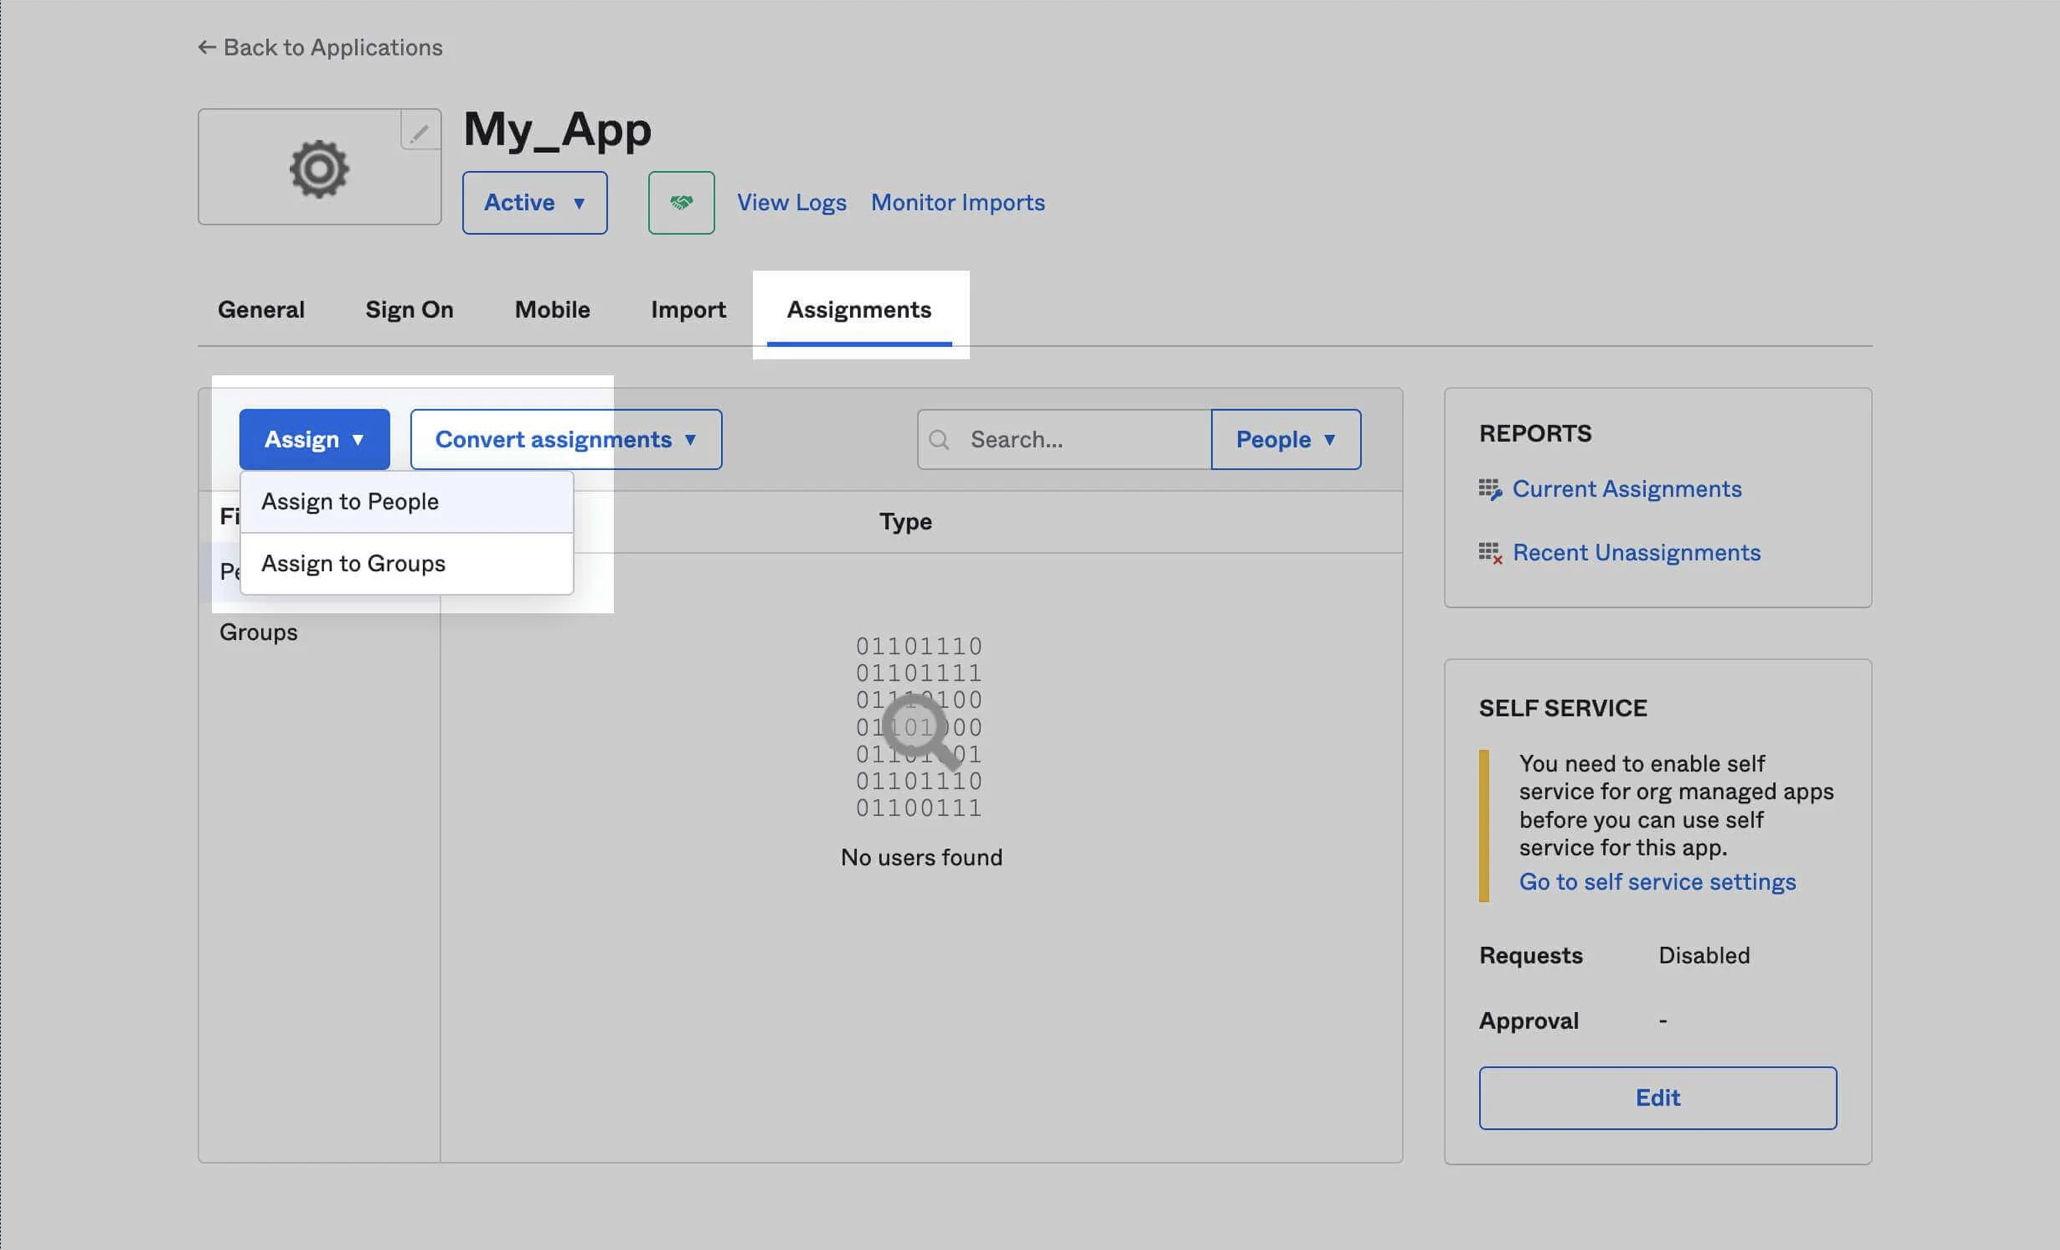
To give users permission to authenticate via this SAML app, you will need to assign users or groups.
Click on the "Assignments" tab and assign the users or groups you require.
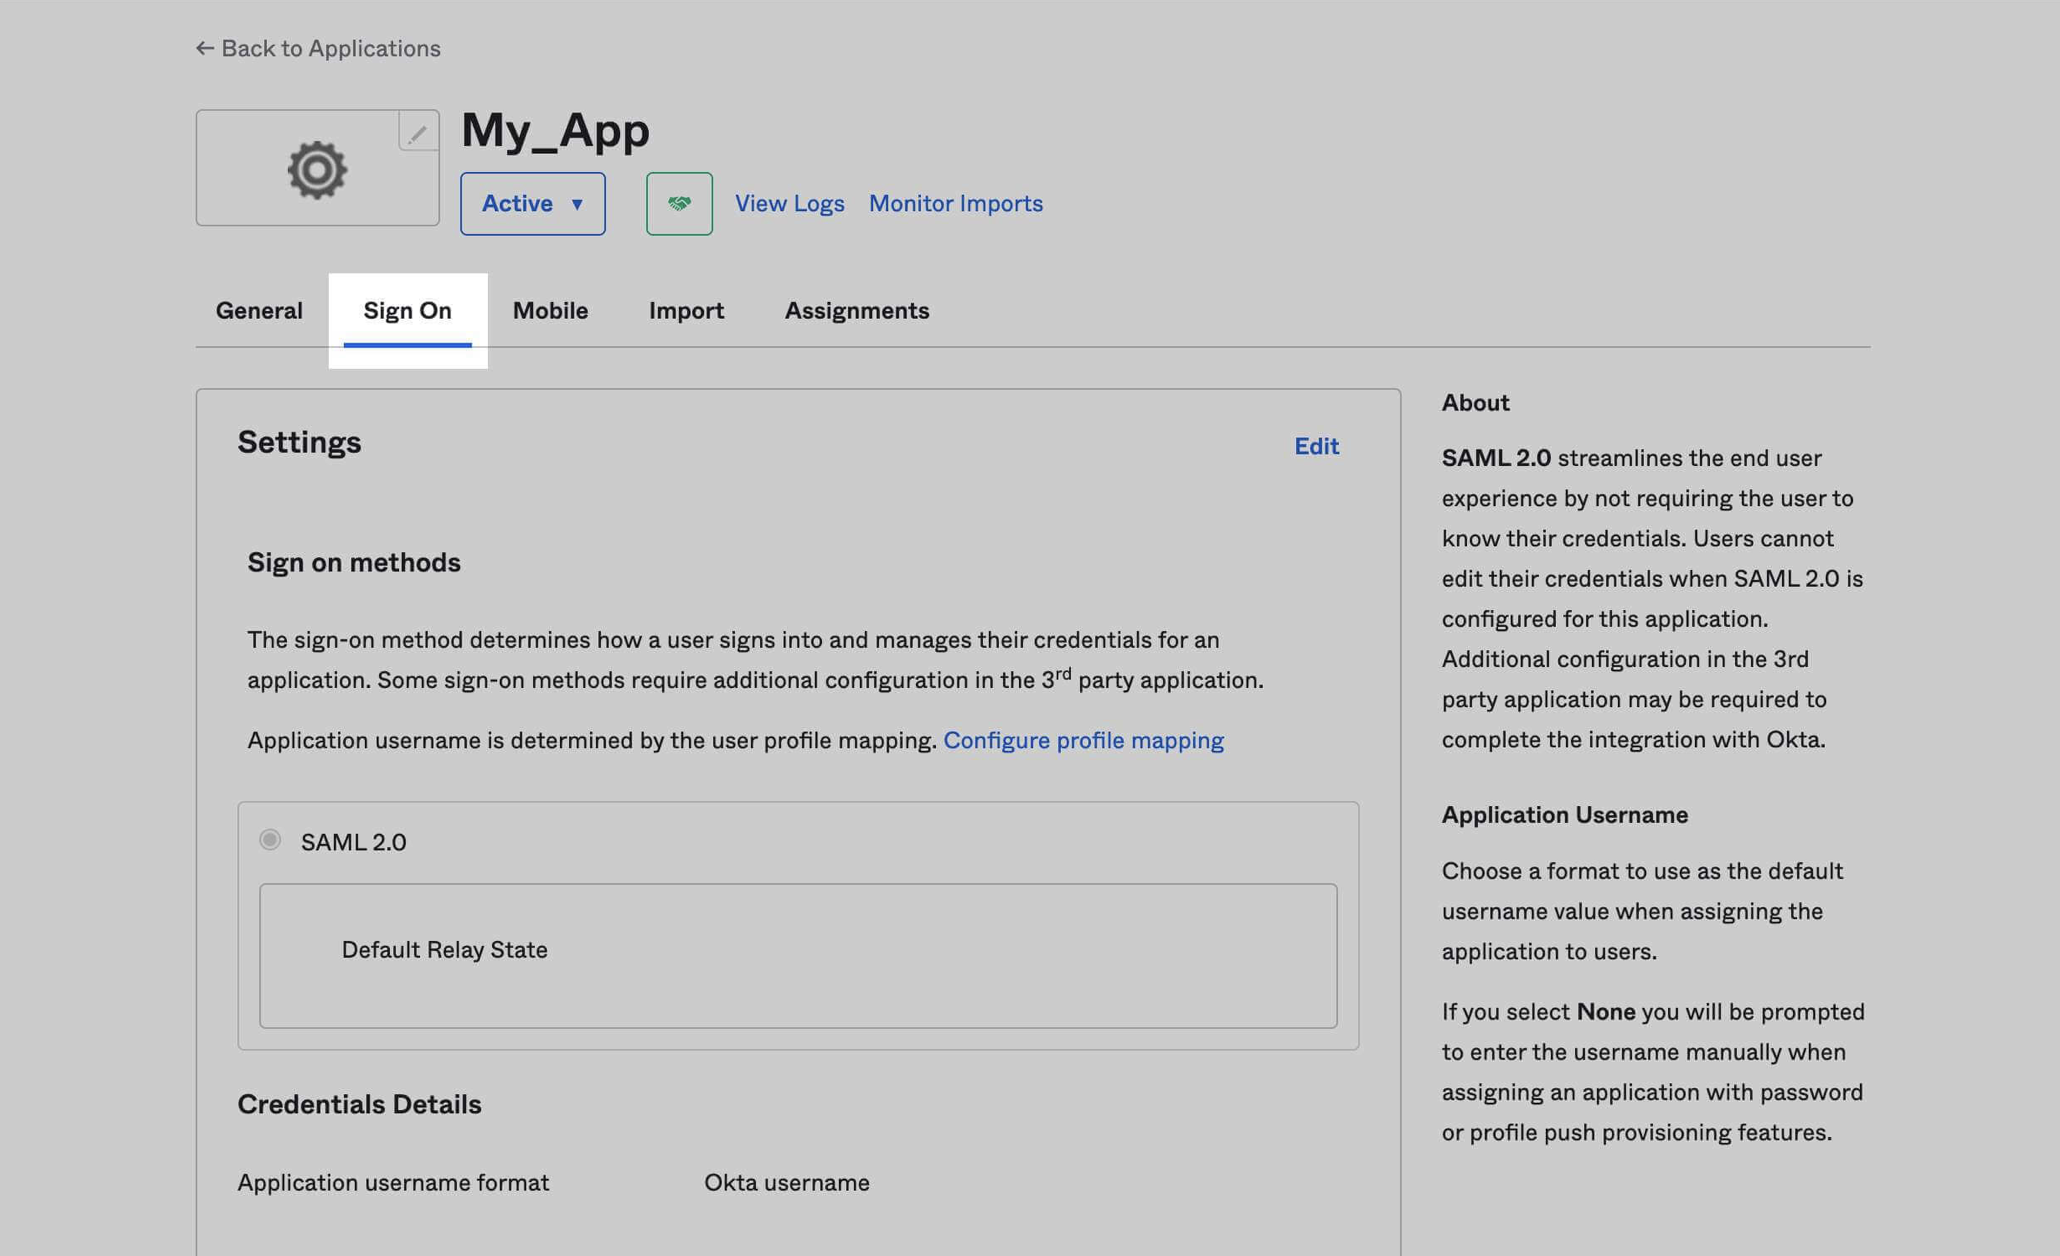
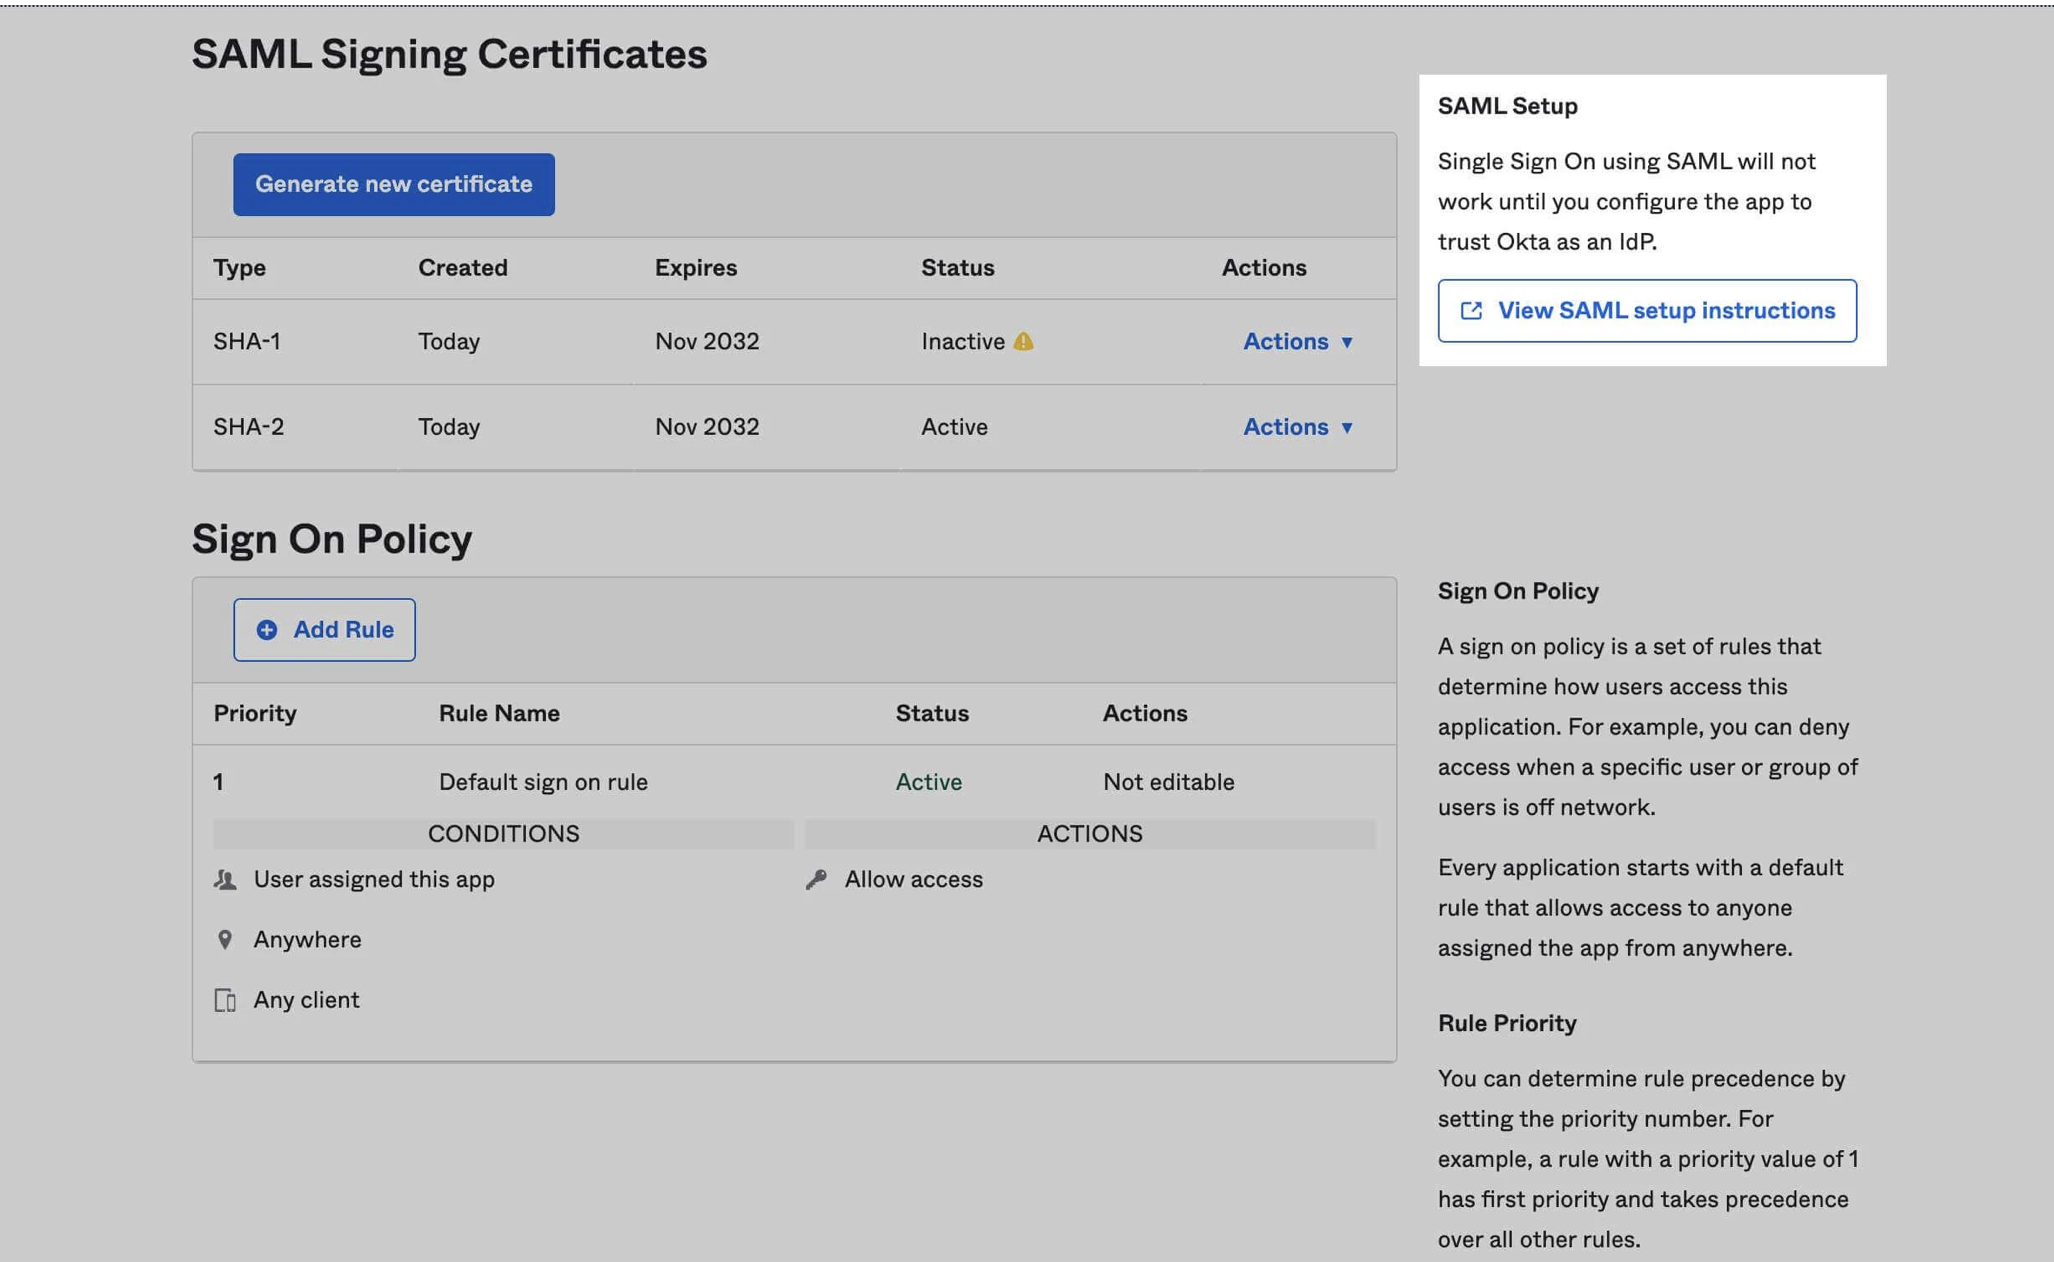
- Click on the "Sign On" tab and scroll down to the "SAML Signing Certificates".
- Click on "View SAML setup instructions".
- Next, under the Optional section at the bottom , copy the IDP metadata values.
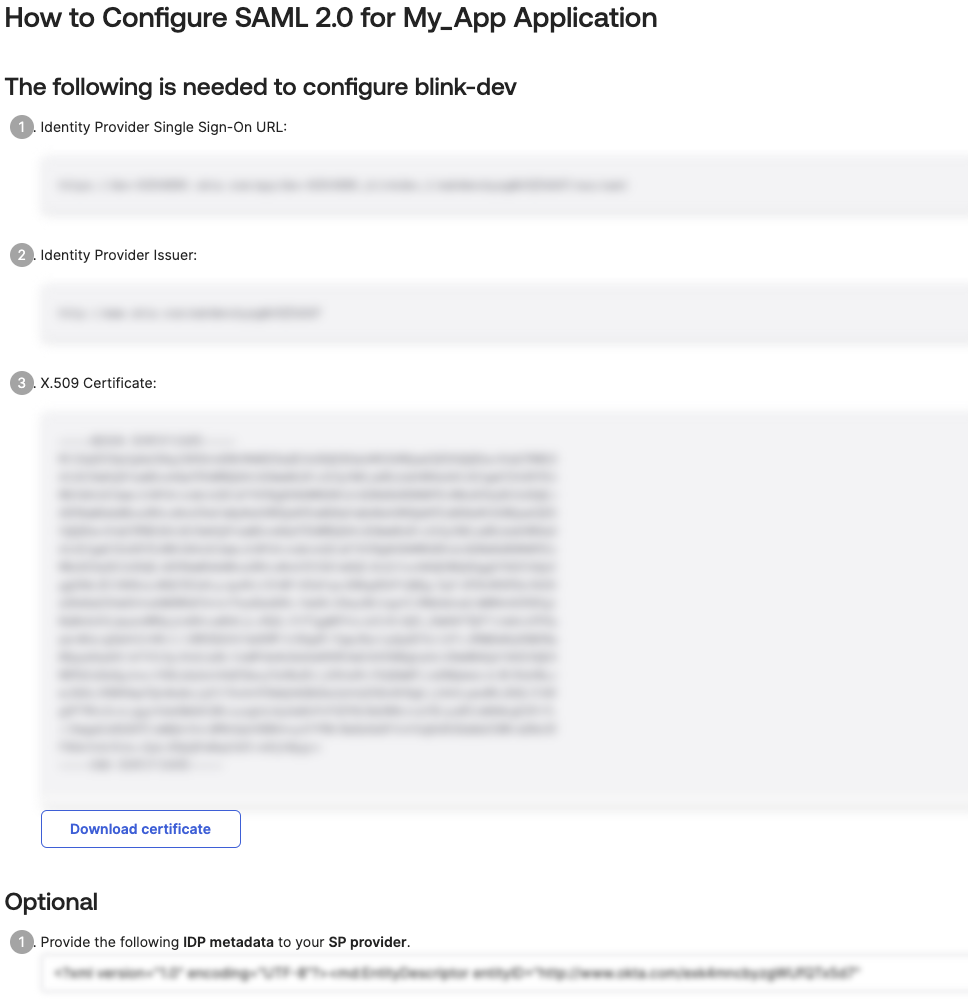
- Next, navigate to the SAML section found within the SAML tab in the Account Management Settings. Paste the IDP metadata values into the designated text field labeled Metadata File.