 Microsoft Outlook
Microsoft Outlook is a personal information manager software system from Microsoft, available as a part of the Microsoft Office suite. Though primarily an email client, Outlook also includes such functions as calendaring, task managing, contact managing, note-taking, journal logging and web browsing.
Creating a Microsoft Outlook connection
Create the connection by using one of the following methods:
Using OAuth
Creating your connection
- In the Blink platform, navigate to the Connections page > Add connection. A New Connection dialog box opens displaying icons of external service providers available.
- Select the Microsoft Outlook icon. A dialog box with name of the connection and connection methods appear.
- (Optional) Edit the name of the connection. At a later stage you cannot edit the name.
- Click Outlook to authenticate using OAuth.
- Sign in using your credentials.
Need admin approval? please refer to the Need Admin Approval guide.
Using App Registration
To create the connection you need:
- A Client ID
- A Client Secret
- A Tenant ID
Obtaining the credentials
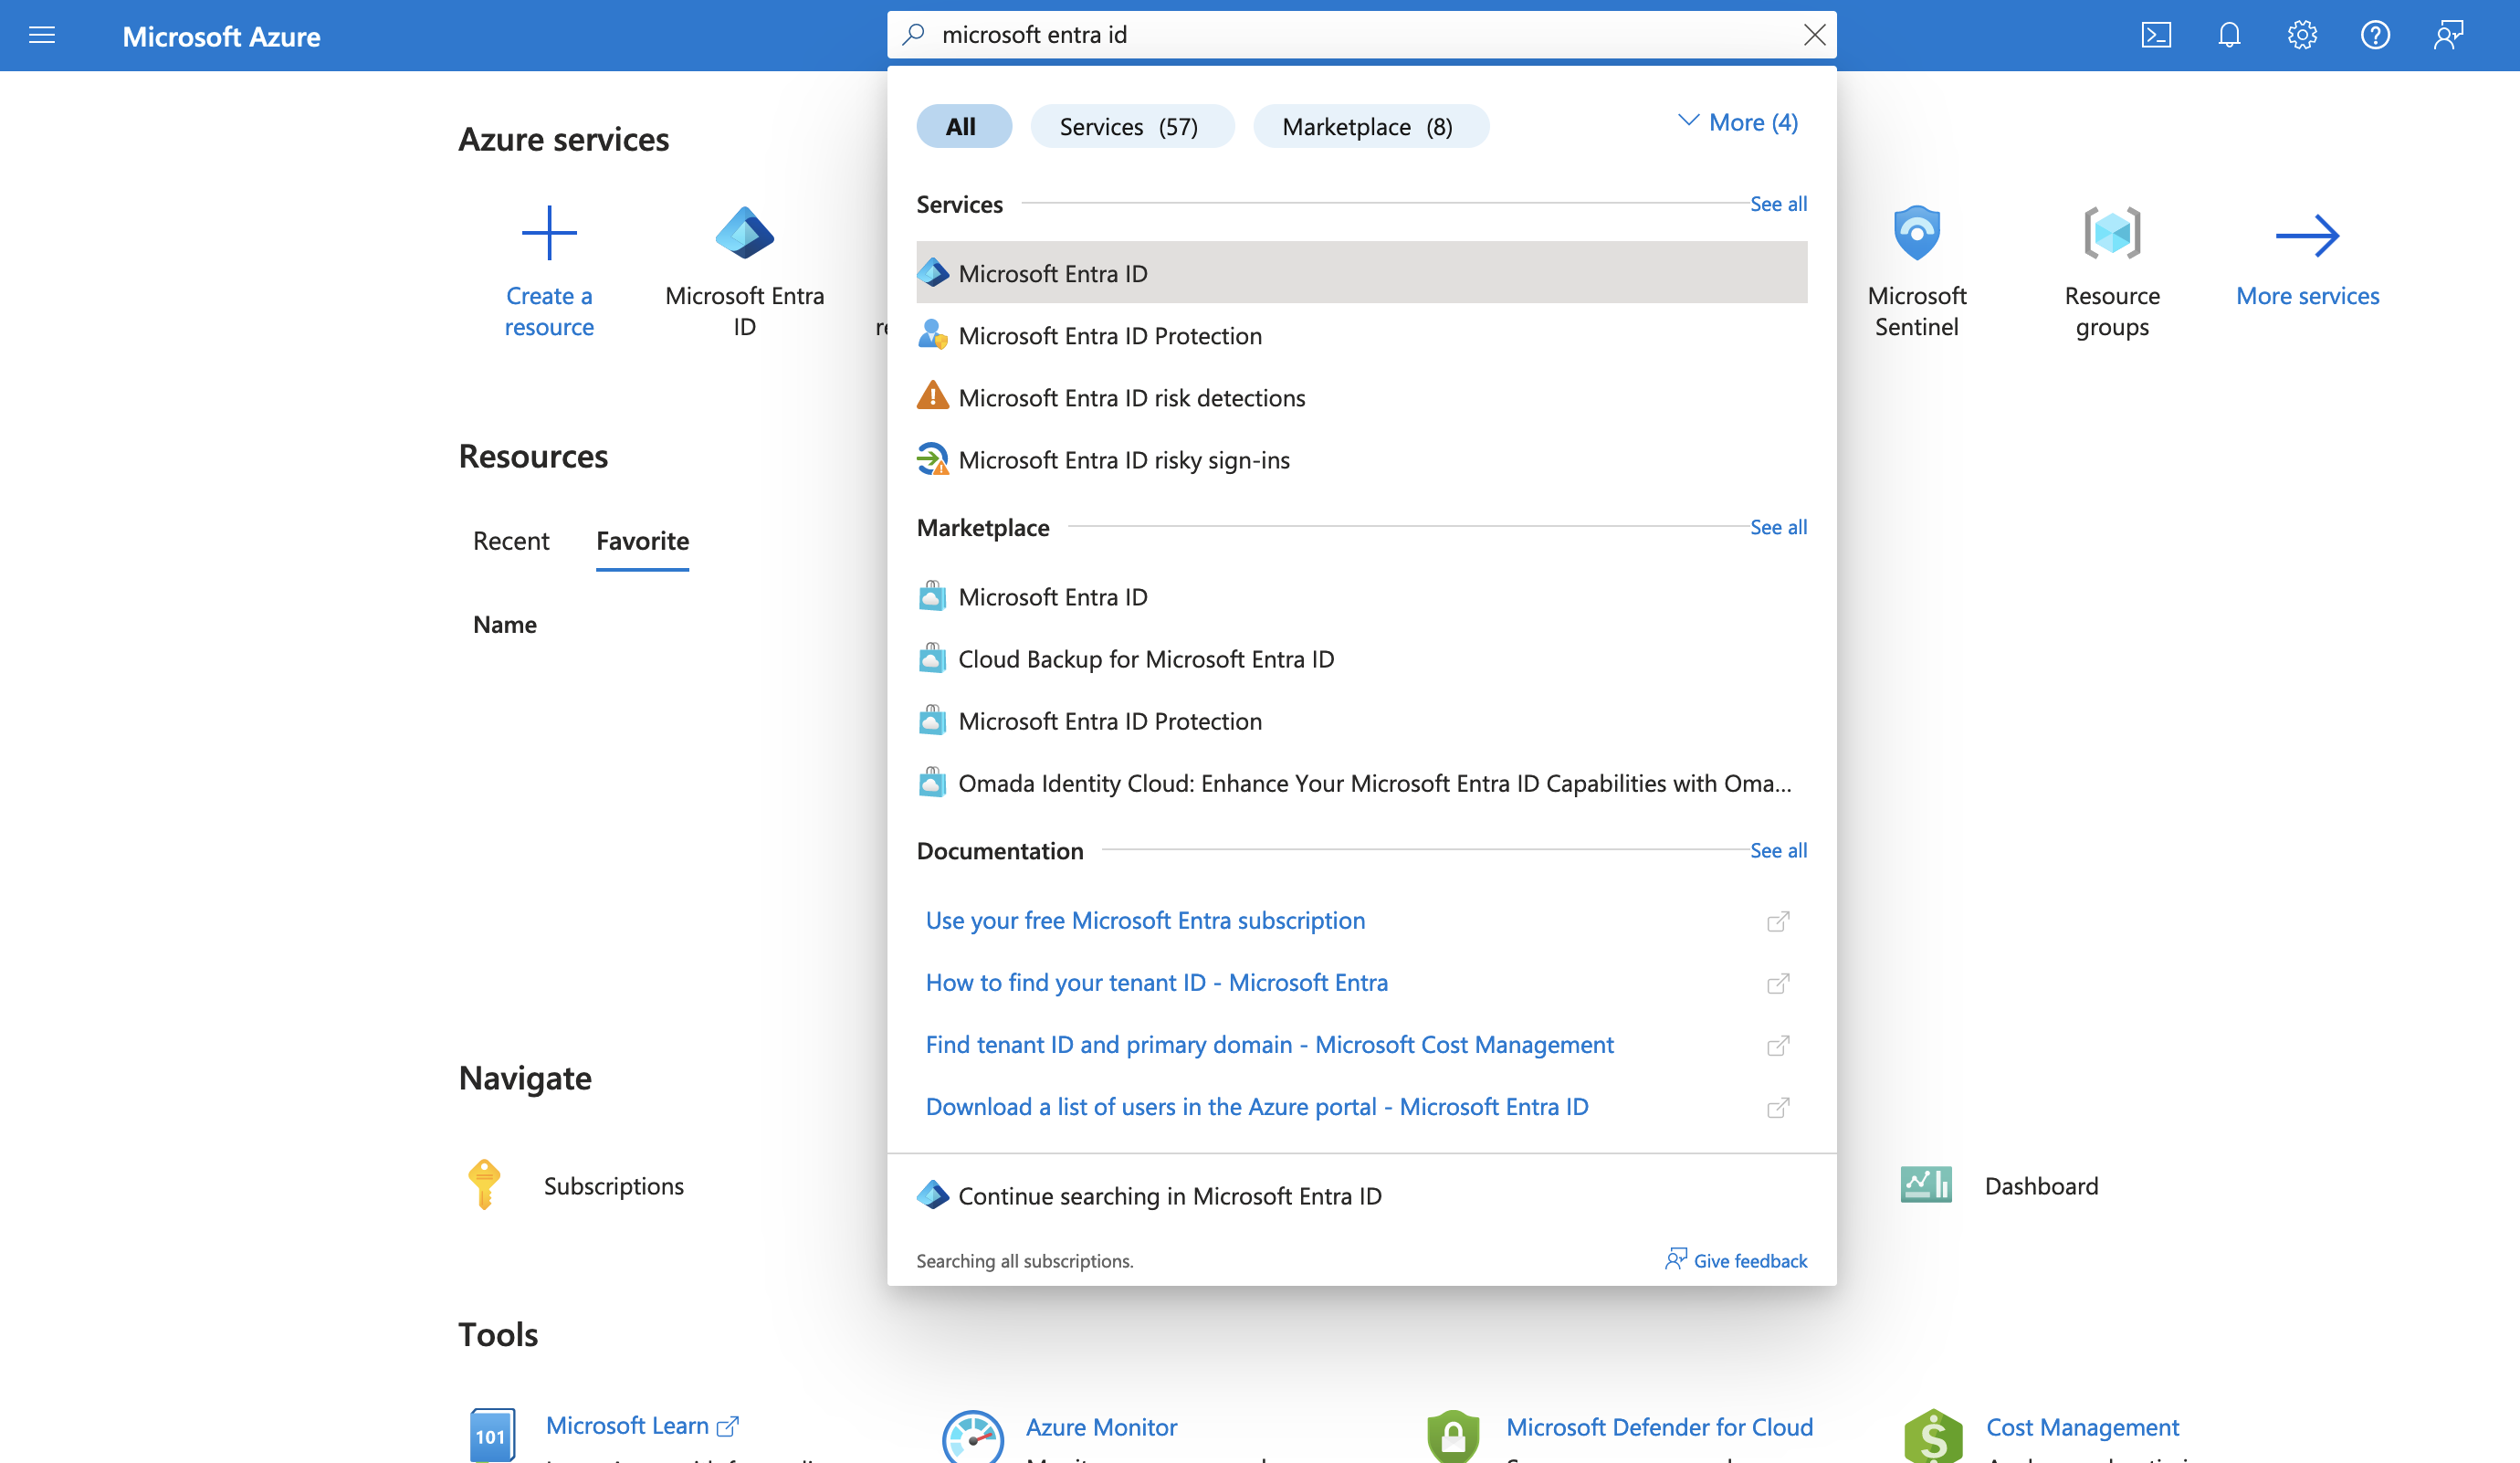
Log into the Azure Portal.
Go to the Microsoft Entra ID resource.

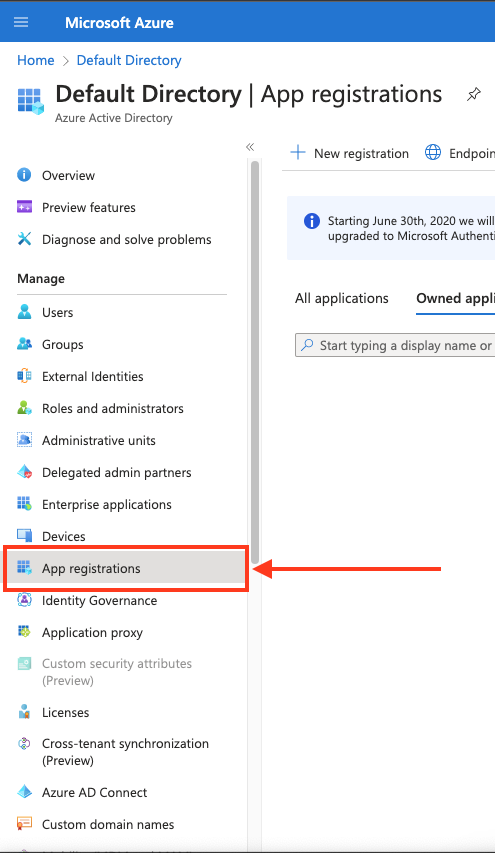
In the left-hand menu, click App registrations.

Create a new application registration or click on one of your existing applications.

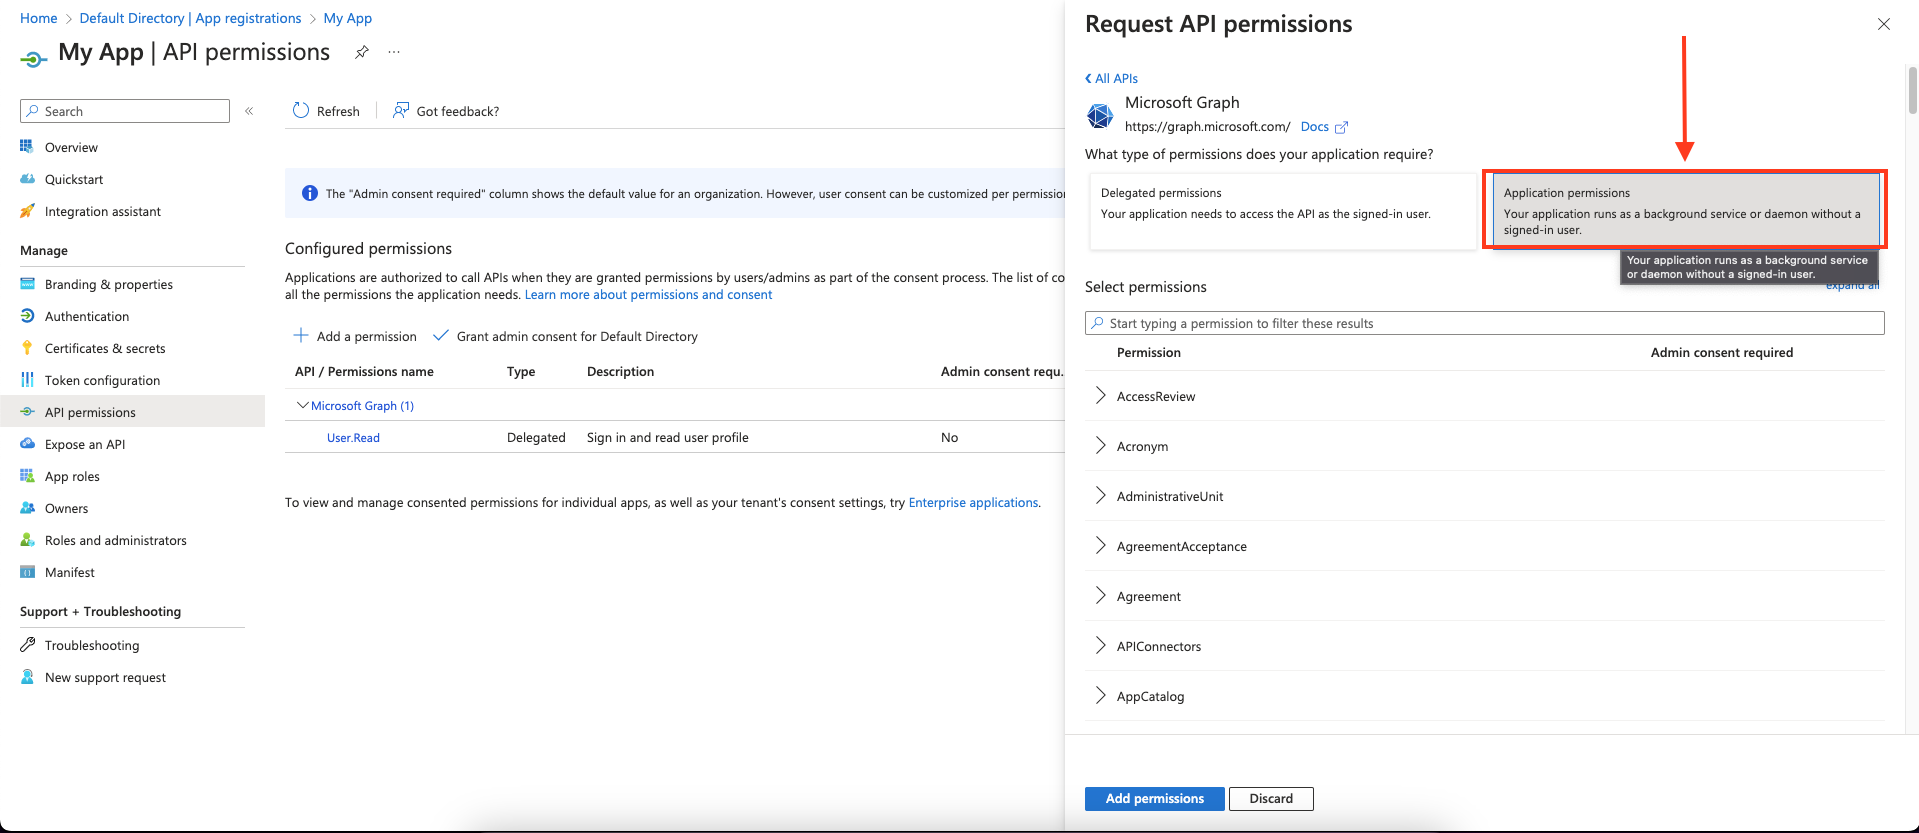
In the left-hand menu, click API permissions.

Click Add a permission and select Microsoft Graph.

Choose Application permissions and mark the permissions you wish to add.

To support all of Blink's actions, these are the required application permissions:
As a best practice, request the least privileged permissions that your app needs in order to access data and function correctly. Requesting permissions with more than the necessary privileges is poor security practice, which may cause users to refrain from consenting and affect your app's usage. For additional information, refer to Microsoft Graph permissions.
Click Add permissions to save the changes.
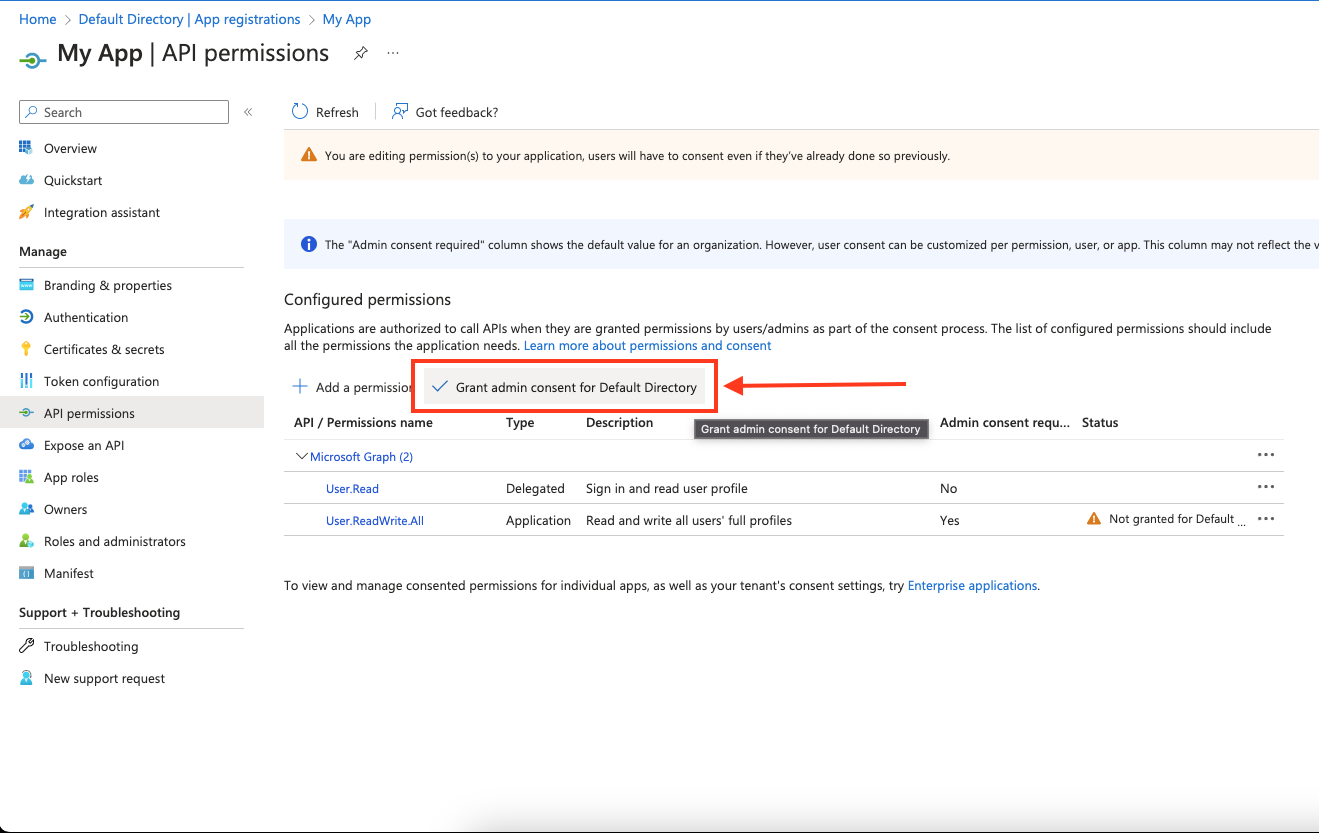
Click Grant admin consent for
<your tenant>on the API permissions page. Only admins can grant consent.
Confirm that the added permissions are now verified.

Navigate to Overview and Copy your client ID and tenant ID.

Create a new client secret.

Copy the secret value.

Creating your connection
- In the Blink platform, navigate to the Connections page > Add connection. A New Connection dialog box opens displaying icons of external service providers available.
- Select the Microsoft Outlook icon. A dialog box with name of the connection and connection methods appear.
- (Optional) Edit the name of the connection. At a later stage you cannot edit the name.
- Select App Registration as the method to create the connection.
- Fill in the parameters:
- The Client ID
- The Client Secret
- The Tenant ID
- (Optional) Click Test Connection to test it.
- Click Create connection. The new connection appears on the Connections page.