 Microsoft Entra ID
Azure Active Directory stores information about objects on the network and makes this information easy for administrators and users to find and use. Microsoft Entra ID uses a structured data store as the basis for a logical, hierarchical organization of directory information.
Creating an Microsoft Entra ID connection
Use one of the following methods to make a connection:
Using OAuth
Creating your connection
- In the Blink platform, navigate to the Connections page > Add connection. A New Connection dialog box opens displaying icons of external service providers available.
- Select the Azure Active Directory icon. A dialog box with name of the connection and connection methods appear.
- (Optional) Edit the name of the connection. At a later stage you cannot edit the name.
- Click Microsoft Entra ID to authenticate using OAuth.
- Sign in using your credentials.
Using App Registration
To create the connection you need:
- A client ID
- A client secret
- A tenant ID
Obtaining the credentials
Log into the Azure Portal.
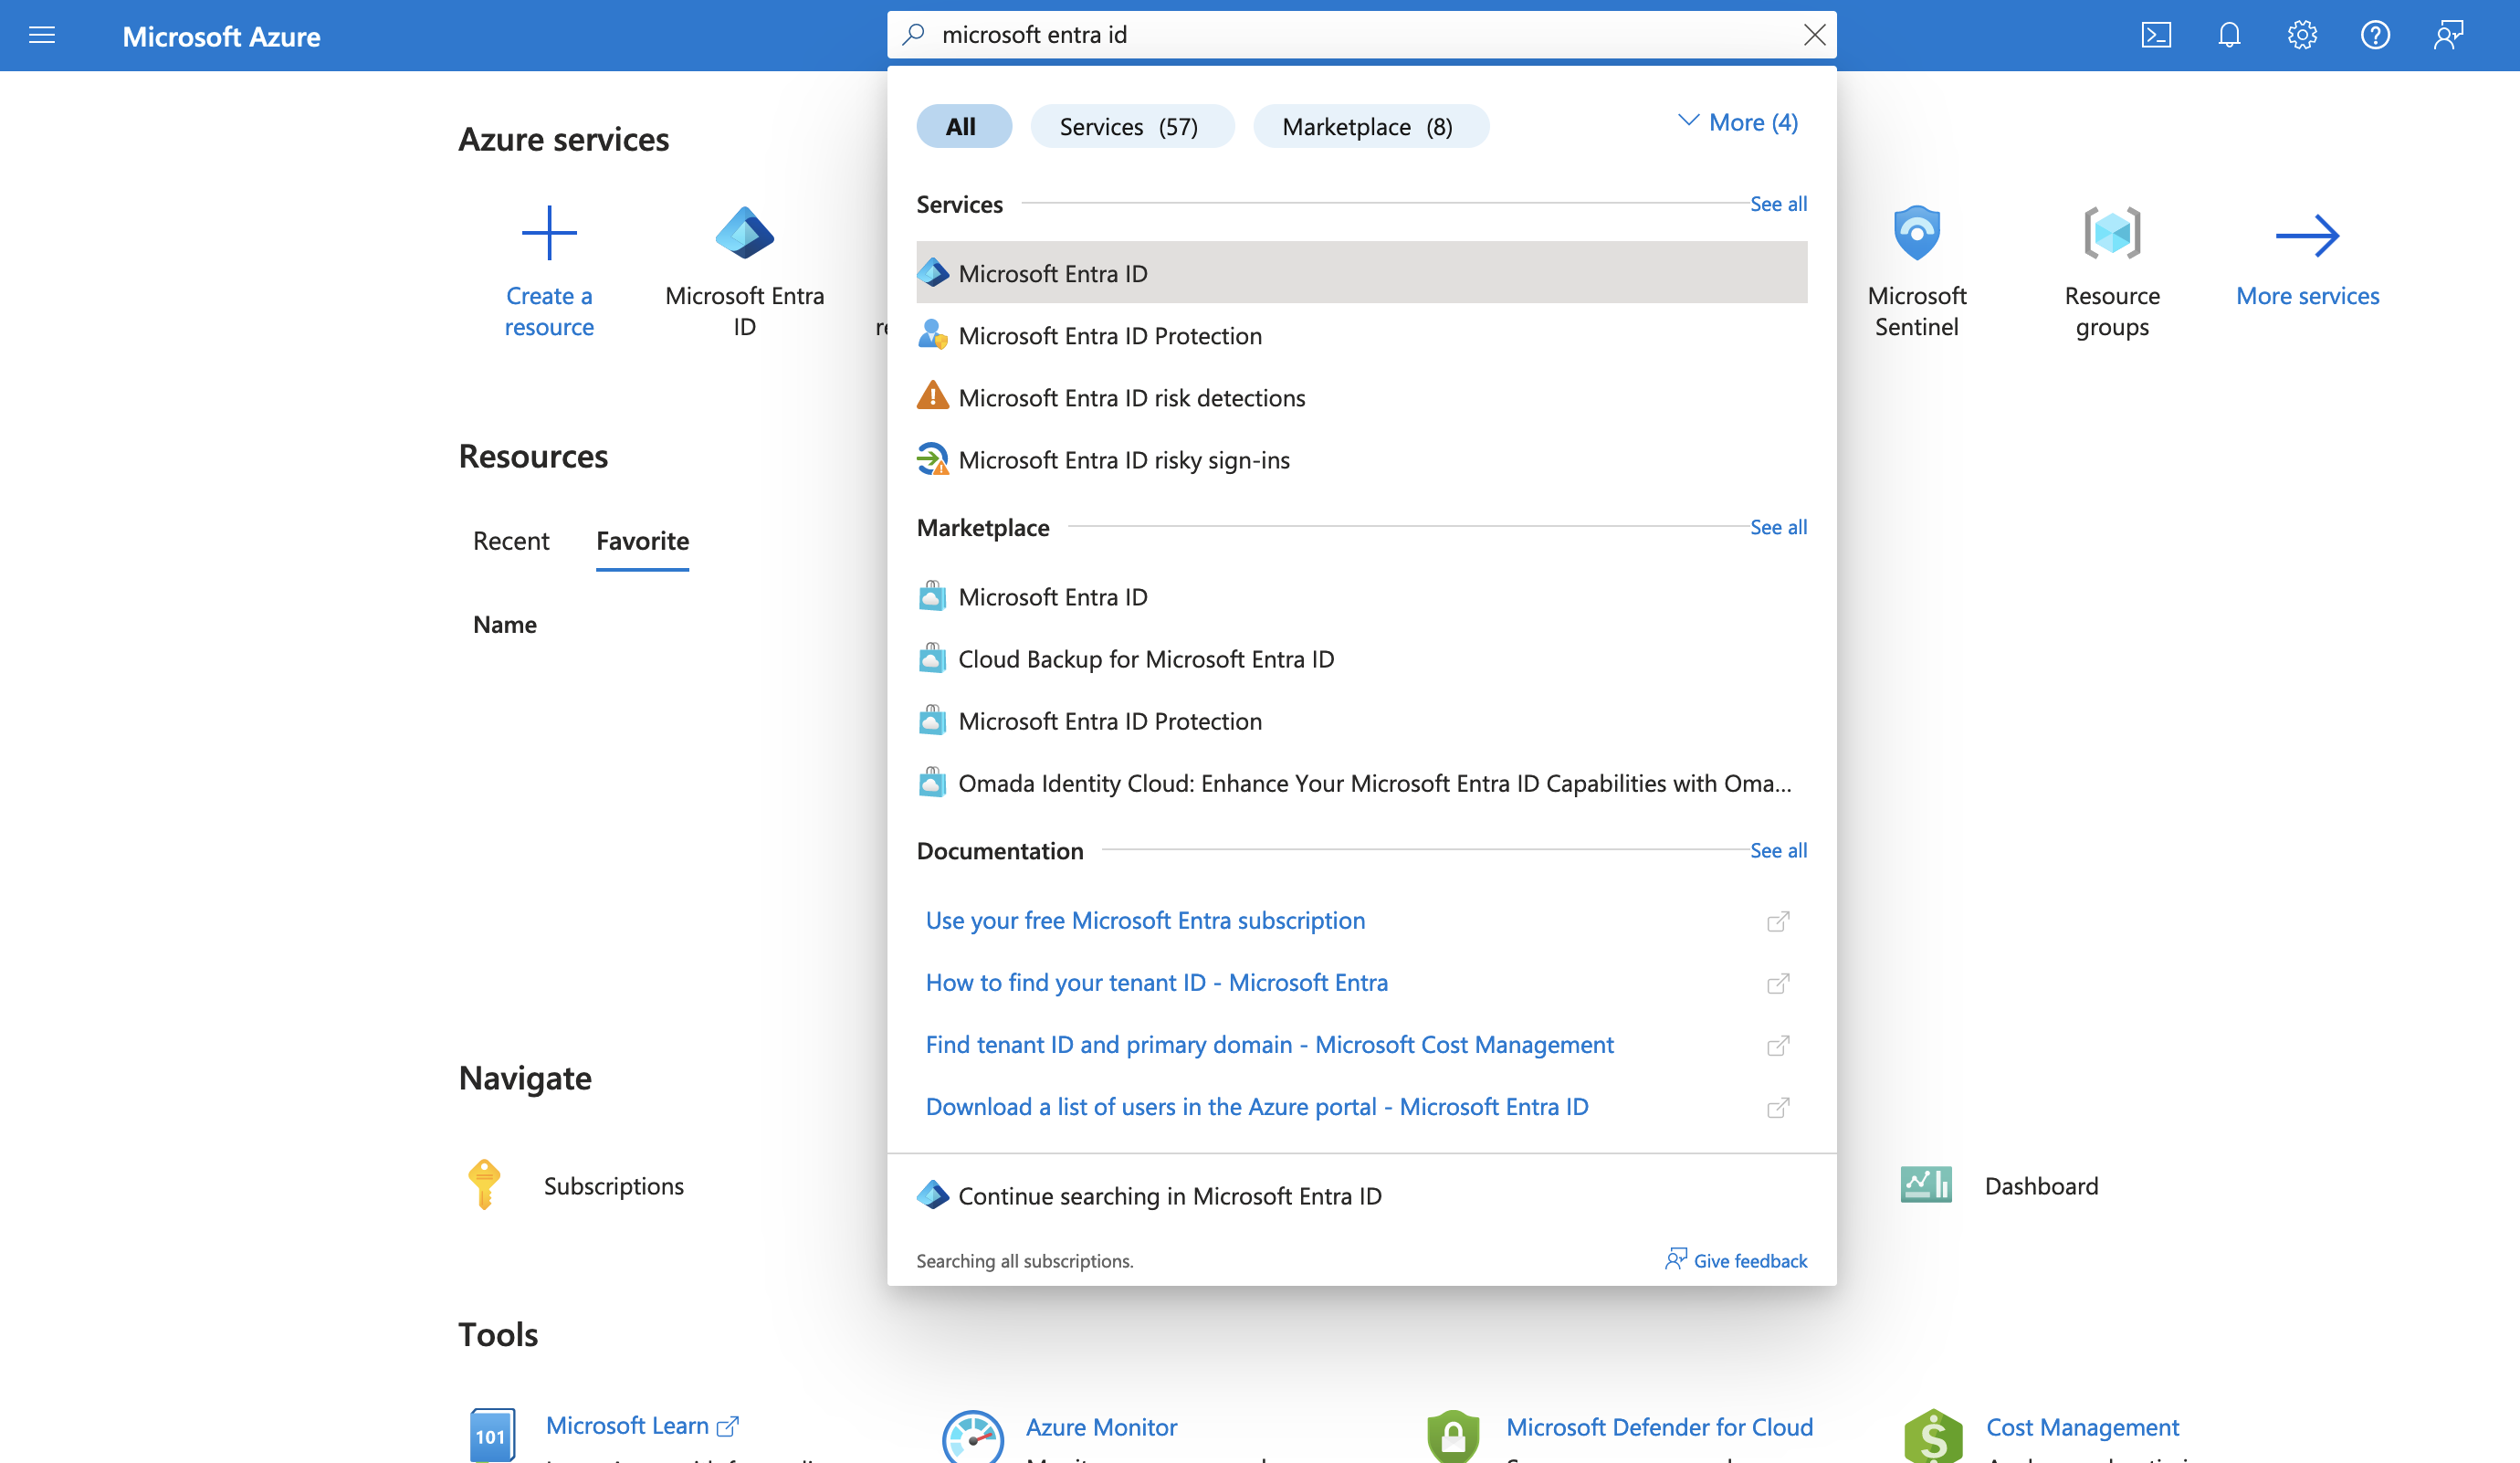
Go to the Microsoft Entra ID resource.
In the left-hand menu, click App registrations.
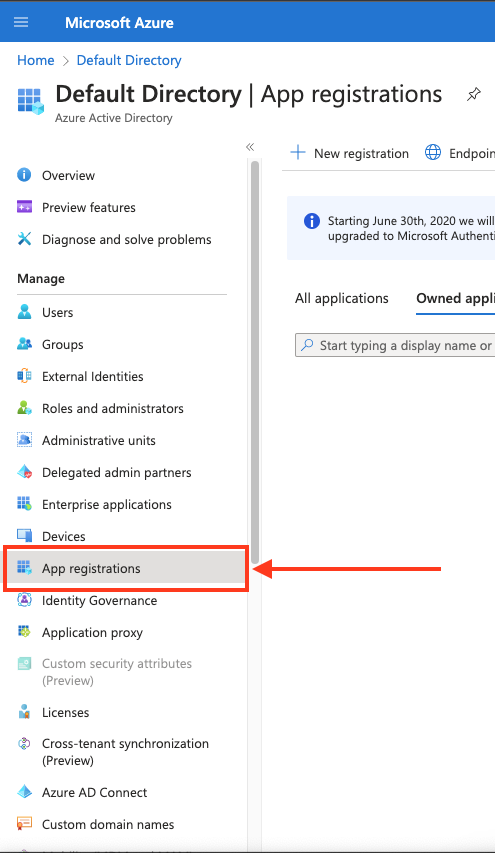
Select the app for which you want to grant permission.

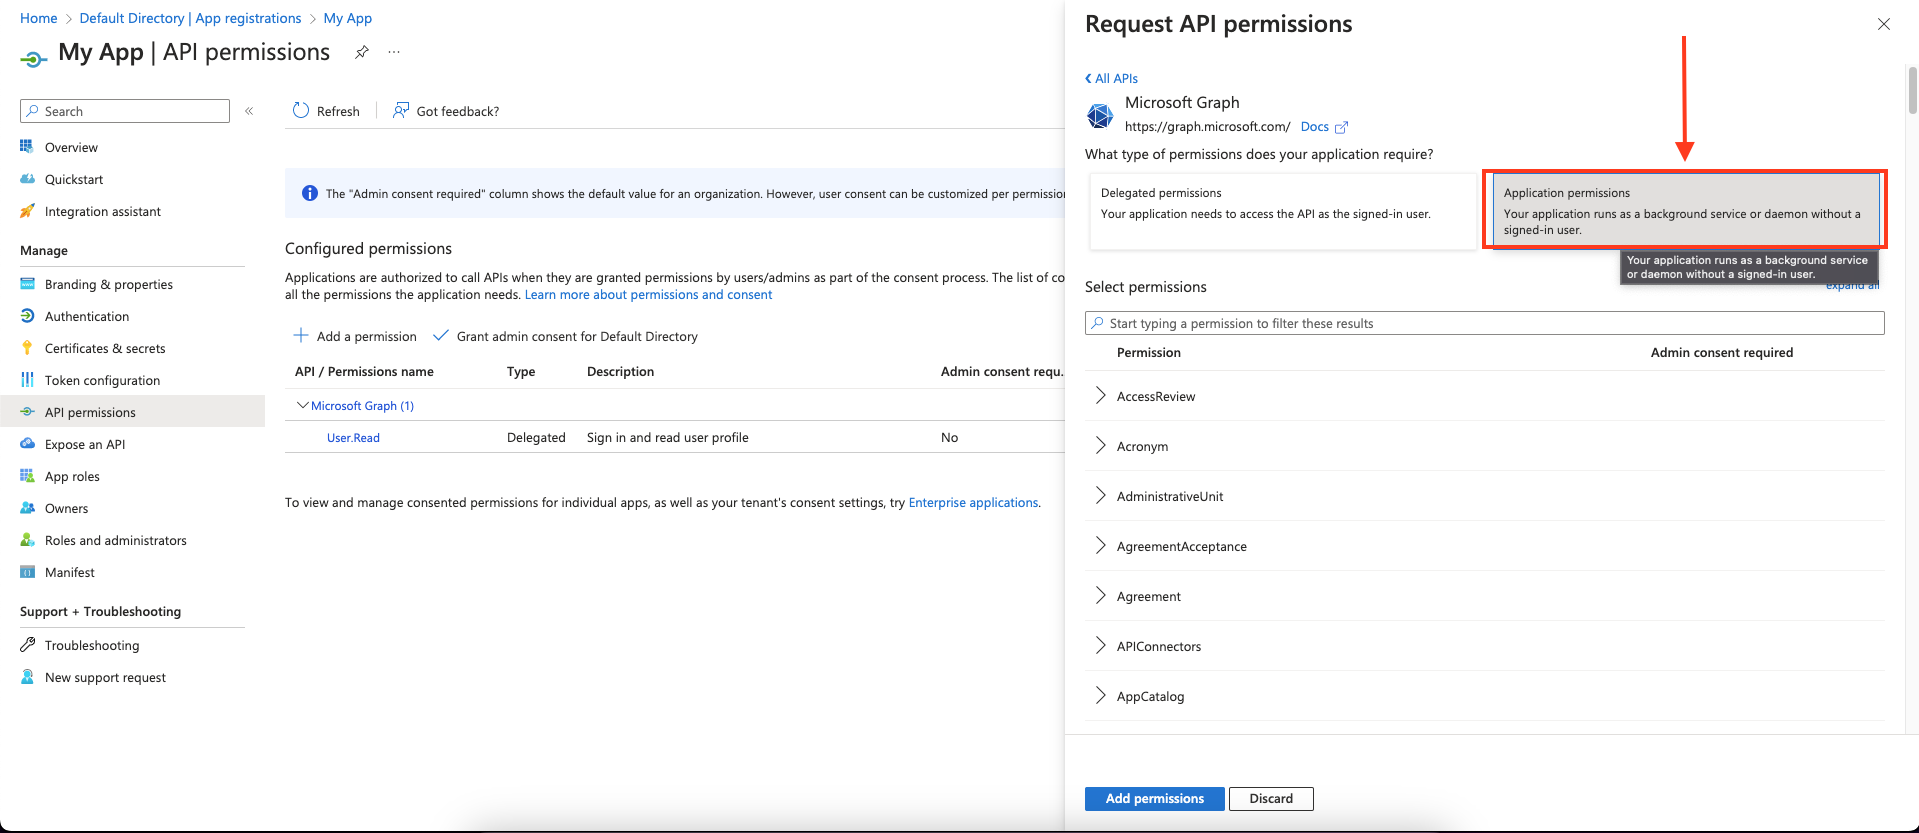
In the left-hand menu, click API permissions.

Click Add a permission and select Microsoft Graph.

Click Application permissions and select the following permission:
User.ReadWrite.AllGroupMember.ReadWrite.AllGroup.ReadWrite.AllDirectory.AccessAsUser.All
Click Add permissions to save the changes.
Click Grant admin consent for
<your tenant>on the API permissions page.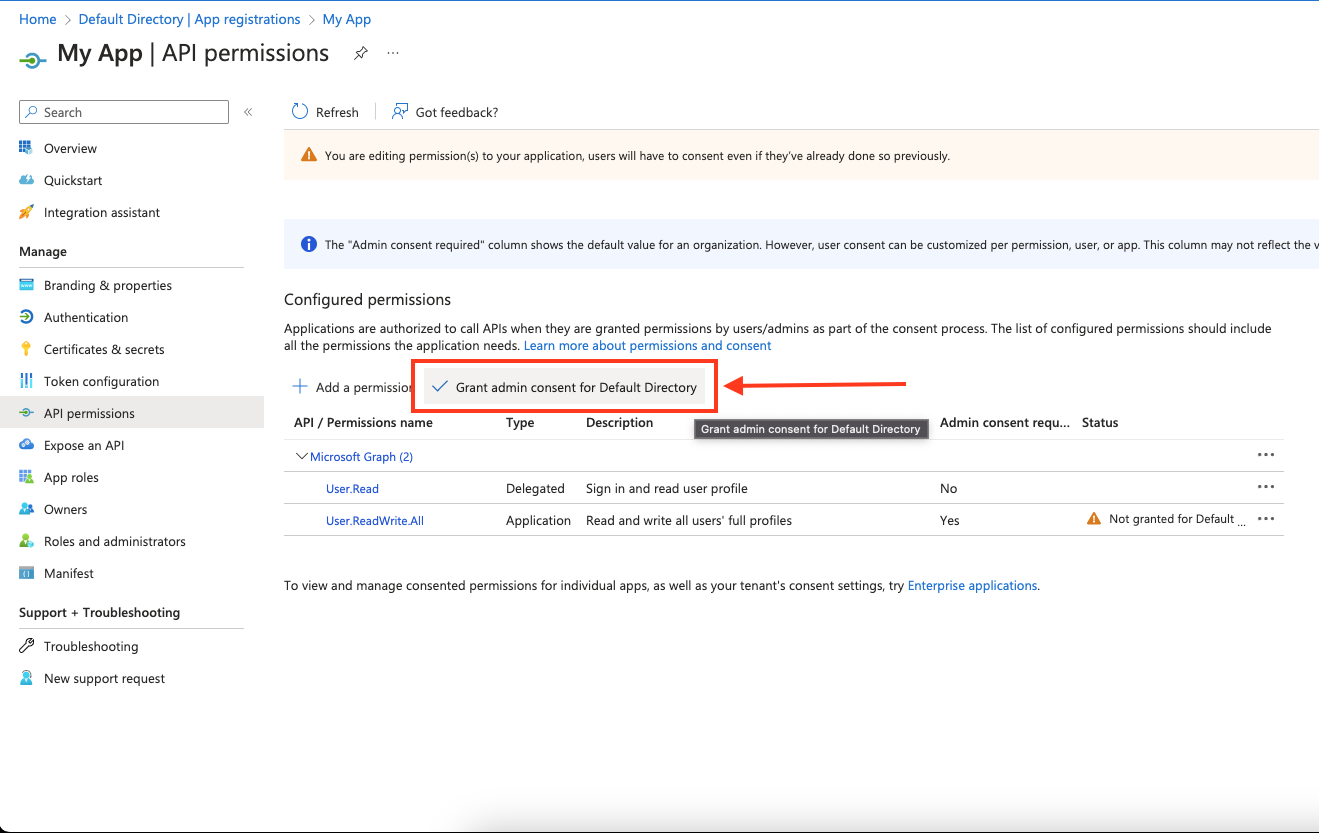
Creating your connection
- In the Blink platform, navigate to the Connections page > Add connection. A New Connection dialog box opens displaying icons of external service providers available.
- Select the Microsoft Entra ID icon. A dialog box with name of the connection and connection methods appear.
- (Optional) Edit the name of the connection. At a later stage you cannot edit the name.
- Select App Registration as the method to create the connection.
- Fill in the parameters:
- The client ID
- The client secret
- The tenant ID
- (Optional) Click Test Connection to test it.
- Click Create connection. The new connection appears on the Connections page.
Using LDAP
Microsoft Entra ID supports administration using the LDAP protocol, allowing you to manage your workspace using Blink's LDAP actions instead of the Microsoft Entra ID integration.
In order to expose your Microsoft Entra ID workspace as an LDAP server, follow these steps:
- Set up an Microsoft Entra ID Domain Services managed domain.
- Access the domain controller's virtual subnet.
- If your runner is running on premises and connected to the Azure virtual subnet, your LDAP server URL is the domain controller's IP address.
- Otherwise, in order to use an external runner, you need to add a public IP to the virtual subnet and assign it to your domain controller.
- To create an LDAP connection to this server:
- Use the IP address accessible to the runner as your URI, with
ldap://protocol, orldaps://if you enabled "Secure LDAP" - Acquire the Distinguished Name of a Microsoft Entra ID user who has permissions to the server. You can use dsquery on a connected Windows Server to obtain the full name of a user.
- Use the password of the specified user. After activating your domain controller, the user should reset their password so that it is properly synced.
- Use the IP address accessible to the runner as your URI, with
Interactive Tutorial Guides
You can also refer to the following tutorial guides for a more in-depth understanding of how to create a Microsoft Entra ID connection.