 Reco
Reco
Reco leverages business context to protect sensitive assets shared through Slack, Jira, Microsoft 365, Google Workspace, and more
Creating a Reco connection
To create the connection you need:
- An API token
- An API address
Obtaining the credentials
Obtain the API token from the authorization on the website. Open the browser Developer tools and inspect network requests to extract the value out of the request headers.
The instructions are for Google Chrome, but most major browsers are similar.
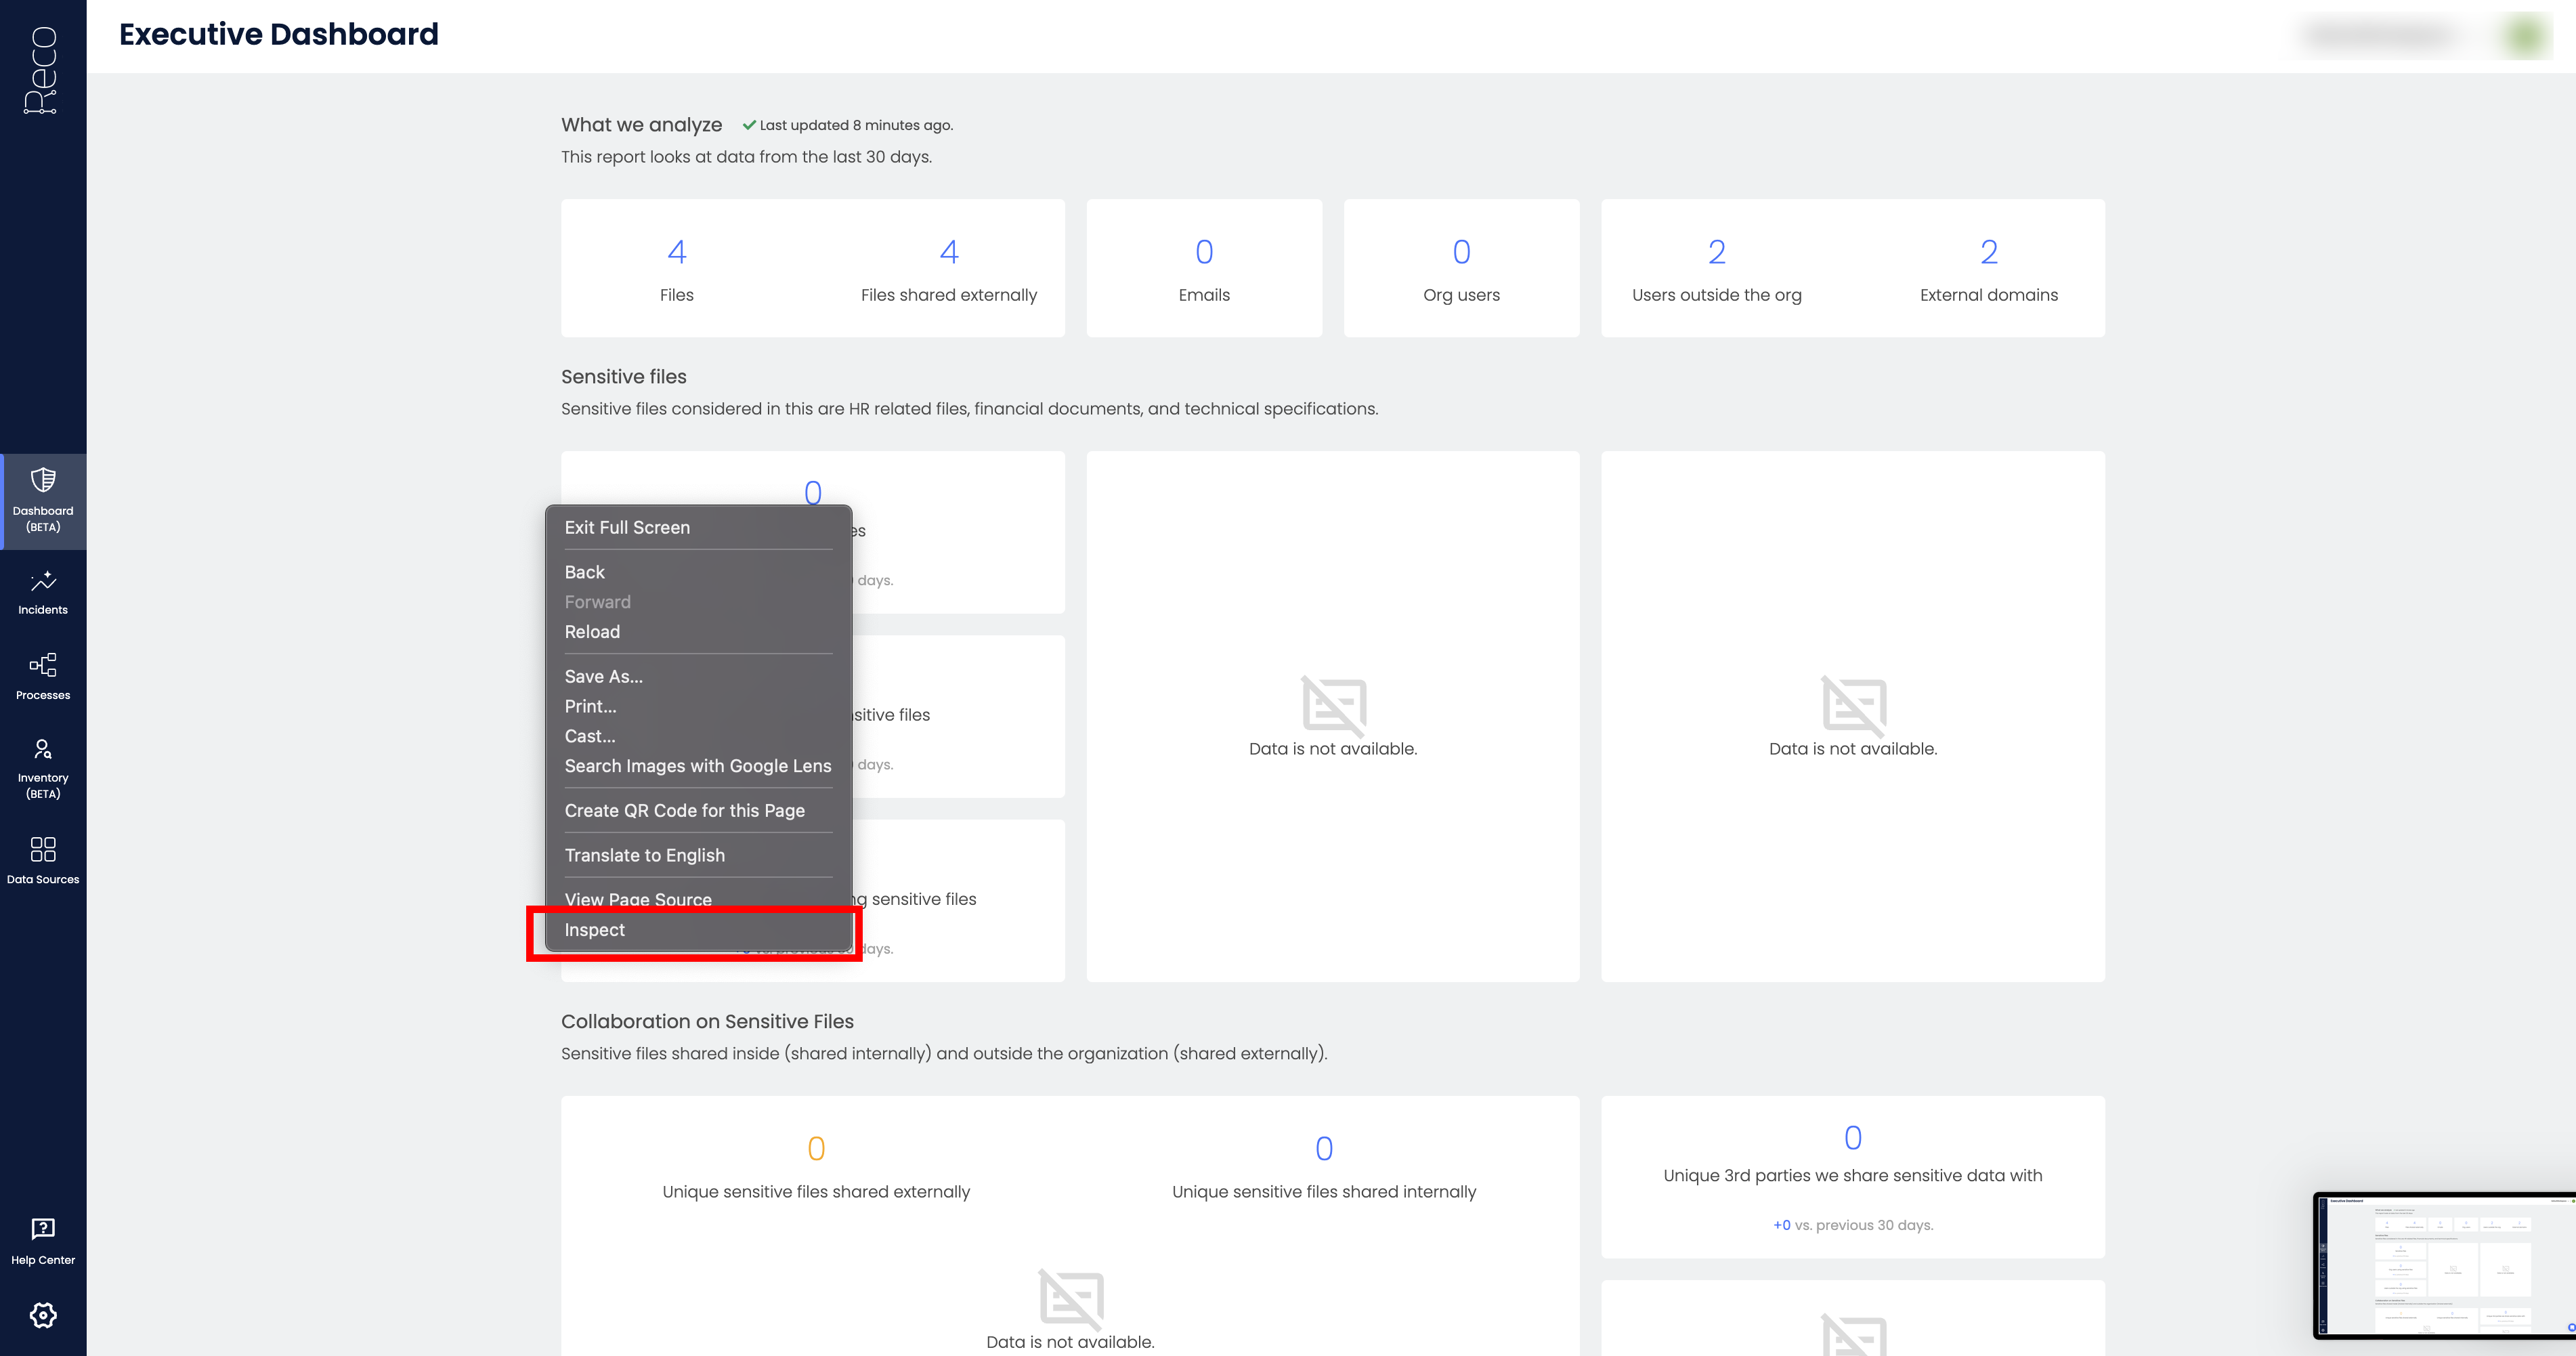
Open your Reco workspace dashboard.
Right click anywhere on the page and select Inspect.
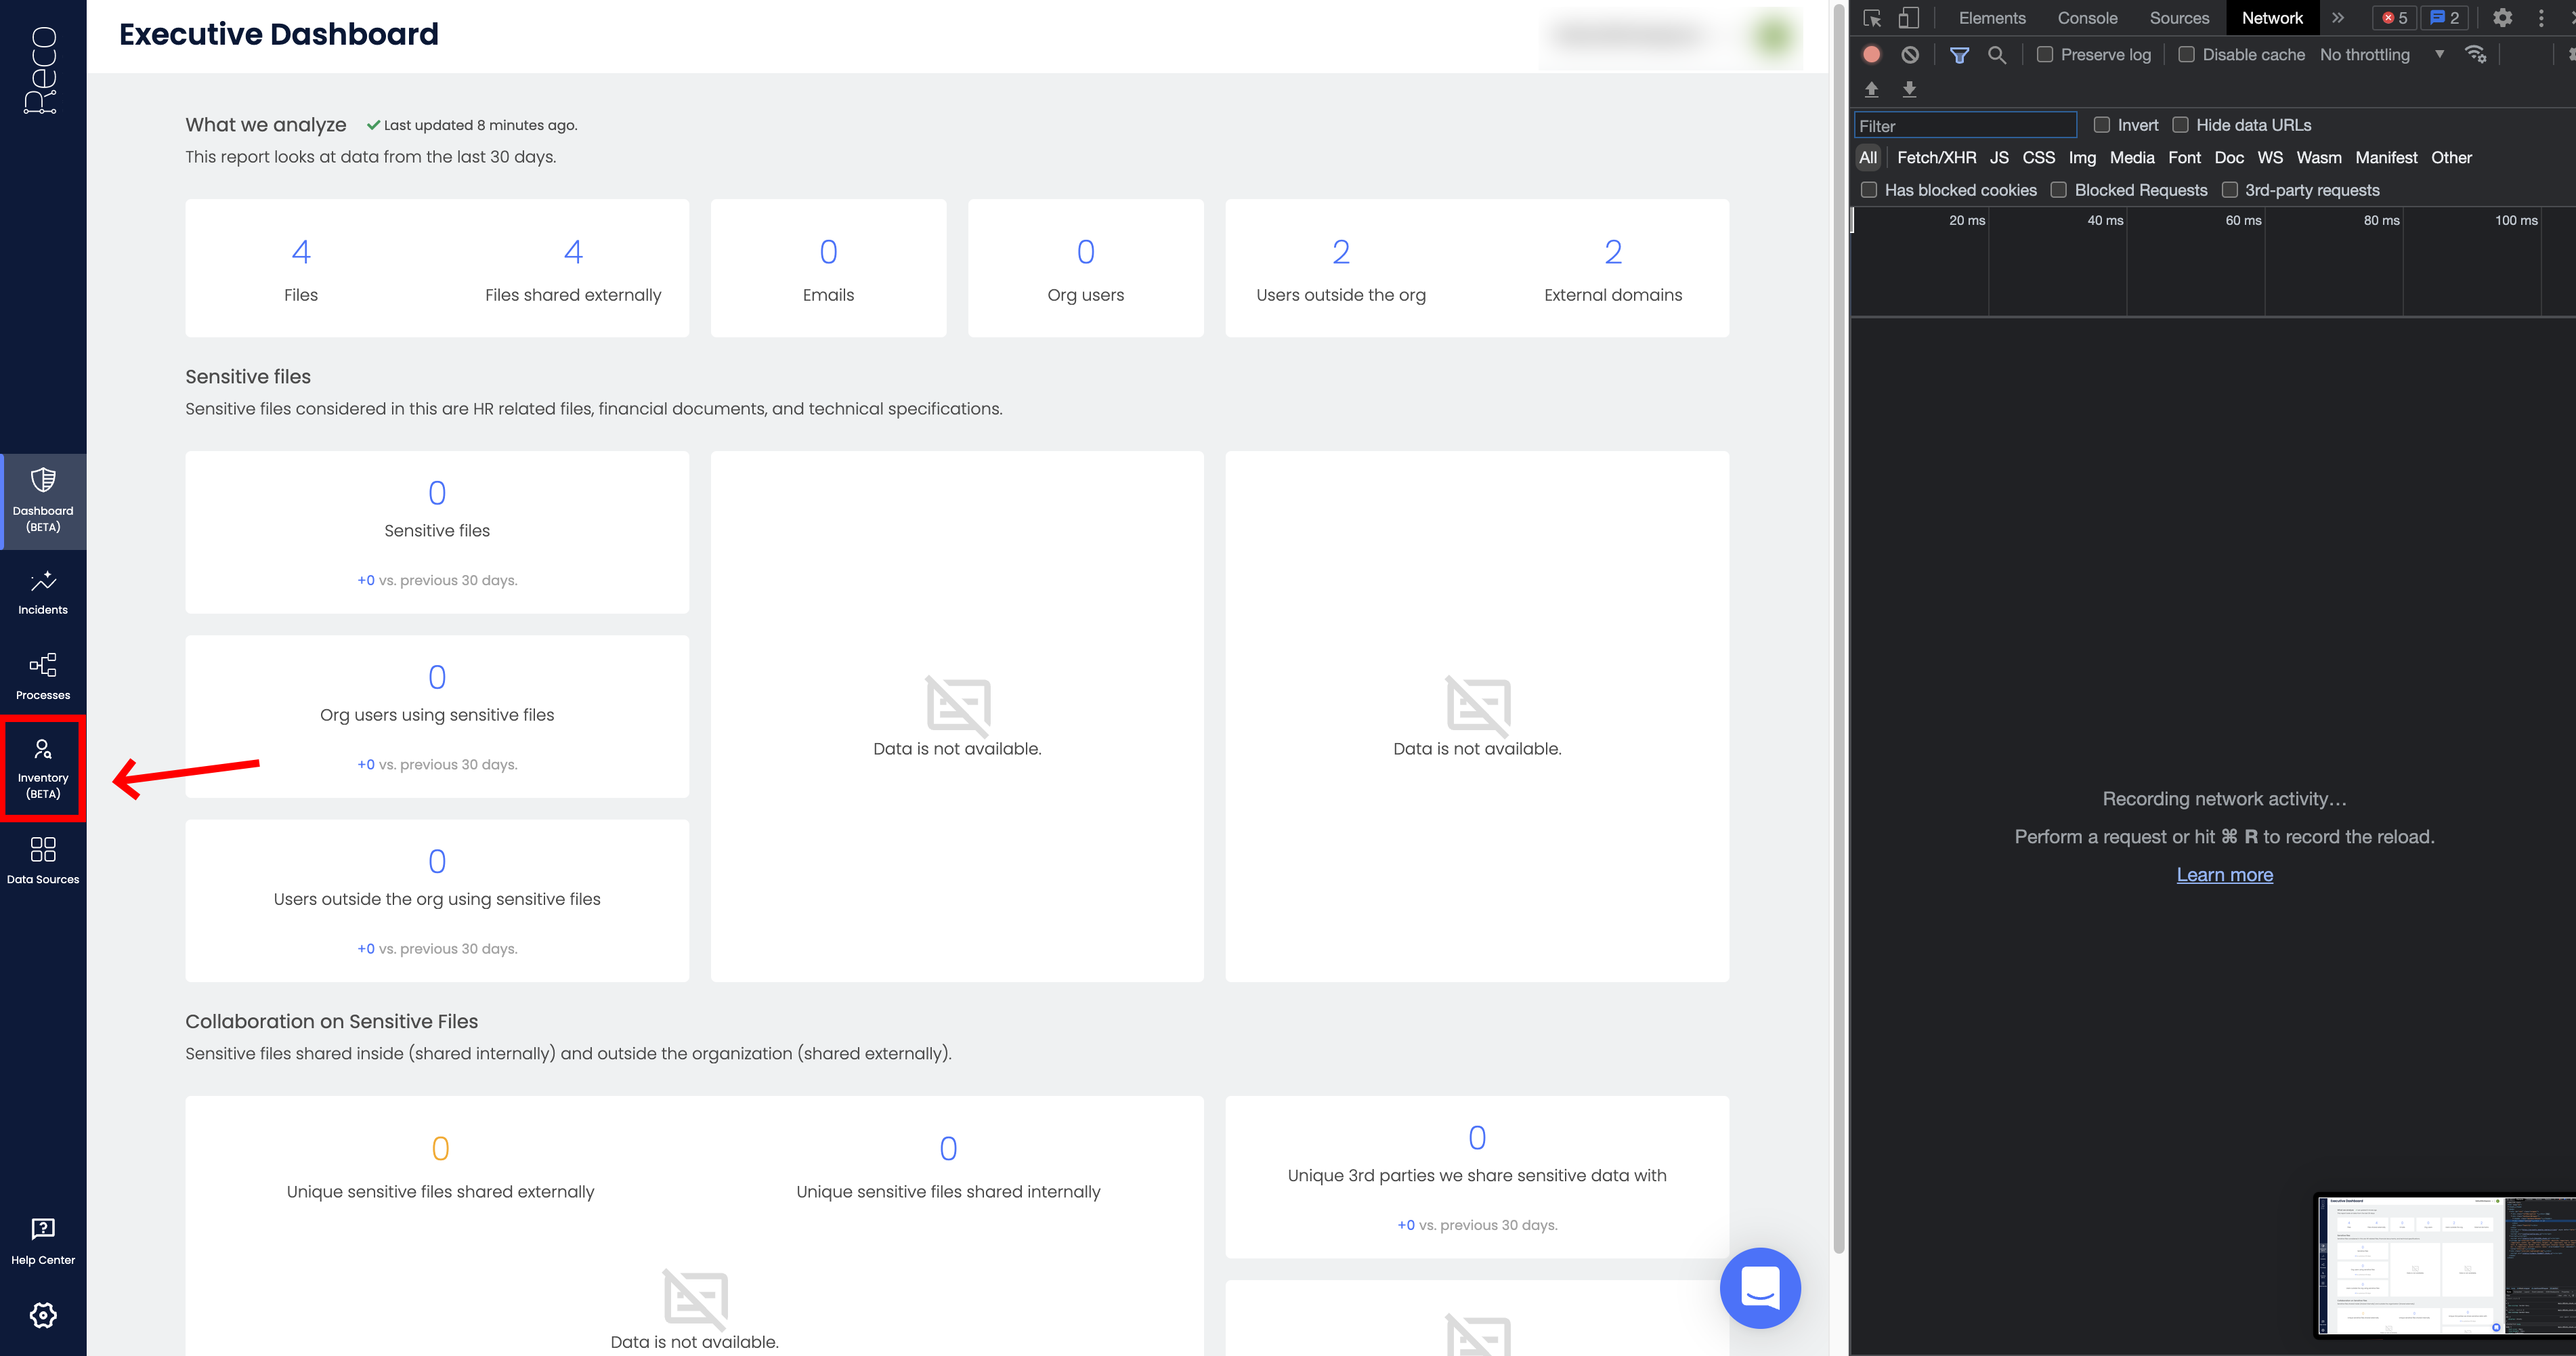
In the developer console, select Network.

With the network tab open, click the Inventory page in Reco.
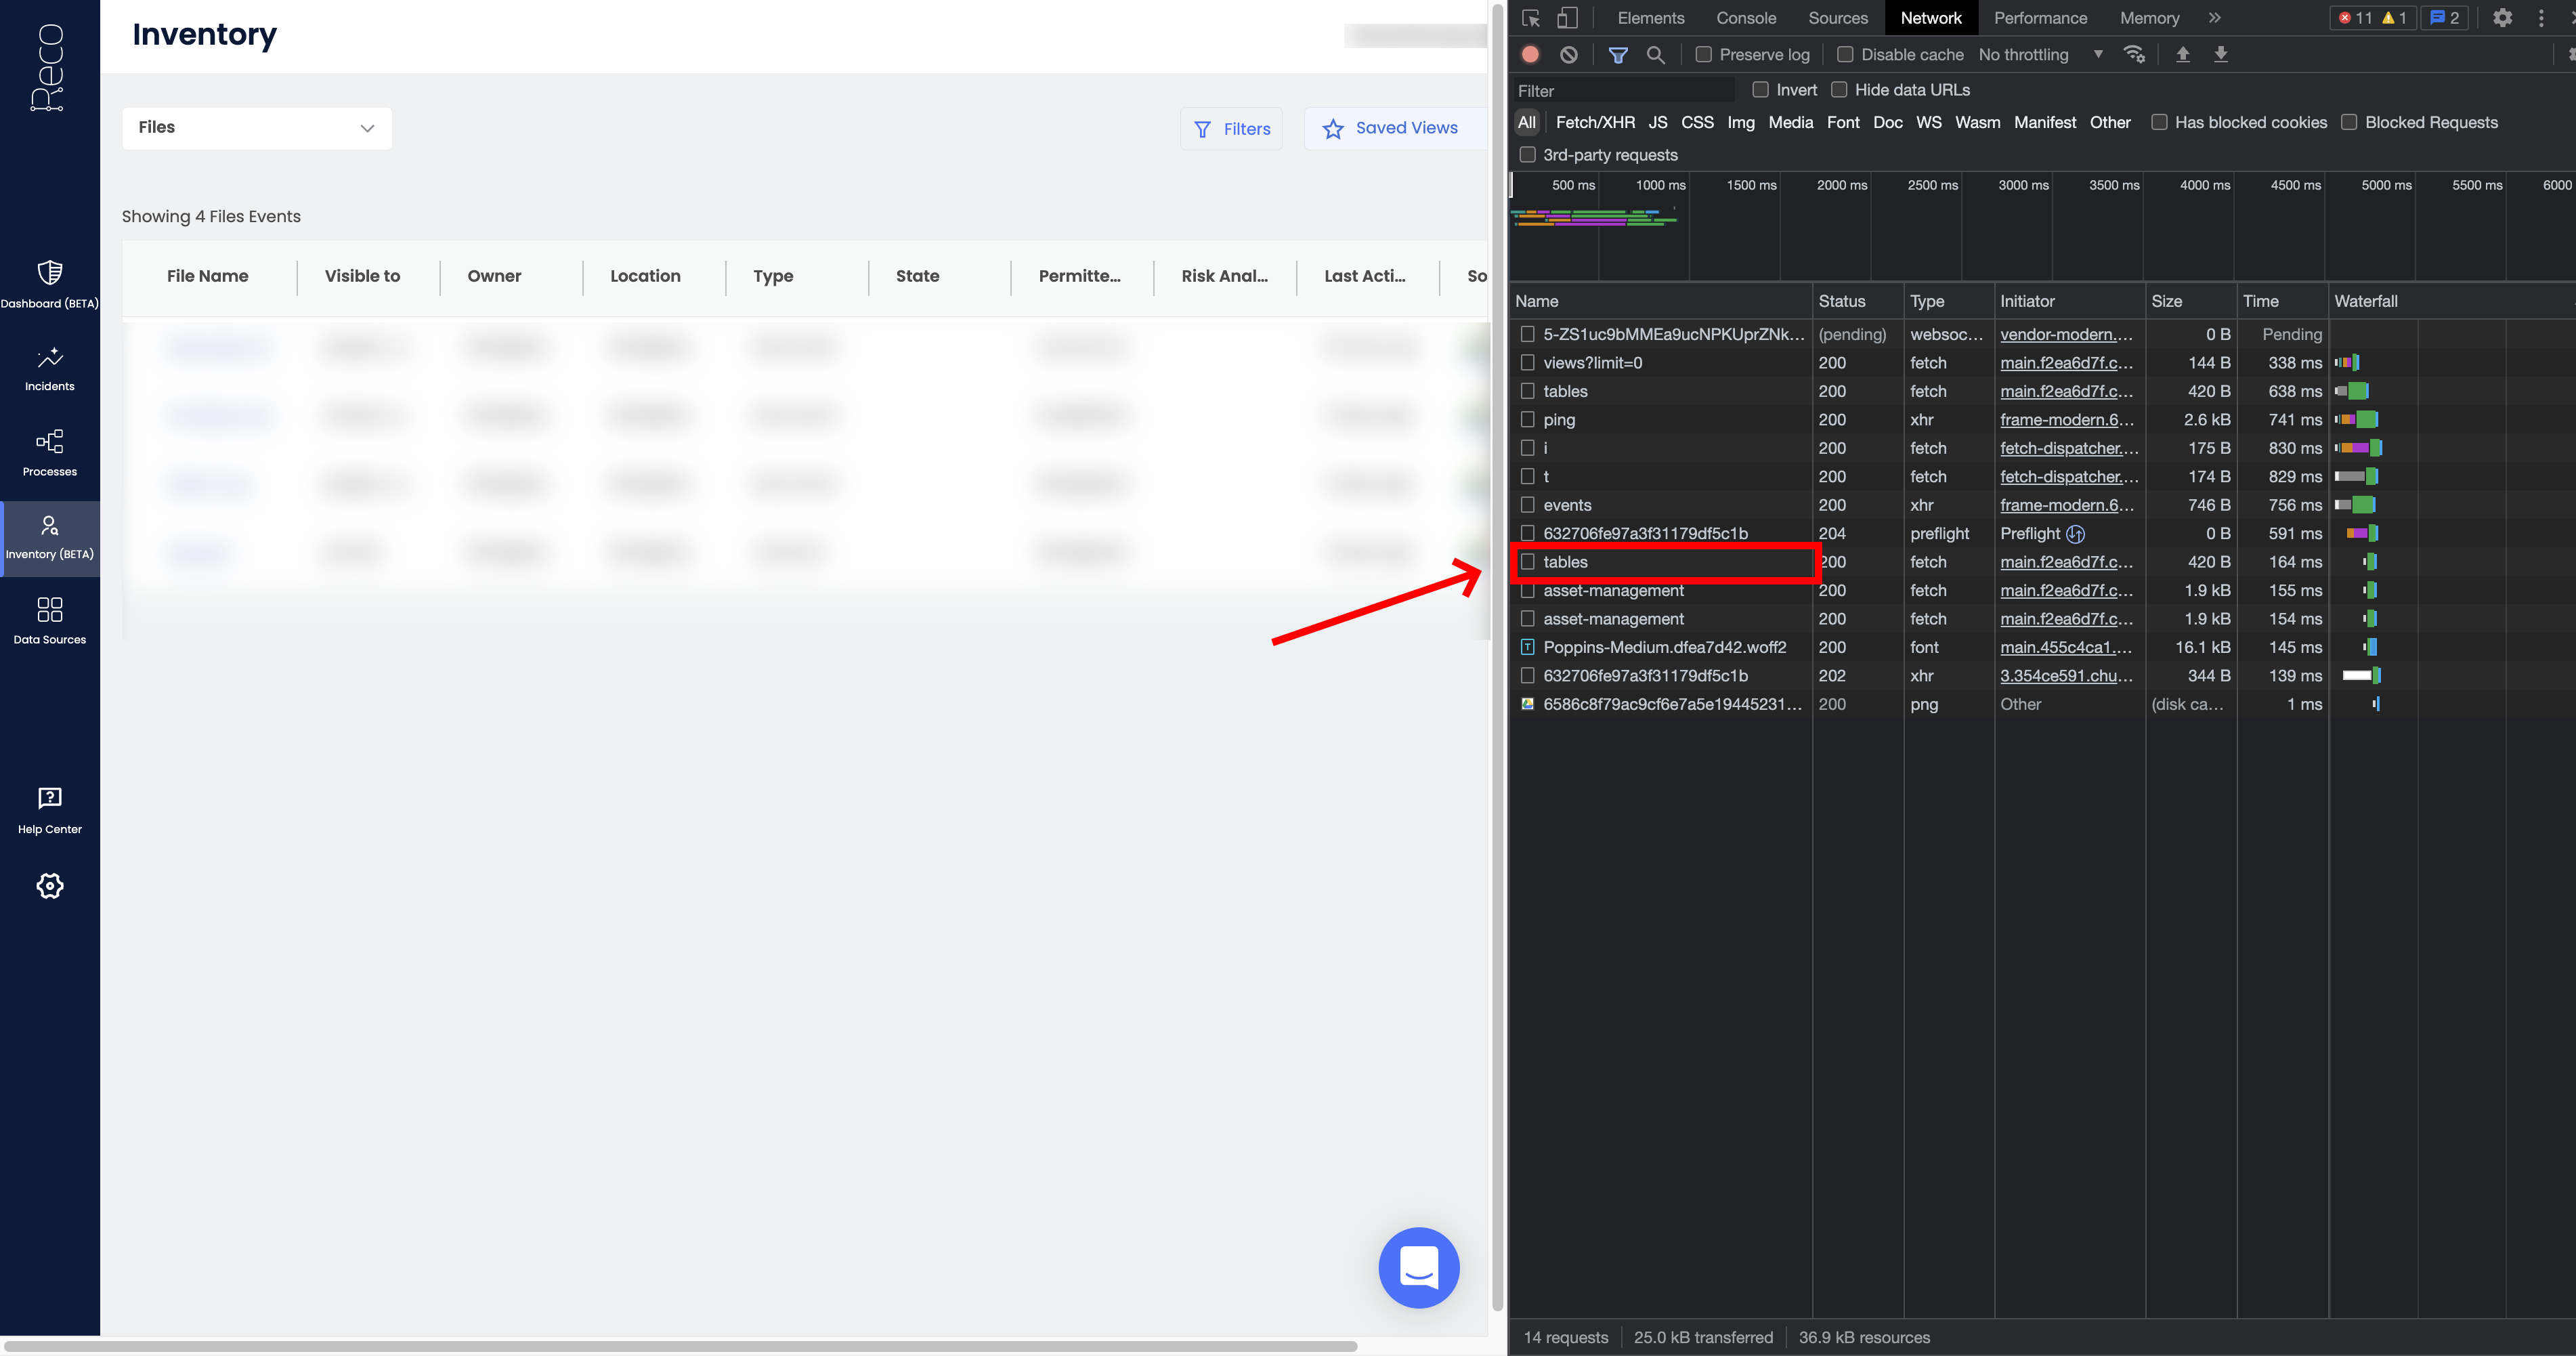
The developer console shows a list of API requests. Select the request named tables. Click its name to view the request details.
In the request headers, you should see a header called authorization. Your API Token is the value of this header, after the word Bearer.
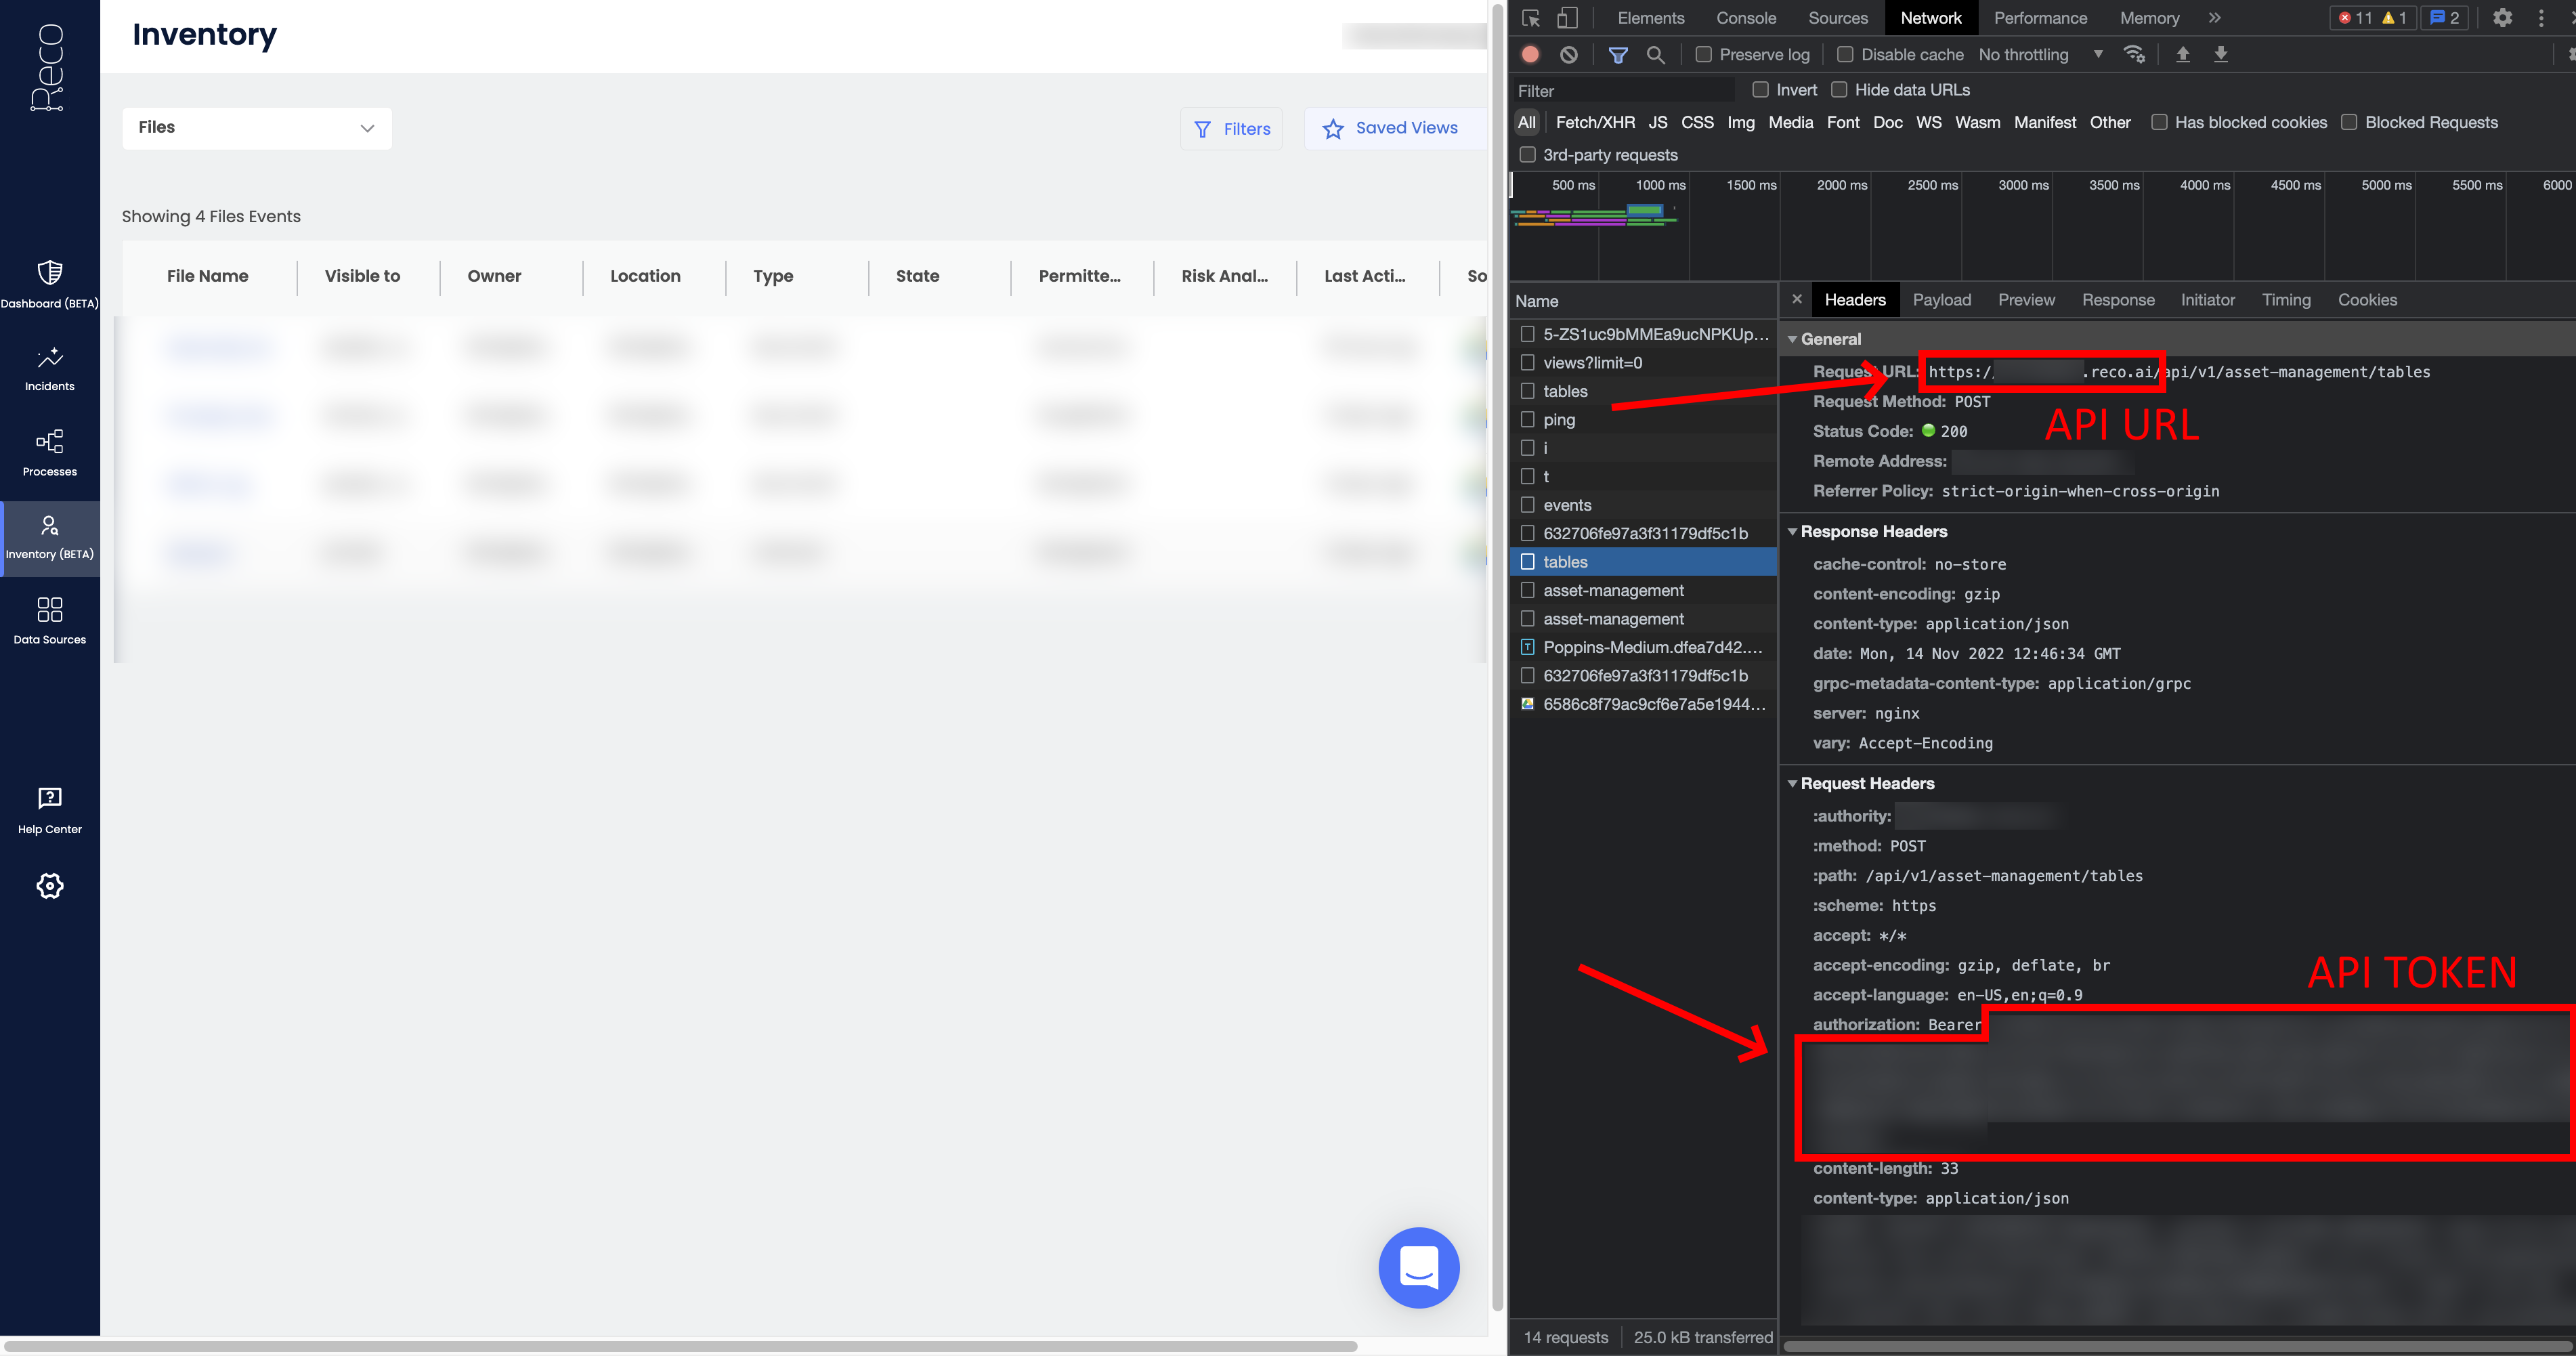
You can also obtain your workspace URL from this tab. Make sure to only take the domain name.
Creating your connection
- In the Blink platform, navigate to the Connections page > Add connection. A New Connection dialog box opens displaying icons of external service providers available.
- Select the Reco icon. A dialog box with name of the connection and connection methods appears.
- (Optional) Edit the name of the connection. At a later stage you cannot edit the name.
- Select API Token as the method to create the connection.
- Fill in the parameters:
- The API token
- The API address
- (Optional) Click Test Connection to test it.
- Click Create connection. The new connection appears on the Connections page.