 Azure Data Explorer
Azure Data Explorer is a fully-managed big data analytics cloud platform and data-exploration service, that ingests structured, semi-structured and unstructured data. The service then stores this data and answers analytic ad hoc queries on it with seconds of latency.
Creating an Azure Data Explorer connection
Using App Registration
To create the connection you need:
- A Cluster URI
- A Client ID
- A Client Secret
- A Tenant ID
Obtaining the credentials
Register an app -
Follow the Azure Documentation on registering a new app.Copy the Application(client)ID and Client Secret credentials.
Grant user impersonation permission for Azure Data Explorer to your new Azure app.
To do so, go to your newly created app in the Azure portal, and click API Permissions.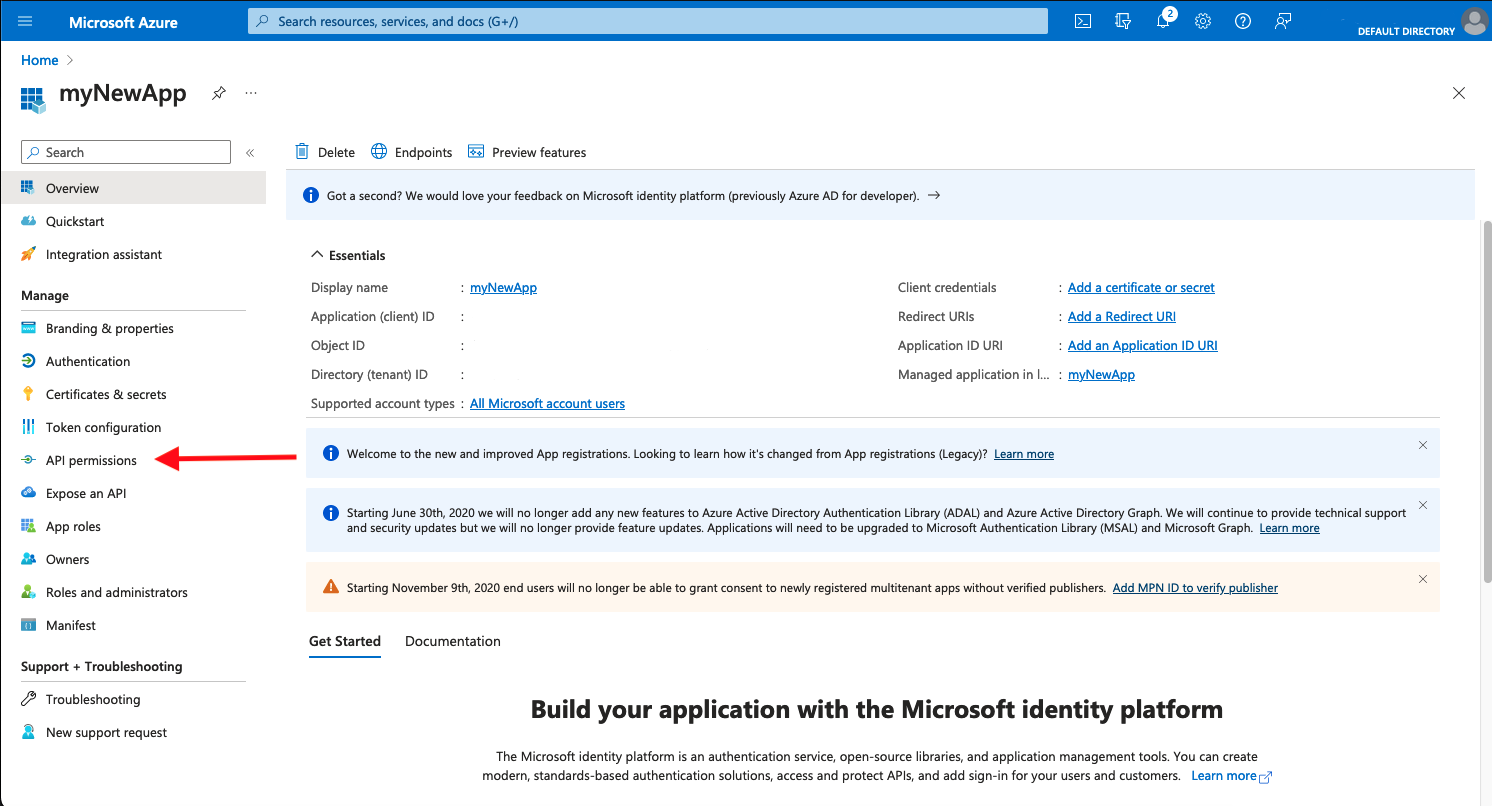
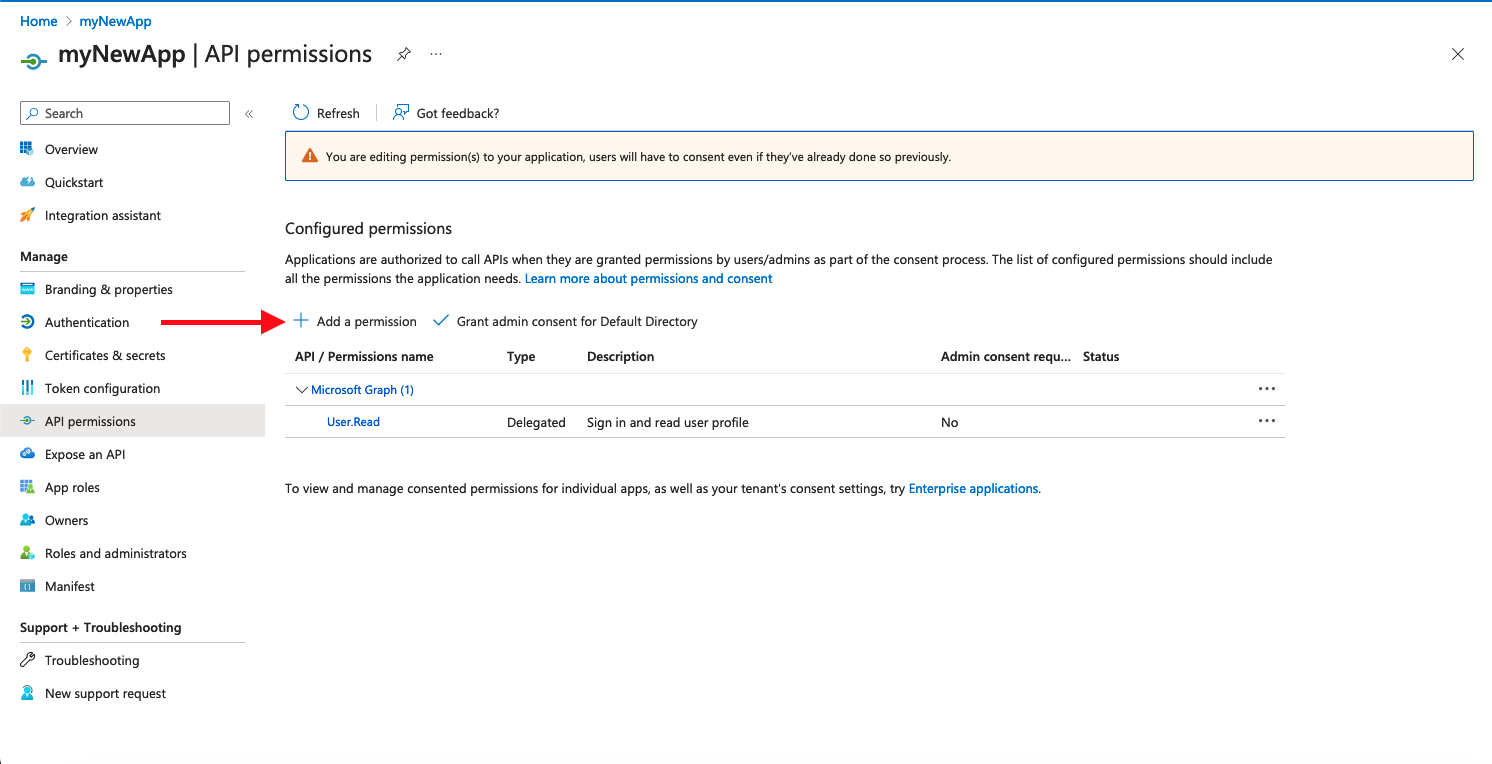
Click on Add a permission.
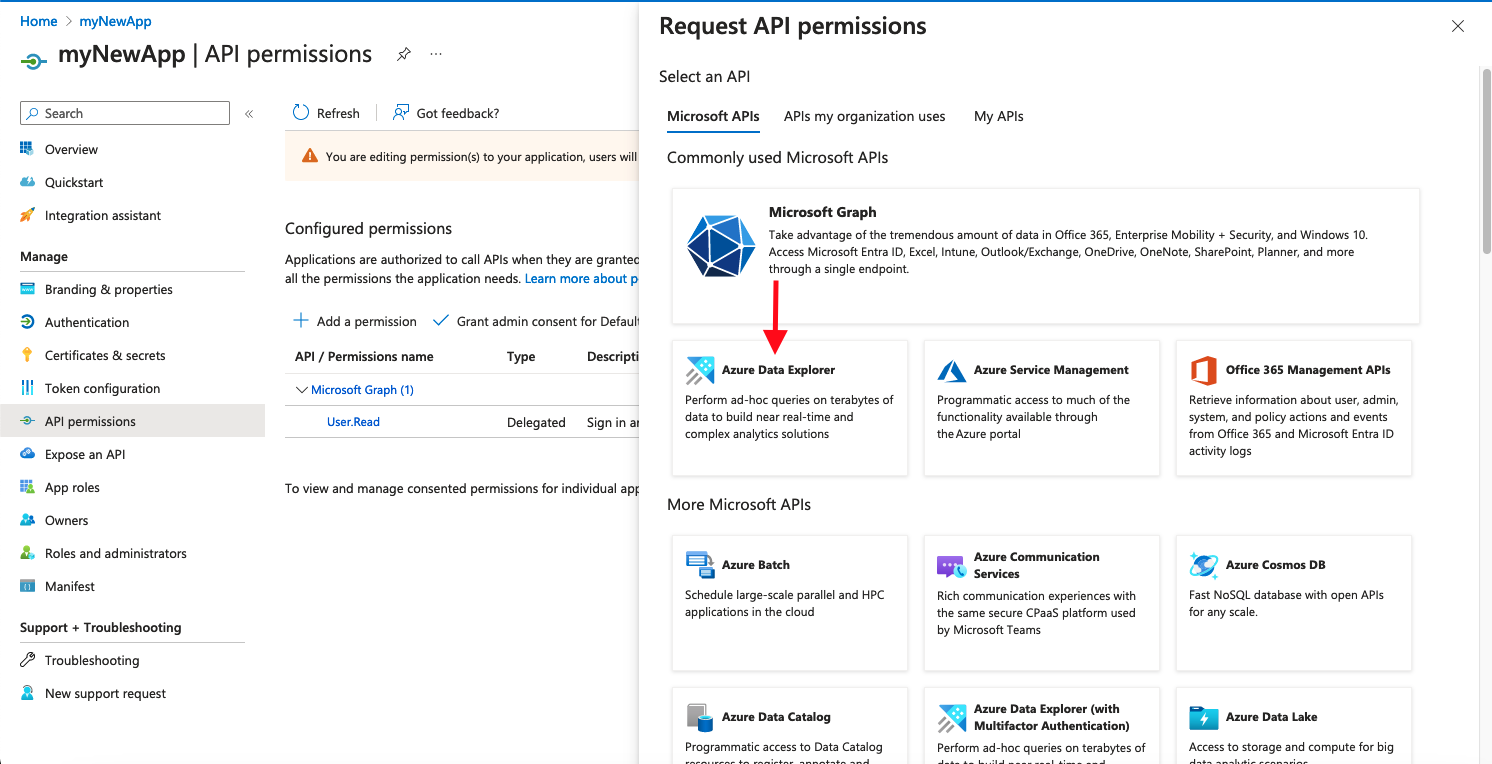
Select the Azure Data Explorer permission.
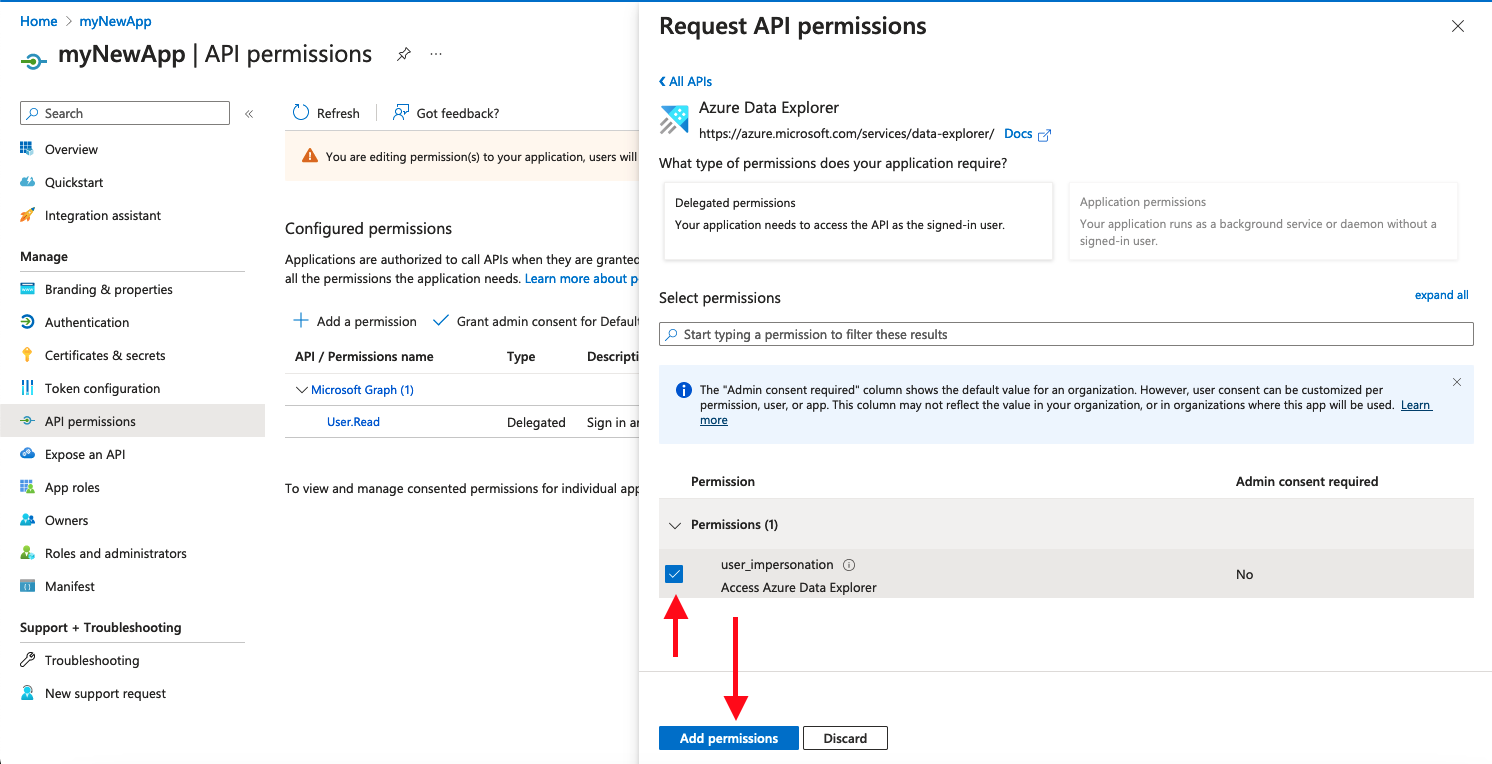
Check the user_impersonation checkbox and press Add permissions.
- Give contributor access on the Azure Data Explorer cluster for the newly created app.
To do so, follow the Data Explorer cluster permissions documentation
Creating your connection
- In the Blink platform, navigate to the Connections page > Add connection. A New Connection dialog box opens displaying icons of external service providers available.
- Select the Azure Data Explorer icon. A dialog box with name of the connection and connection methods appear.
- (Optional) Edit the name of the connection. At a later stage you cannot edit the name.
- Select App Registration as the method to create the connection.
- Fill in the parameters:
- The Cluster URI
- The Client ID
- The Client Secret
- The Tenant ID
- (Optional) Click Test Connection to test it.
- Click Create connection. The new connection appears on the Connections page.