 SharePoint
SharePoint is a web-based platform developed by Microsoft that serves as a collaborative tool for organizations. It enables teams to store, organize, and share information and documents, fostering seamless collaboration and knowledge management within a company.
Creating a SharePoint connection
Create the connection by using one of the following methods:
Using OAuth
Creating your connection
- In the Blink platform, navigate to the Connections page > Add connection. A New Connection dialog box opens displaying icons of external service providers available.
- Select the SharePoint icon. A dialog box with name of the connection and connection methods appear.
- (Optional) Edit the name of the connection. At a later stage you cannot edit the name.
- Click SharePoint to authenticate using OAuth.
- Sign in using your credentials.
Using Service Account
To create the connection you need:
- A client ID
- A client secret
- A tenant ID
The following permissions are required in order to use the entire suite of Blink actions:
Sites.ReadWrite.AllSites.Manage.AllFiles.ReadWrite.All
Obtaining the credentials
Go to the Azure App Registrations Portal.
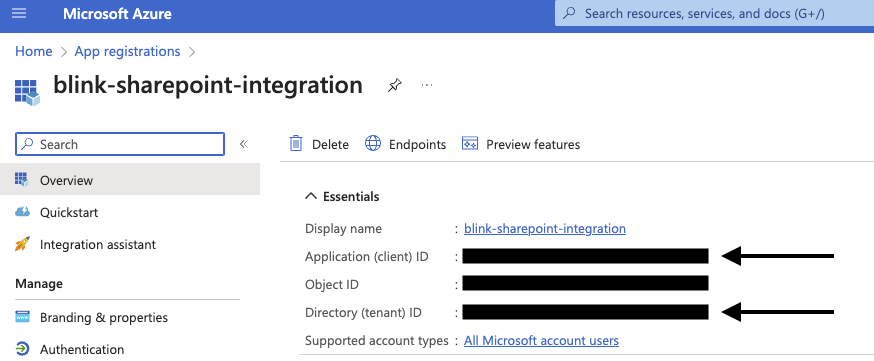
Click on the app registration you want to use.
If you do not have an App registration, click App registrations > New registration.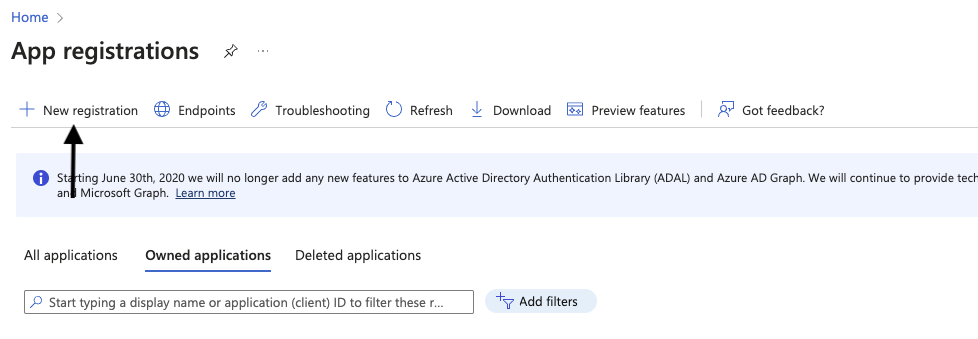
Copy your App (Client) ID and Directory (Tenant) ID.
Click Add a certificate or secret.

Click New Client Secret

Name your client secret and click Add
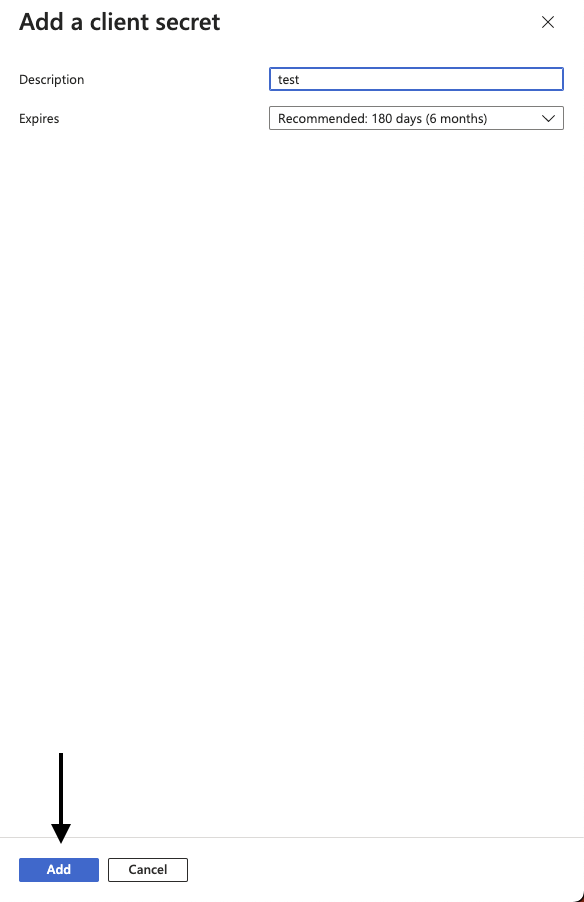
Copy your client secret

Creating your connection
- In the Blink platform, navigate to the Connections page > Add connection. A New Connection dialog box opens displaying icons of external service providers available.
- Select the SharePoint icon. A dialog box with name of the connection and connection methods appear.
- (Optional) Edit the name of the connection. At a later stage you cannot edit the name.
- Select Service Account as the method to create the connection.
- Fill in the parameters:
- The Client ID
- The Client Secret
- The Tenant ID
- (Optional) Click Test Connection to test it.
- Click Create connection. The new connection appears on the Connections page.