 Kandji
Kandji is an MDM for Apple devices. There are two primary components to Kandji: the Kandji web app and Kandji’s proprietary macOS Agent. The web app is used to configure, review, and report settings on enrolled devices.
The Kandji Agent enforces settings, remediates discrepancies, and reports data back to the web app.
Both components also have many other capabilities.
Creating a Kandji connection
To create the connection you need:
- An API token
- An API address
Obtaining the credentials
Kandji uses instance-level bearer tokens to control access to the API.
Log in and click Settings.
Click Access.
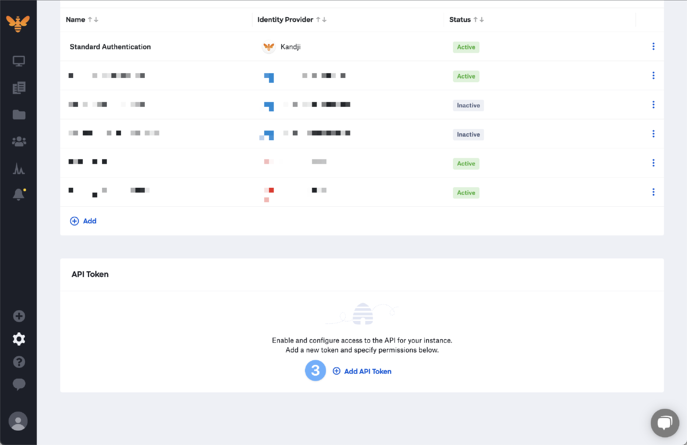
Click Add API Token to create a new API key.

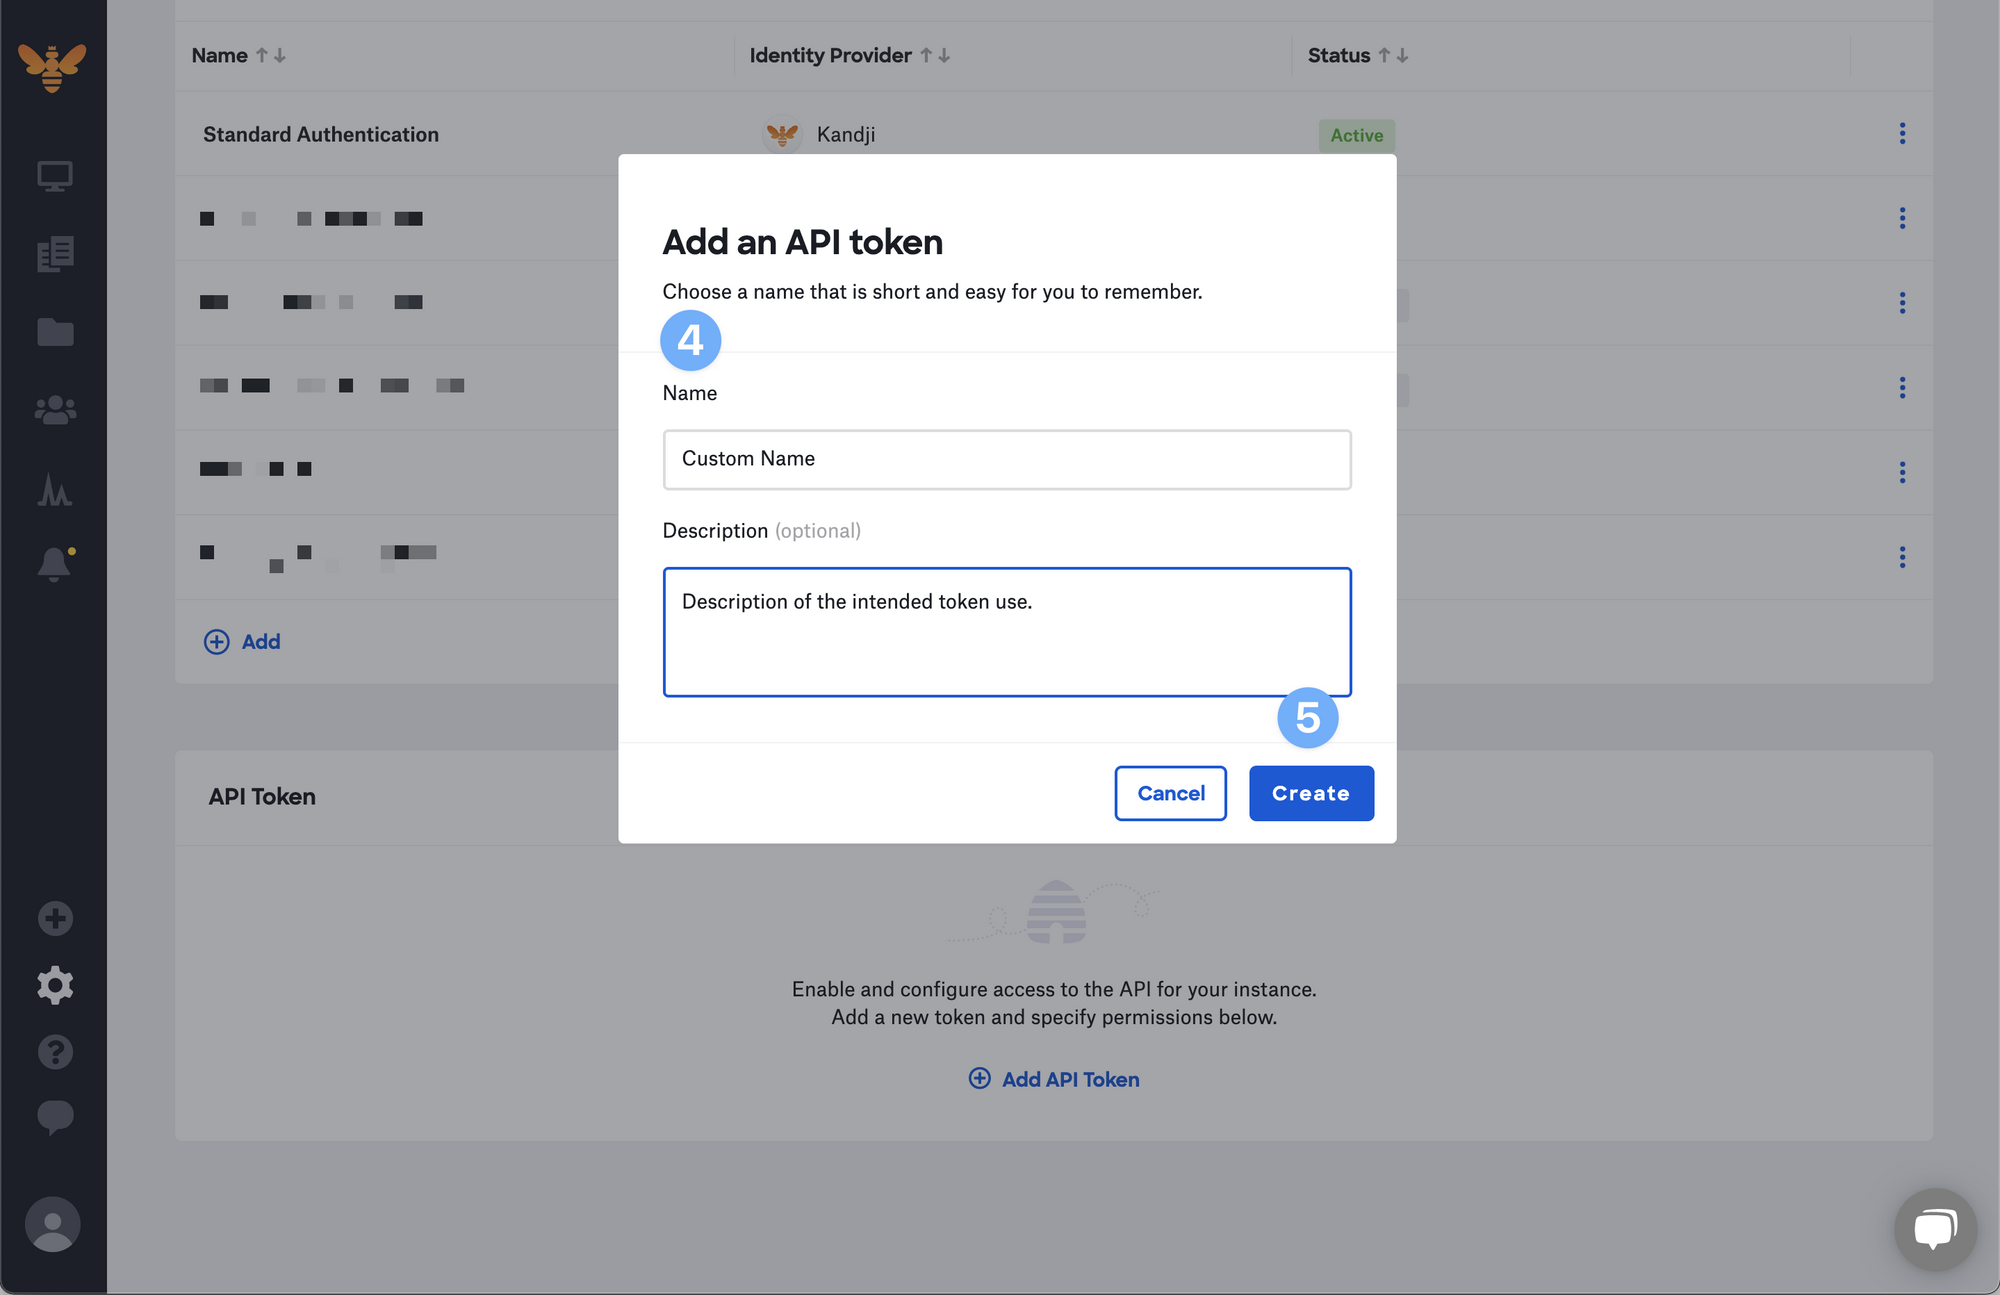
Provide a Name and a Description for your API token.
Click Create.
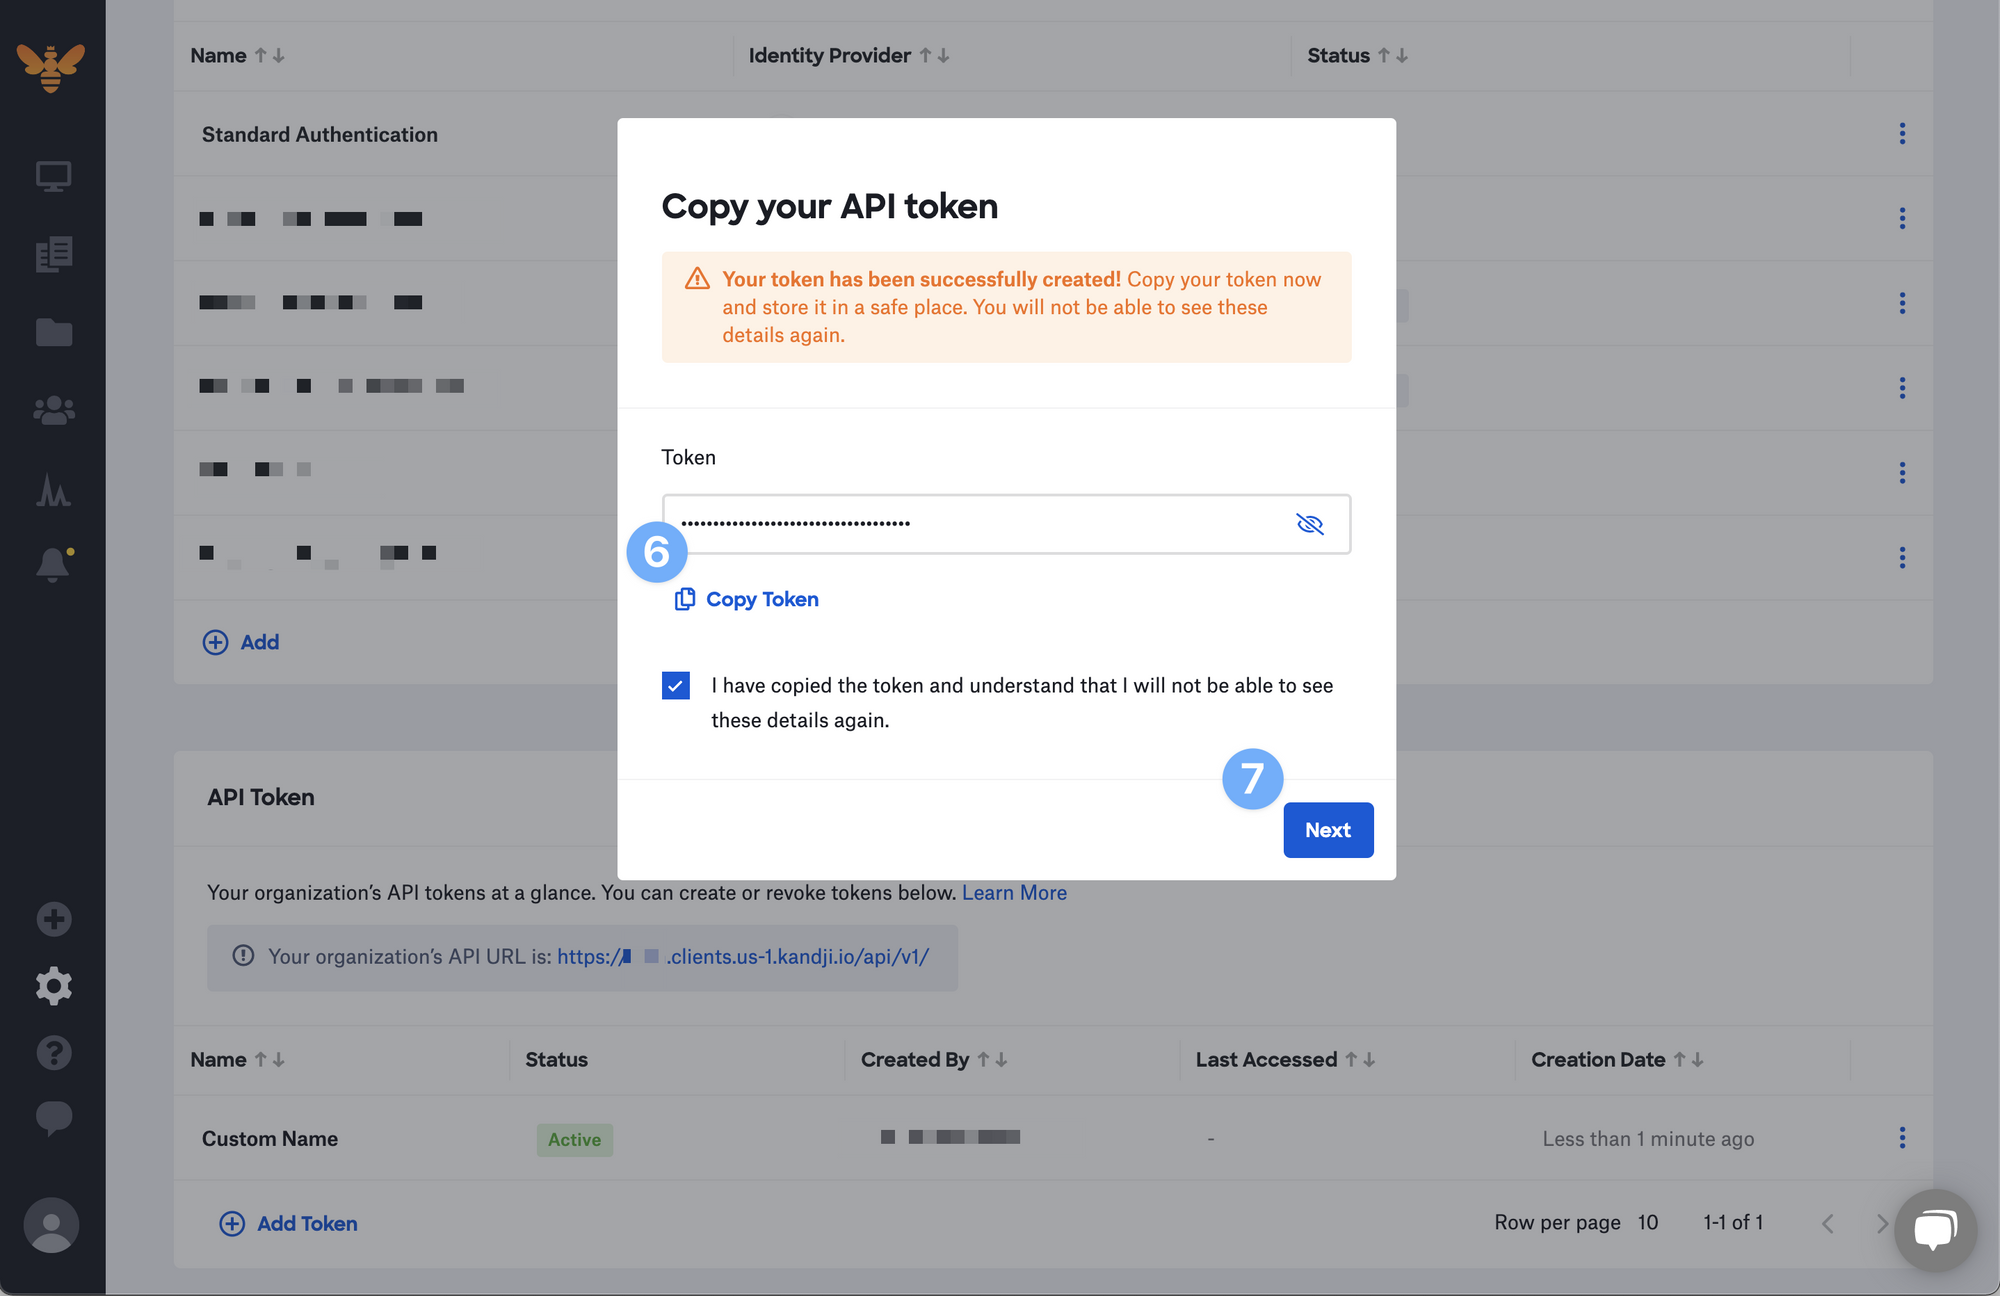
Kandji will display a modal with the API token. Click the visibility symbol to expose it or use the Copy Token button to copy the API token to your clipboard, storing it in a safe place. You will not be able to see the token details again.
Click Next.
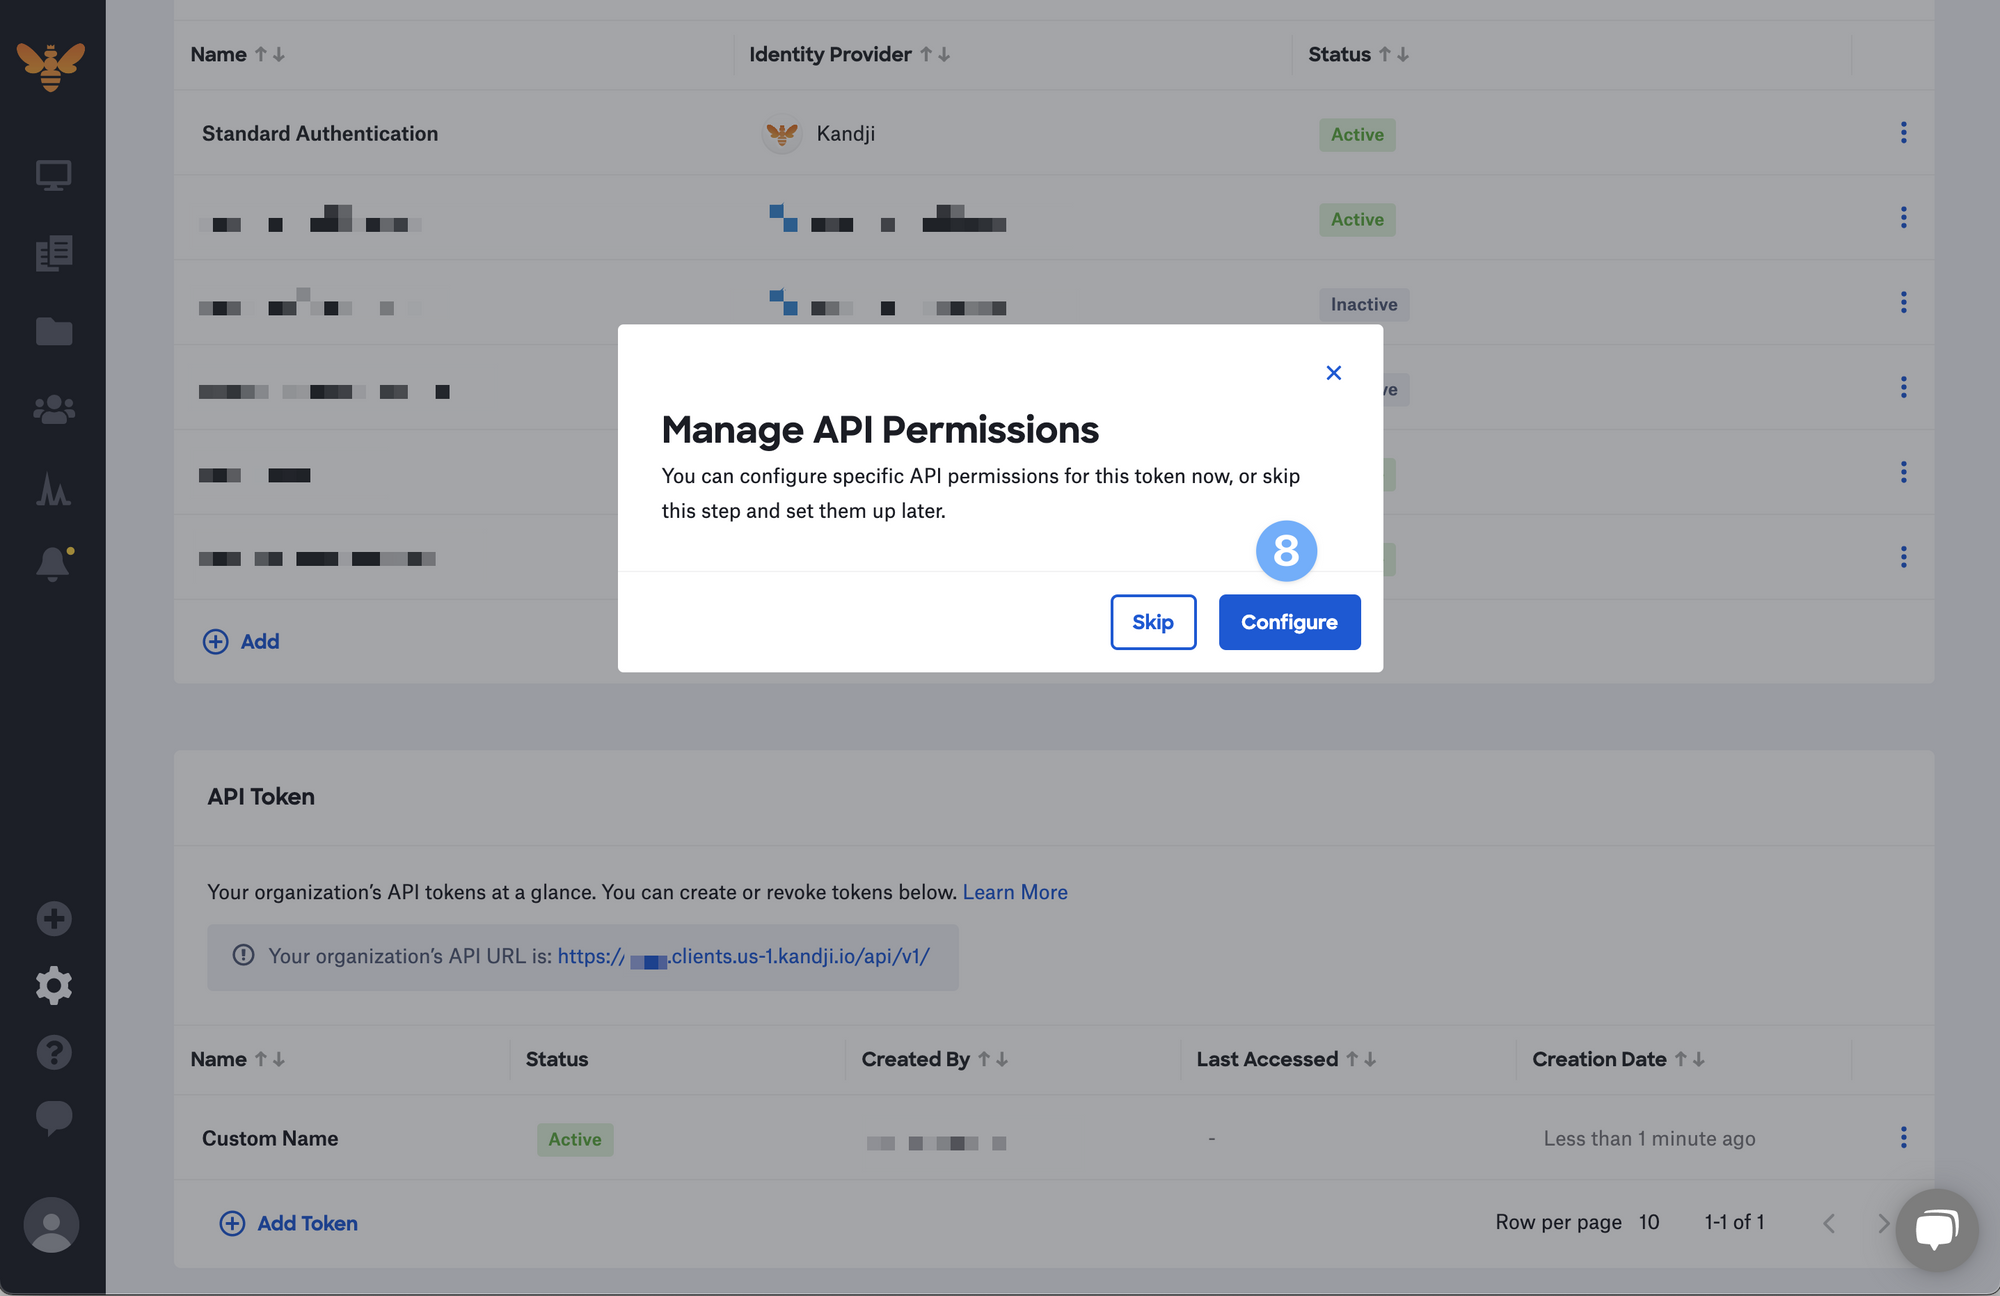
Click Configure to manage the API permissions for this specific token or Skip to change them later.
After making your modifications, click Save.

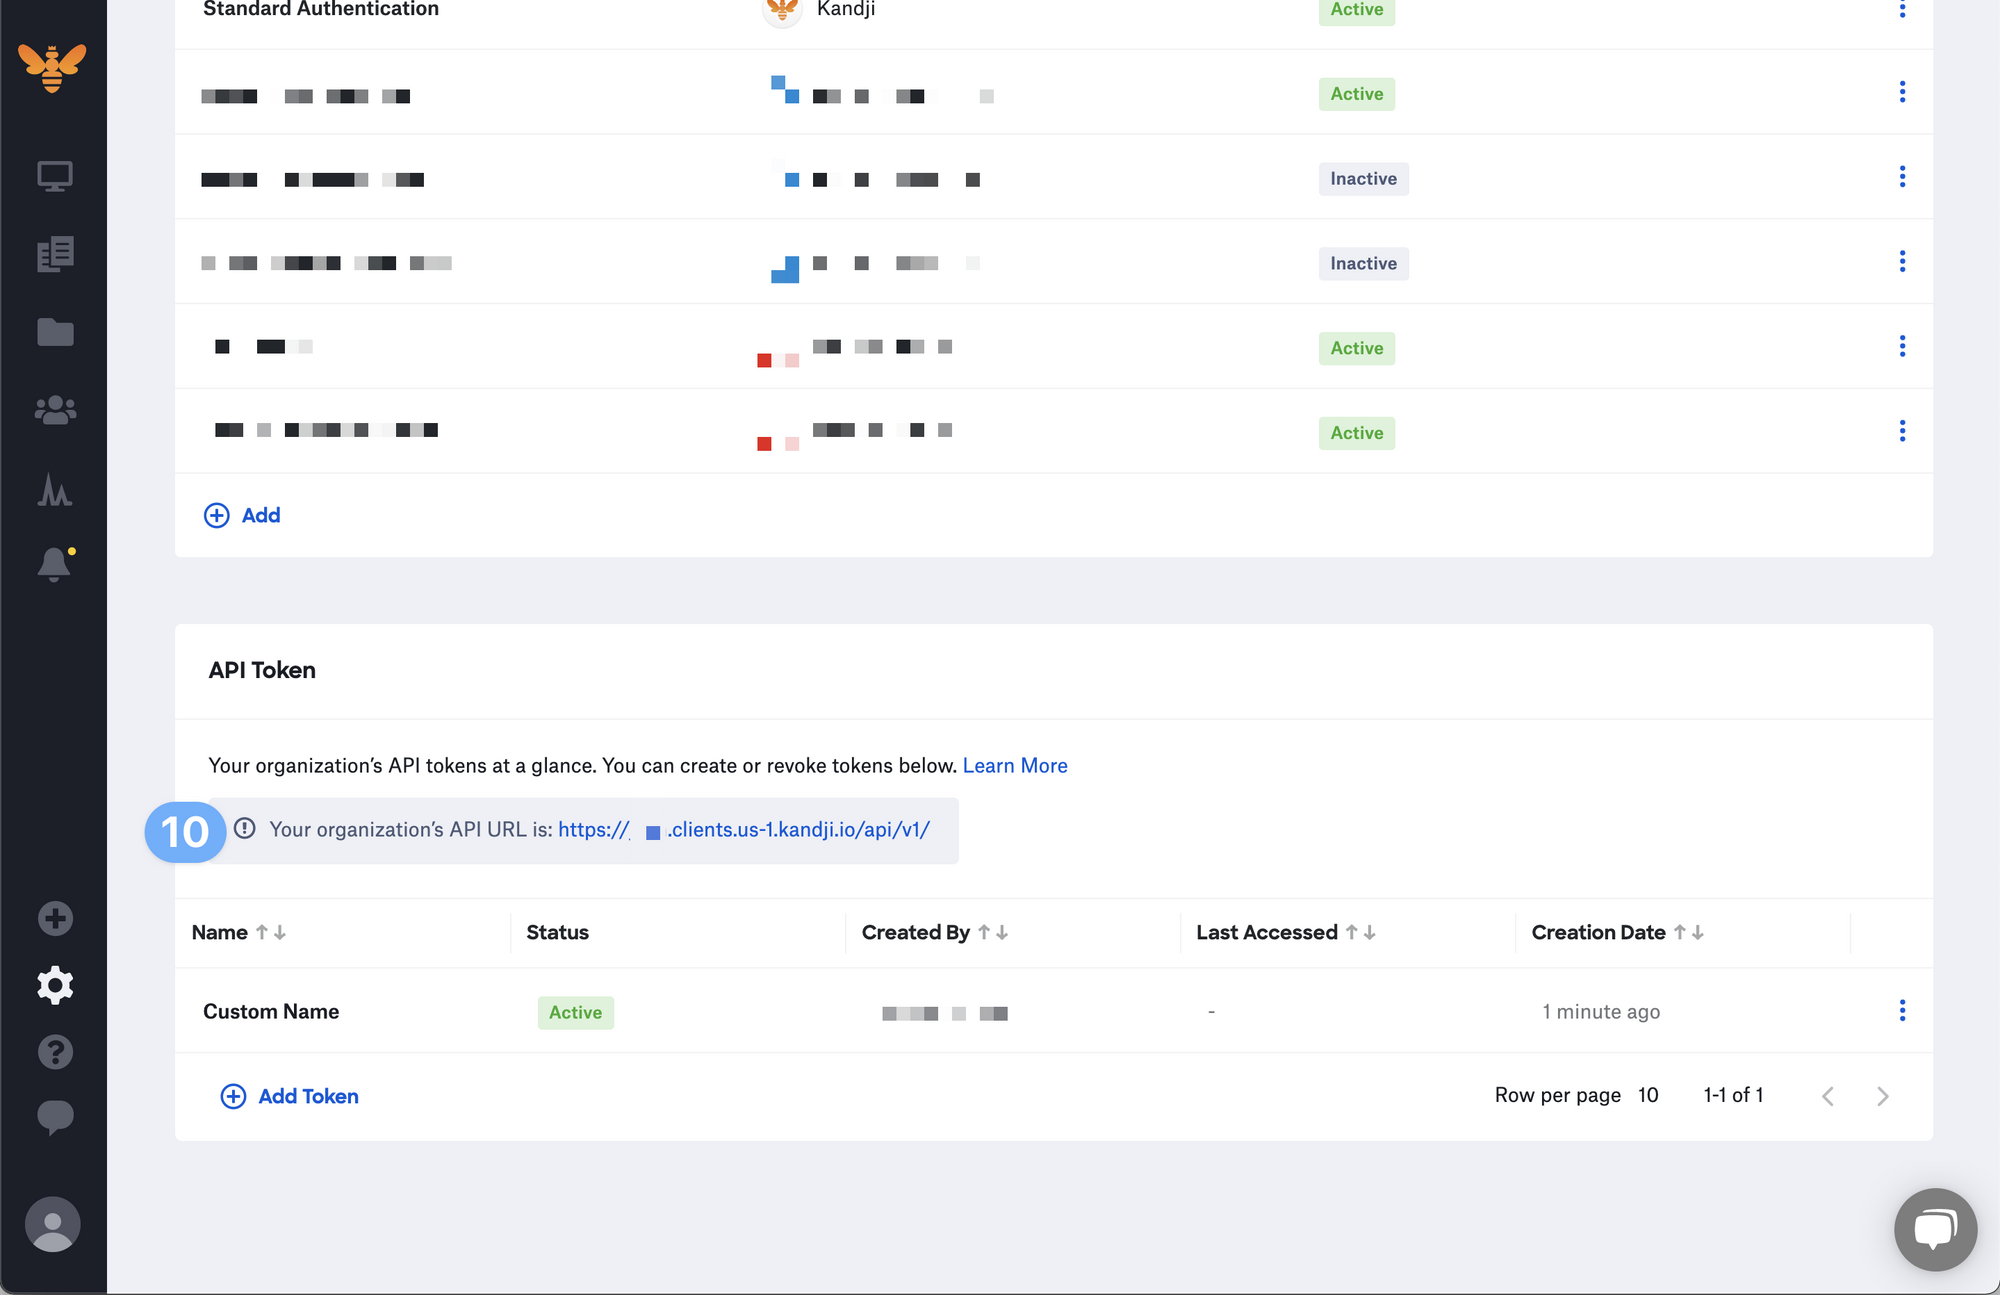
Once you create your first token, you will see your instance-specific API URL.
Creating your connection
- In the Blink platform, navigate to the Connections page > Add connection. A New Connection dialog box opens displaying icons of external service providers available.
- Select the Kandji icon. A dialog box with name of the connection and connection methods appears.
- (Optional) Edit the name of the connection. At a later stage you cannot edit the name.
- Select API Token as the method to make the connection.
- Fill in the parameters:
- The API token
- The API URL
- (Optional) Click Test Connection to test it.
- Click Create connection. The new connection appears on the Connections page.