 Proofpoint Protection Server
Proofpoint Protection Server is an email security solution that shields organizations from spam, phishing attacks, and malware threats. With filtering techniques and real-time threat detection, providing comprehensive protection for email communication.
Creating a Proofpoint Protection Server connection
Using Username & Password
To create the connection you need:
- An API Address
- A Username
- A Password
Obtaining the credentials
An administrator must have a role that includes access to a specific REST API.
Proofpoint on Demand (PoD) administrators must file a support ticket to Proofpoint support to obtain a role with access to an API.
On-premise administrators: Edit the filter.cfg file and set the following key to true:
com.proofpoint.admin.apigui.enable=tIn the management interface, create a role of type API and select the APIs under Managed Modules for the role and assign an administrator that role.
The following are the required managed modules for this integration:
pssQuarantine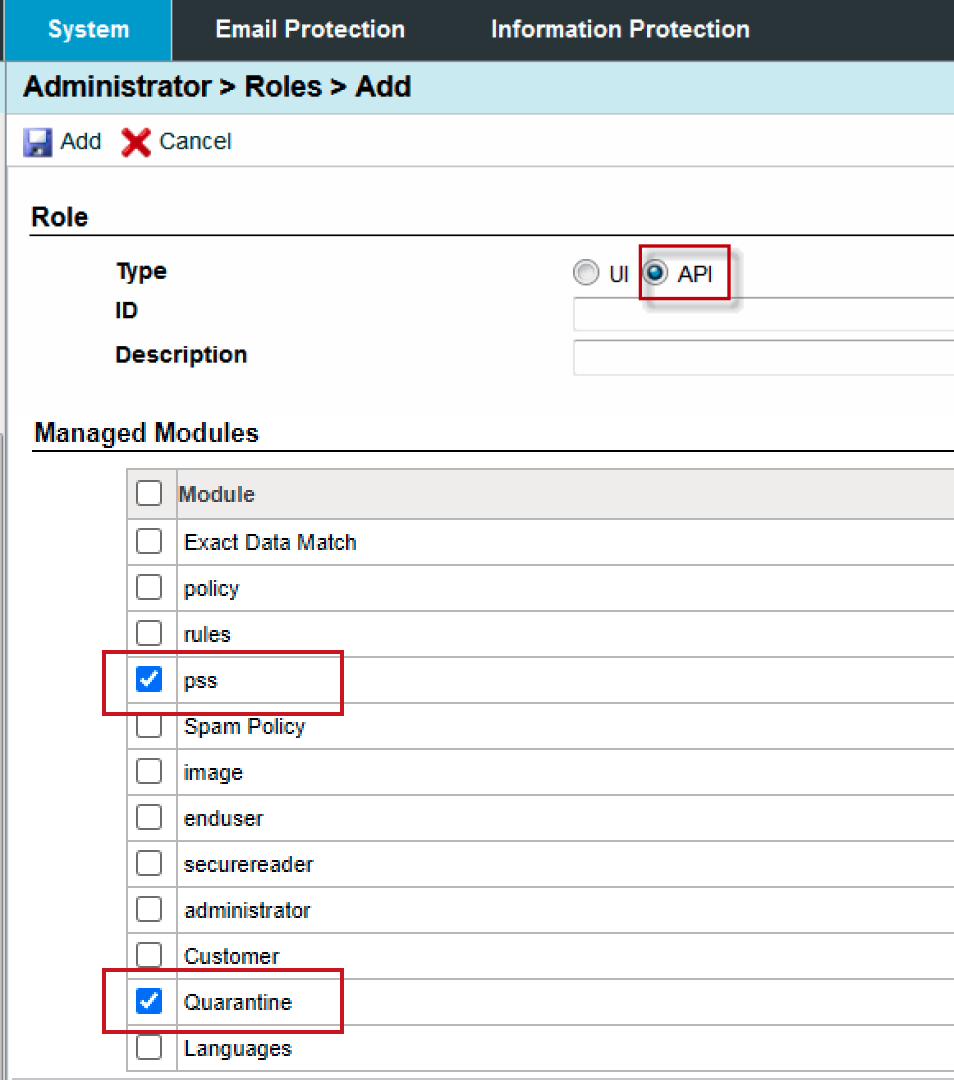
Creating your connection
- In the Blink platform, navigate to the Connections page > Add connection. A New Connection dialog box opens displaying icons of external service providers available.
- Select the Proofpoint Protection Server icon. A dialog box with name of the connection and connection methods appear.
- (Optional) Edit the name of the connection. At a later stage you cannot edit the name.
- Select Username & Password as the method to create the connection.
- Fill in the parameters:
- The API Address
- The Username
- The Password
- (Optional) Click Test Connection to test it.
- Click Create connection. The new connection appears on the Connections page.